The BetaFPV Pavo Femto is a 2S 75mm tiny whoop designed specifically for the DJI O4 Air Unit. Weighing under 100g including the battery, it delivers impressive 4K onboard recording and a crisp 1080p live video feed. In this review, I’ll walk you through my first impressions, discussing design, setup, flight performance, and comparing it to another O4 whoop—the Meteor75 Pro.

For more info on Tiny Whoops, check out my buyer’s guide: https://oscarliang.com/best-tiny-whoop/
Table of Contents
Where to Buy
You can get the Pavo Femto from:
- BetaFPV: https://oscarliang.com/product-obqa
- AliExpress: https://s.click.aliexpress.com/e/_oFPxyvk
- RDQ: https://oscarliang.com/product-eqrn
- GetFPV: https://oscarliang.com/product-93yq
Inside the box, you get:
- The drone itself
- An extra set of propellers
- A USB-C adapter for connecting the FC to Betaflight
Note: The recommended battery is a 2S 450mAh pack (not included), get them here: https://oscarliang.com/product-t4aj. The same battery designed for the Pavo Pico also fits perfectly in the Pavo Femto.
Specifications
- Wheelbase: 75mm
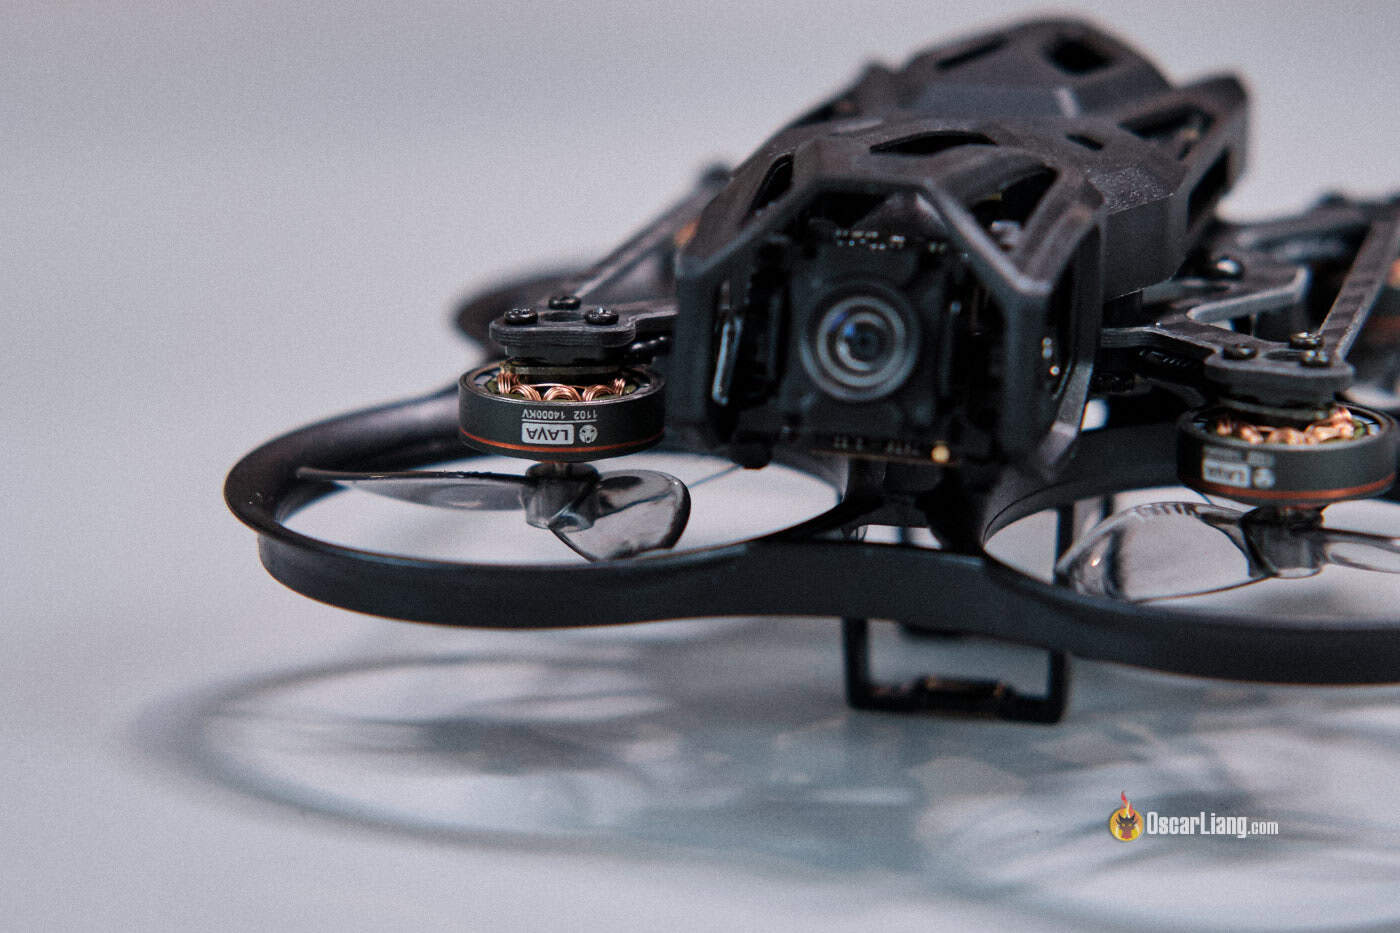
- Motors: LAVA 1102 Brushless Motor
- Frame: Pavo Femto Brushless Whoop Frame (Black)
- Propellers: Gemfan 1611 3-Blade Propellers (40mm)
- Flight Controller: F4 2-3S 20A AIO FC
- Receiver: Onboard Serial ELRS 2.4GHz
- Camera & VTX: DJI O4 Air Unit (Lite)
- Hover Time: ~5:15 minutes
- Weight:
- 54.8g (without battery)
- 84.4g (including 2S 550mAh LiHV)
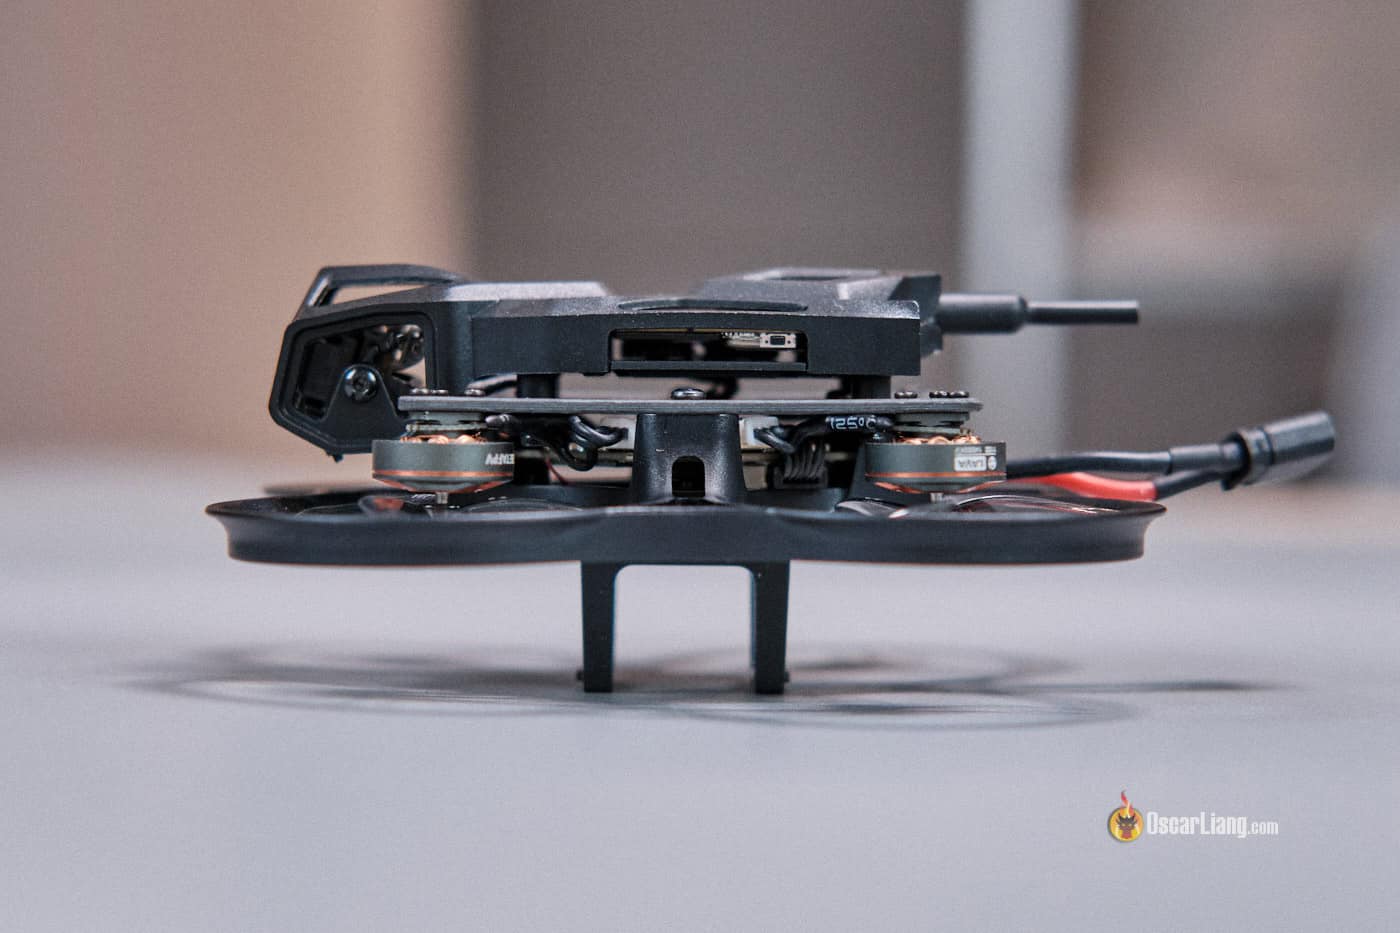
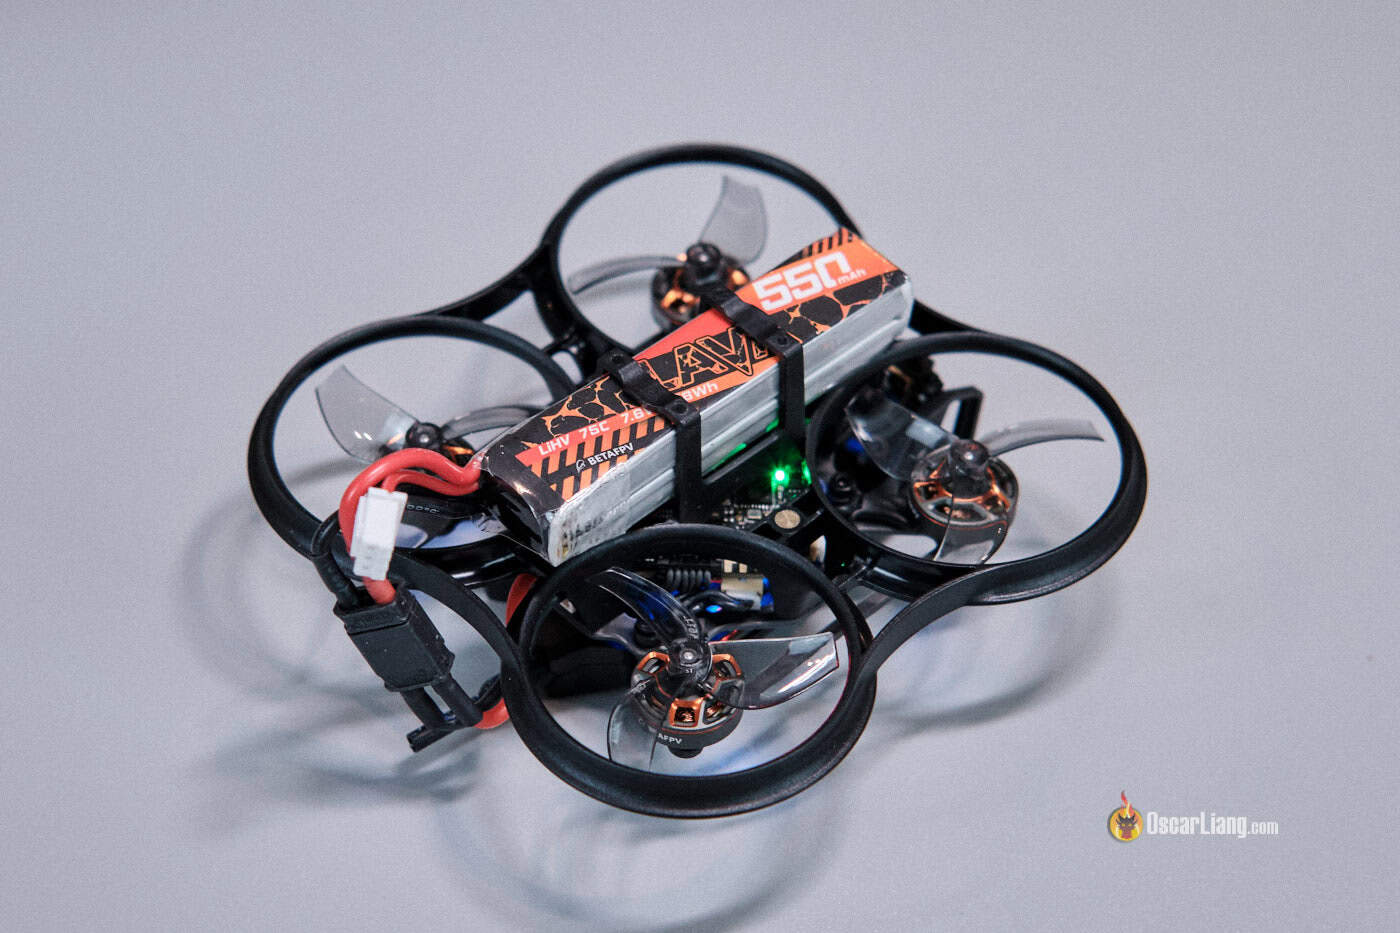
Build and Design
The Pavo Femto is essentially a 75mm tiny whoop that spins 40mm props—but powered by a 2S battery, it packs extra power for improved outdoor performance in challenging conditions compared to its 1S counterparts.
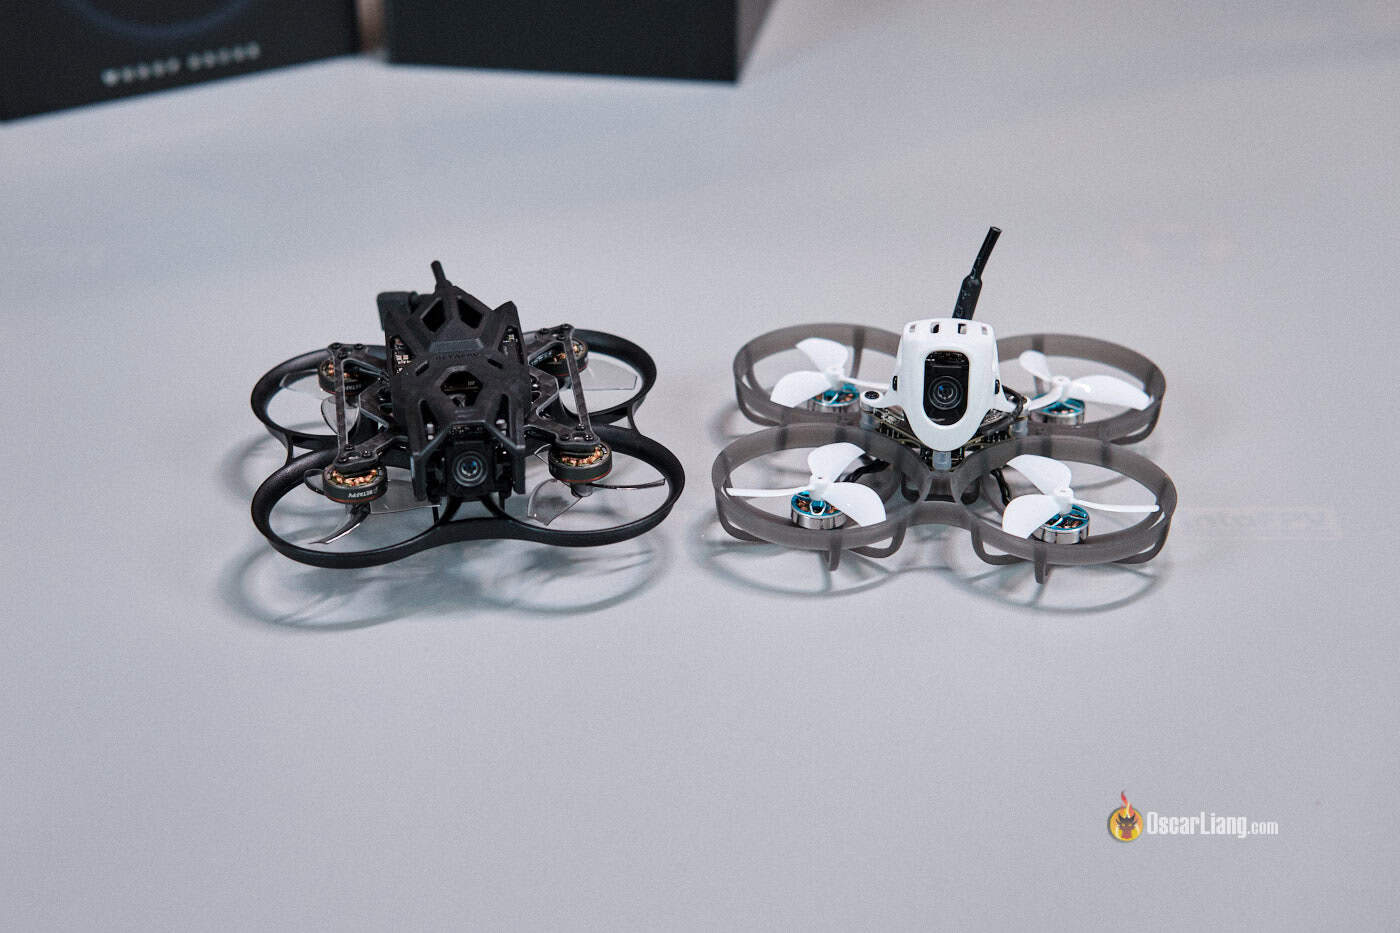
It’s incredibly compact—even smaller than the previous Pavo Pico (once hailed as the smallest BNF drone carrying the DJI O3 Air Unit) and even the recently released Meteor75 Pro, a 1S whoop with O4. Notably, while both the Pico and Meteor75 Pro use larger 45mm props, the Femto uses smaller 40mm props.
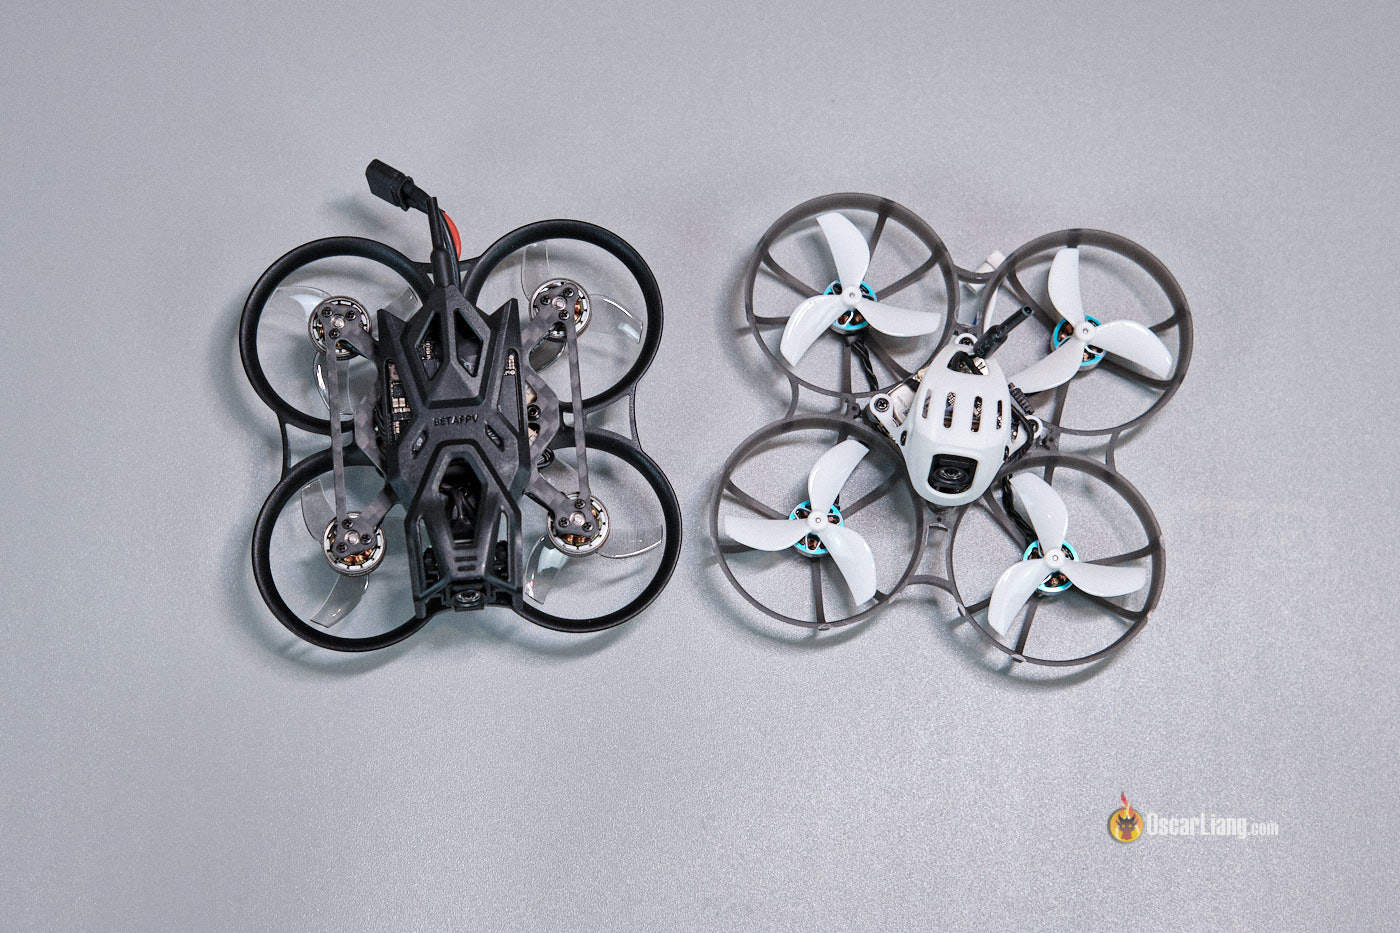
Left: Pavo Femto; Right: Meteor75 Pro
Despite its tiny size, the weight difference is striking. With a 2S battery installed, the Femto weighs about 84g—compared to 36g for other O4 tiny whoops. In other words, this tiny whoop is quite heavy, it’s effectively carrying two 1S 550mAh batteries. Its “tanky” frame, built with plenty of plastic for increased durability, also adds to the weight.
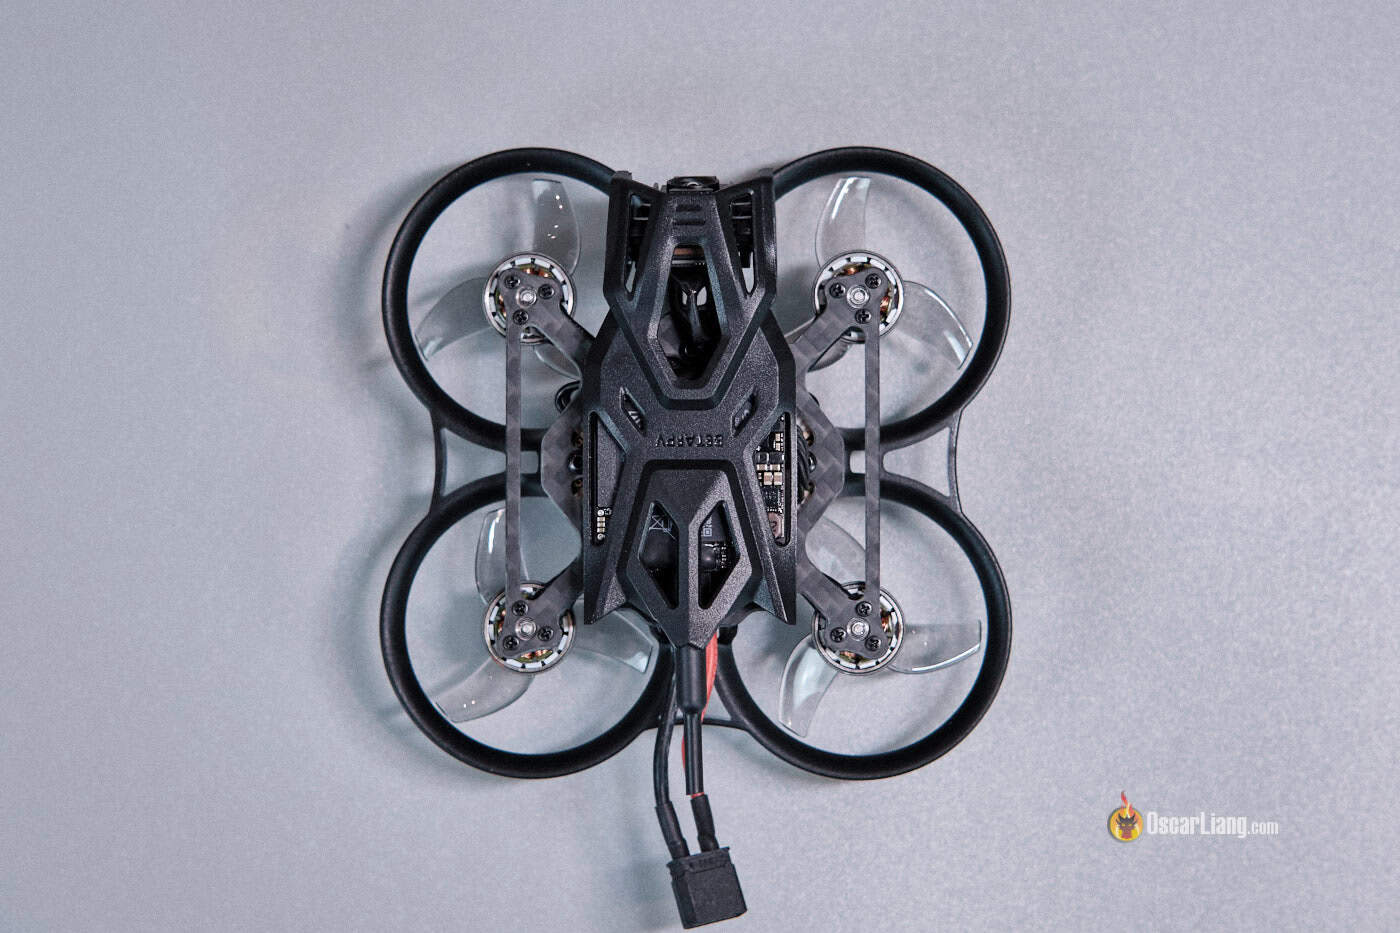
The battery holder is integrated into the stiff injection-molded plastic frame, meaning it can only fit one battery size. A flexible, removable TPU battery holder would have been more versatile, accommodating various battery sizes and shapes.

The Femto uses an XT30 connector, which is common for 2S micro drones. I’m a bit surprised BetaFPV didn’t opt for their proprietary BT3.0 connector—which I appreciate for its simplicity and lighter weight—but XT30 does offer a wider range of battery compatibility.

Under the hood, the drone is powered by BETAFPV LAVA 1102 motors at 14,000KV, paired with an F4 flight controller featuring 20A ESCs. It also includes an integrated ExpressLRS receiver and 16MB of Blackbox logging memory. With a total of 5 UARTs (only 2 in use), there’s plenty of expansion potential.
Installation
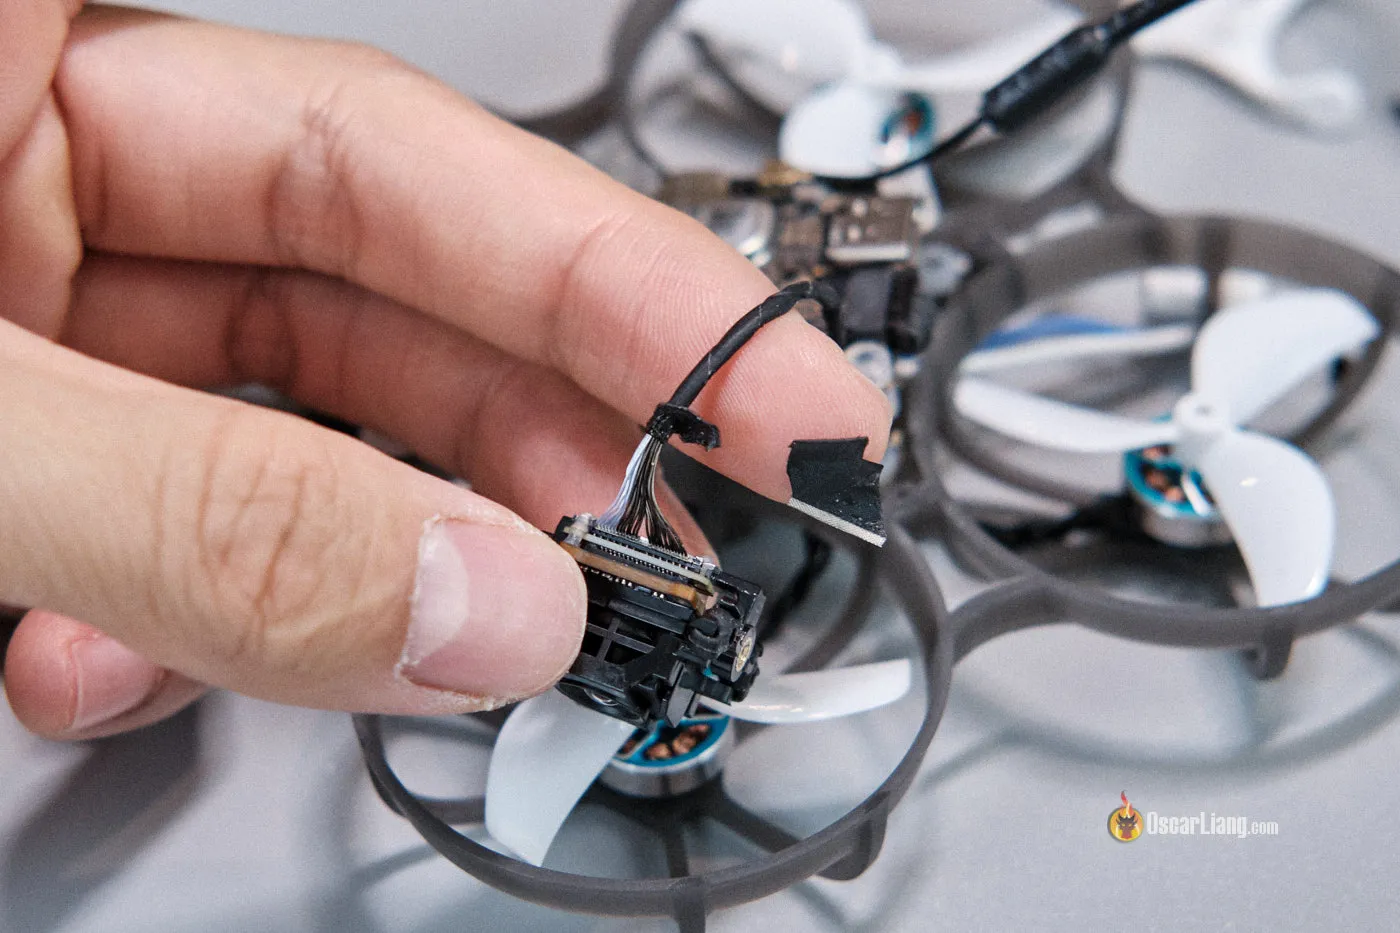
Installing the DJI O4 Lite into this compact frame isn’t as straightforward as with other Pavo models. If possible, I’d recommend buying the drone with the O4 Lite pre-installed at the factory to avoid the hassle and potential issues during installation.
For a detailed tutorial on installing the O4 in the Femto, check out BetaFPV’s guide:
O4 Integration and Soft Mounting
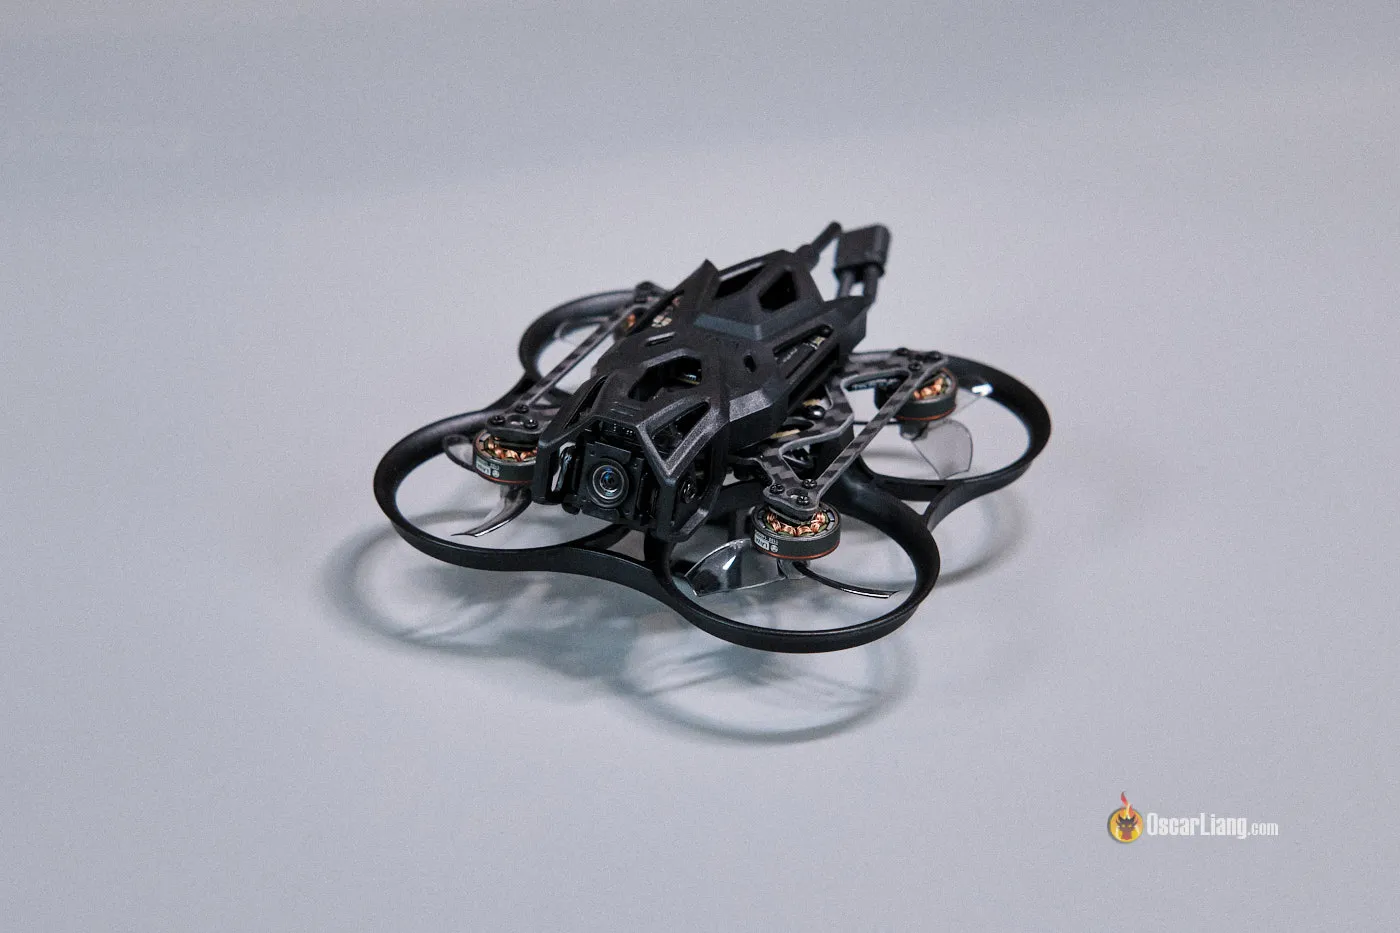
The DJI O4 Air Unit needs no introduction—we have been talking about it many times in the past 2 months, check out my review if you haven’t already. As mentioned in my review, its susceptibility to vibration and jello means proper soft mounting is a must.
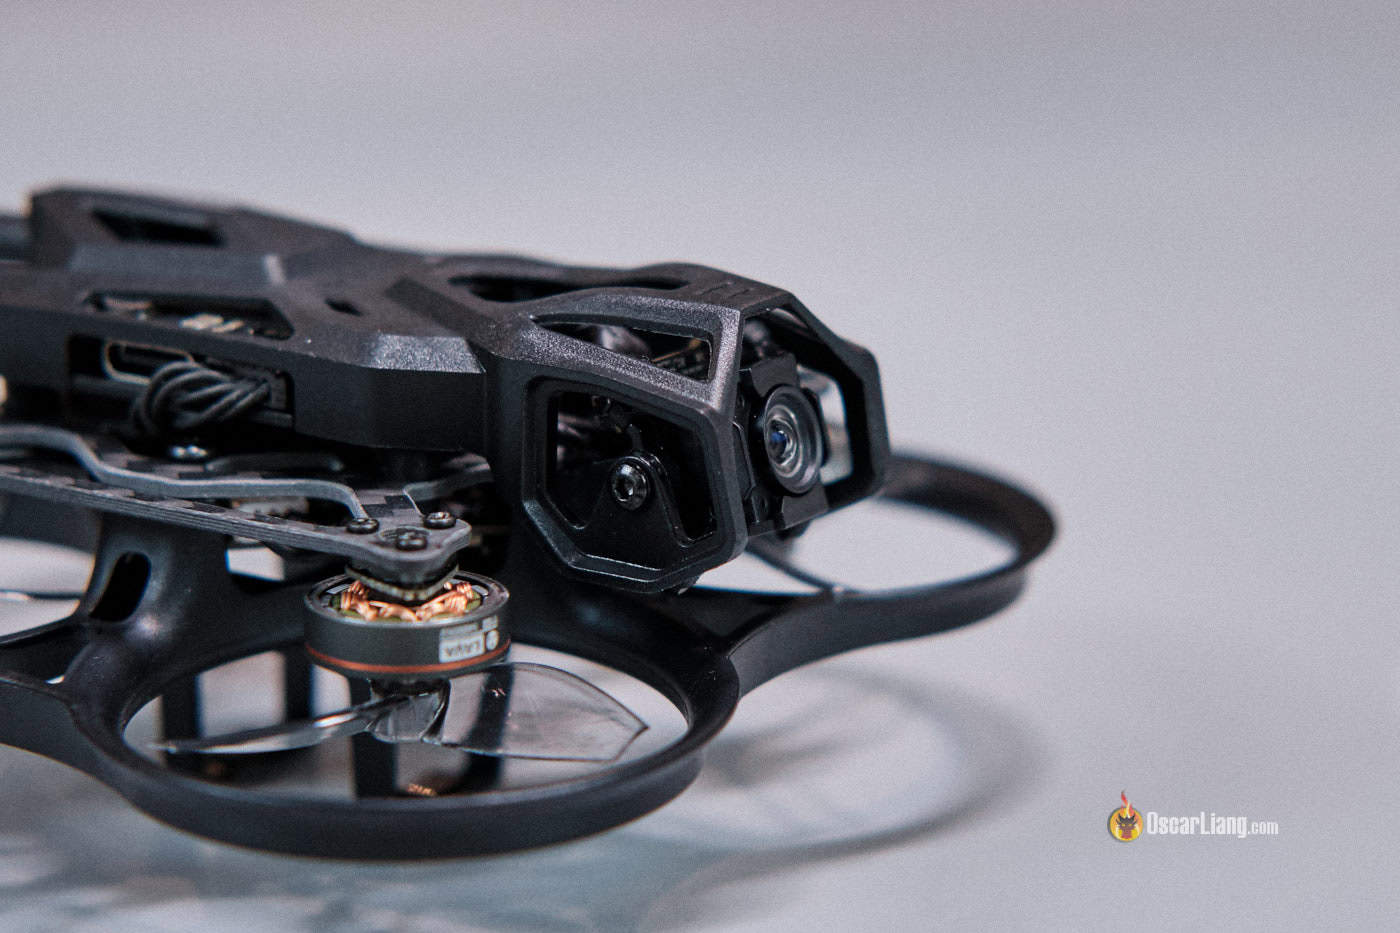
BetaFPV uses an innovative soft mounting mechanism in the Femto that they’ve refined over the past few weeks. This mount features a two-piece design: a back piece with two mounting screws on the sides (19mm width) and a front clamp that secures the camera. The two parts are connected by four vibration-dampening “balls” that reduce the vibrations reaching the camera.
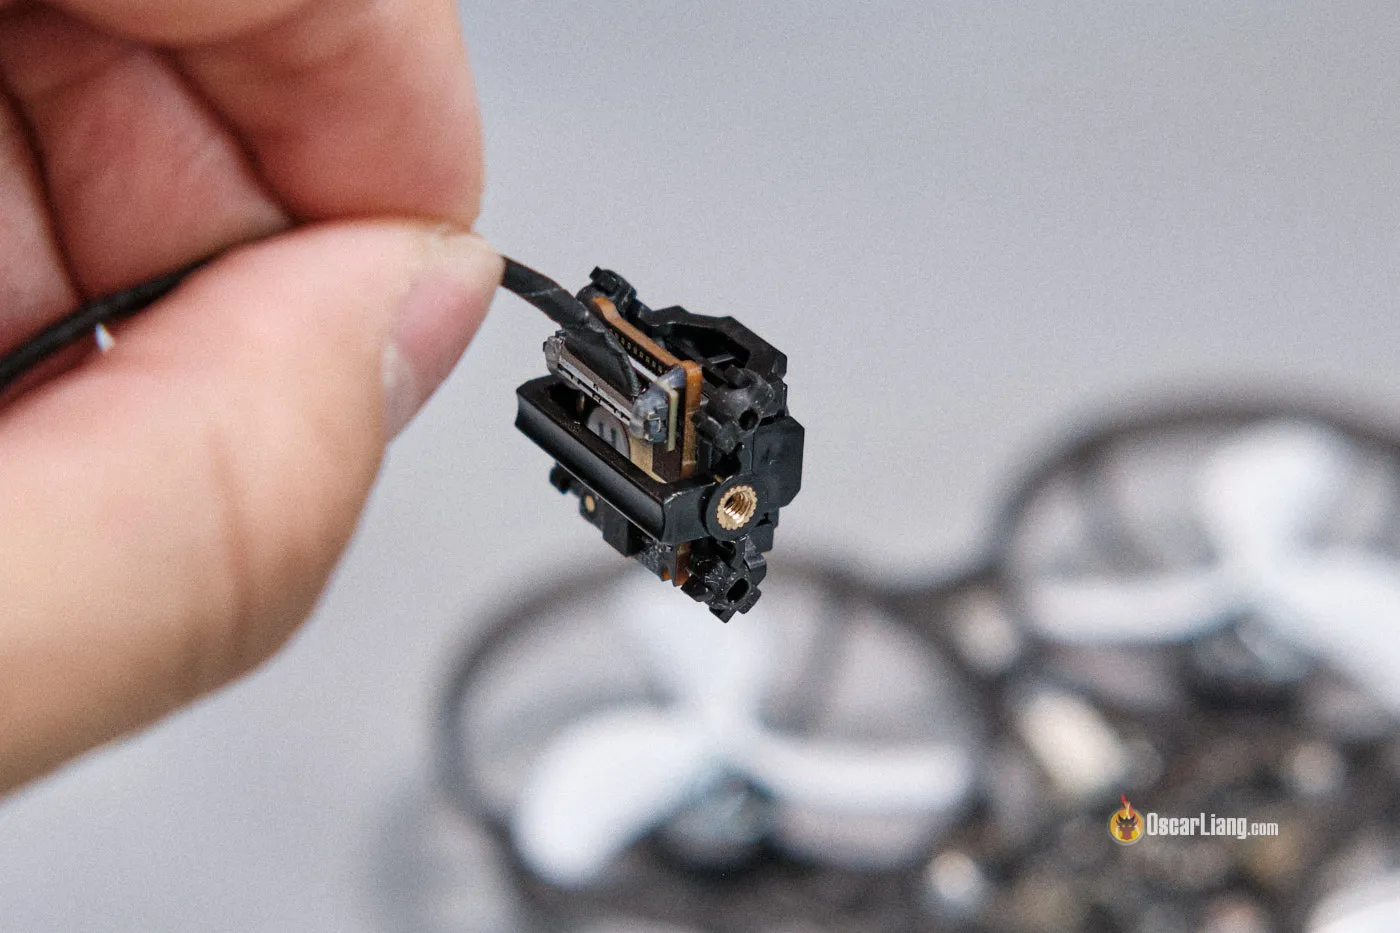
However, one issue I noticed is that the silicone dampers appear to be touching the frame, potentially transferring unwanted vibrations. A slightly roomier canopy could provide a wider gap and further isolate the camera.
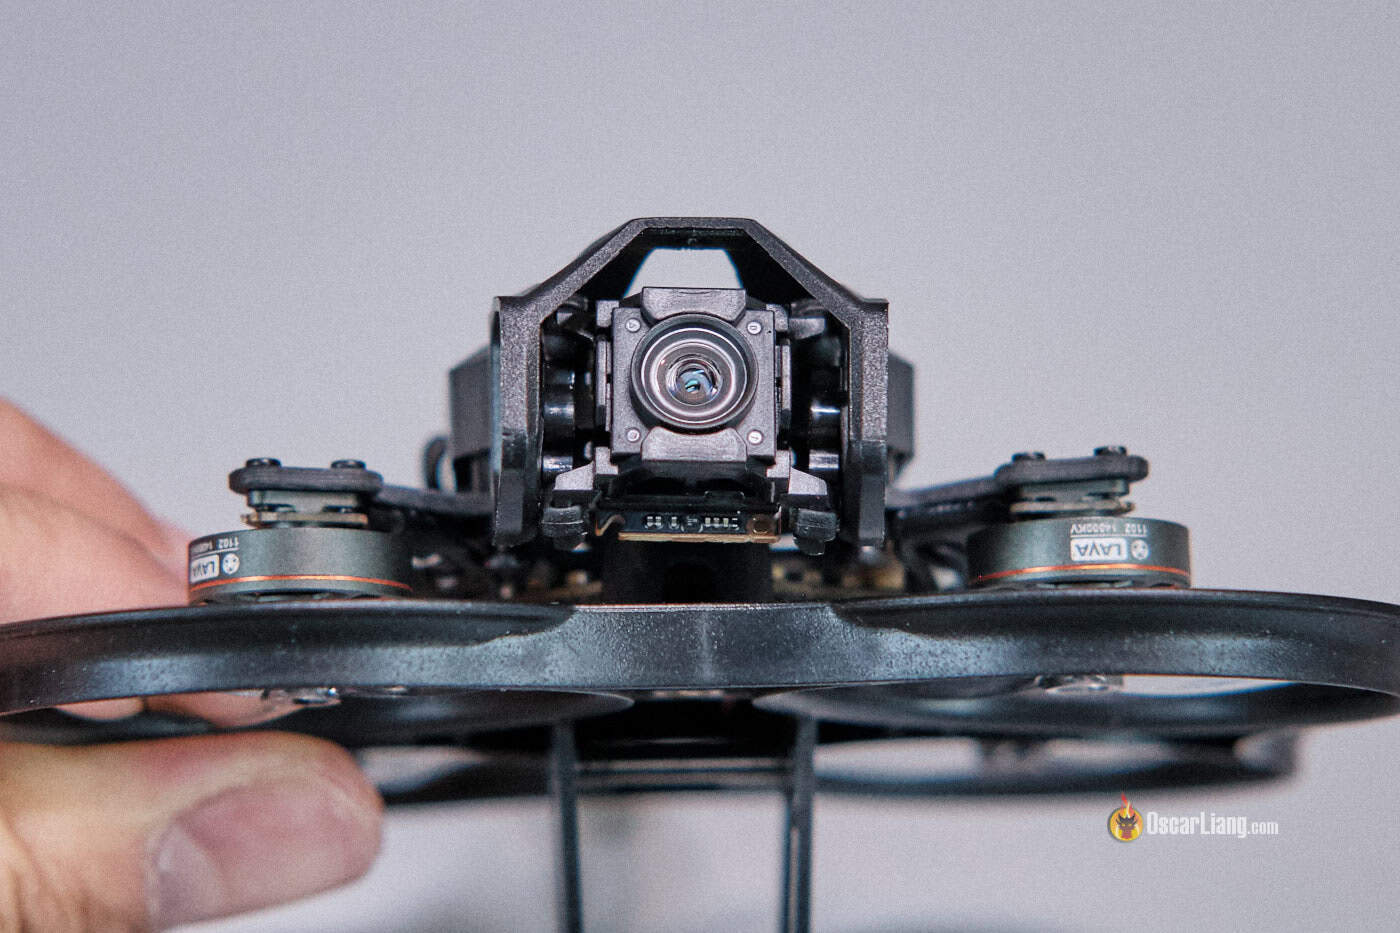
Another potential issue is related to the O4 camera. Specifically, the camera cable is quite short and rigid, which can transfer vibration to the camera. Make sure it doesn’t rub against the frame. Furthermore, you could try removing 5–10mm of tape near the camera connector to expose the more flexible part of the cable, reducing rigidity and vibration.
It’s easy to access the bind button and USB-C port on the O4 air unit.
Flight Performance
Raw footage:
Despite its heavy weight, the Pavo Femto is incredibly snappy and responsive thanks to its compact form factor. Outdoors, it flies smoothly in calm conditions; however, once you introduce a bit of breeze, the drone might become twitchy—likely due to the combination of tiny propellers, heavy weight, and the design of its prop guards.
I tried flying the Femto indoors, but I found it harder to control precisely compared to similarly sized 1S tiny whoops. Its increased weight means it doesn’t feel as nimble, with more momentum making rapid direction changes slower. Additionally, the Femto is noticeably louder than 1S whoops (including the Meteor75 Pro O4), and the weight raises concerns about potential damage when you crash.
Stabilized footage using Gyroflow:
On the upside, contrary to reports about O4 stabilization issues, I’m happy to report that mine performed quite well even outdoors. There were some minor vibrations here and there, but overall the stabilized footage was usable. That said, the field of view is fairly narrow, so personally I prefer the raw, non-stabilized footage.
In my tests, I was getting around 4 minutes and 45 seconds of flight time using the recommended BetaFPV LAVA 2S 550mAh LiHV battery. With a 450mAh battery, the flight time dropped to just 3 and a half minutes.
Comparing to Meteor75 Pro
BetaFPV appears to have recognized that a 1S 75mm platform is slightly too small to effectively carry the DJI O4 Air Unit for outdoor flying.
The Femto, powered by a higher voltage 2S battery, is noticeably more powerful than the Meteor75 Pro and can handle stronger winds outdoors. However, this increased power comes with trade-offs: the Femto is noisier and less agile indoors due to its heavier weight. The smaller props mean that the motors have to work harder (spinning at higher RPM) to keep the drone afloat compared to the Meteor75 Pro, making it louder and somewhat less efficient. On the flip side, the faster RPM response translates to greater raw performance and responsiveness.
While the Femto’s enhanced power is appealing for outdoor flying in calm conditions, it’s in an awkward position. For indoor flying, I still think the Meteor75 Pro offers superior handling. Outdoors, the Femto flies well, only when the weather is calm; as soon as the wind picks up, I start to notice some wobble and jello in the footage, and the drone can be pushed around more easily than larger models.
How to Setup
To connect to Betaflight configurator, use the provided USB-C adapter.

Flight Controller Board Target: BETAFPVF405 (preloaded with Betaflight version 4.5.0). Original CLI Diff available here.
The ESC is preflashed with Bluejay, (C-X-70 – Bluejay, 0.19)
Setup Instructions:
- Bind the ELRS Receiver: Plug in the USB cable, wait about 60 seconds until the receiver enters WiFi mode (green LED flashing rapidly). On your phone, join the ExpressLRS RX WiFi network (make sure to place your phone close to the drone, as the WiFi signal from the FC is extremely weak). Open browser and go to 10.0.0.1, then enter your bind phrase on the webpage. Detailed instructions can be found here: https://oscarliang.com/bind-expresslrs-receivers/#Method-3-Entering-Bind-Phrase-in-Web-UI
- Pair the DJI O4 Air Unit with your Goggles: Follow the instructions here: https://oscarliang.com/how-to-setup-dji-o4-lite/#Pairing-DJI-Goggles-3-with-O4-Lite. The O4 doesn’t require activation, so you can fly as soon as it’s paired.
- Setup the Modes Tab: Configure your arm switch, angle mode, and turtle mode. For guidance, see this tutorial: https://oscarliang.com/betaflight-modes/#How-to-Setup-Arm-Switch
- In Power tab, set warning voltage to 3.4V, and min voltage to 3.2V – I tend to land when voltage drops to 3.3V due to voltage sag, and when you land the voltage would normally rise to 3.5-3.6V.
That’s it—your Femto should now be ready for its maiden flight!
Final Thoughts
In conclusion, if you’re looking for a sub-100g tiny whoop that can be flown both indoors and outdoors, the Pavo Femto is worth considering. However, if cinematic video quality is your top priority, you might be disappointed with the current performance of the DJI O4 Lite. In that case, you might want to consider a larger drone equipped with the O4 Pro. While you can fly the Femto indoor, personally I prefer the Meteor75 Pro as it’s more precise, quieter and causes less damage when you crash.
Still, for fun flights—especially outdoors on calm days—the Pavo Femto proves to be an engaging and capable little drone. Its unique combination of 2S power, compact size, and robust performance makes it a noteworthy entry in the tiny whoop market.
You can get the Pavo Femto from:
- BetaFPV: https://oscarliang.com/product-obqa
- AliExpress: https://s.click.aliexpress.com/e/_oFPxyvk
- RDQ: https://oscarliang.com/product-eqrn
- GetFPV: https://oscarliang.com/product-93yq
17 comments
Is it possible to bind the drone to the controller (RadioMaster Boxer) with a different method other than using the “Bind Phrase” method?
Yes, there are various way to bind, check out this guide: https://oscarliang.com/bind-expresslrs-receivers/
I wonder if anyone else is having an issue with Pavo Femto FC/ESC, where the drone starts drifting to the right-side after a week or so of light flying. There is a YouTube video by another owner demonstrating the same thing. The drift is severe rather.
Hey oscar, im not sure if im wrong, but is the setup when binding to the Dji o4 lite supposed to say o3 air unit??
Sorry for trying to correct you if im wrong..
Yes it’s a typo, thanks for the correction.
pavo femto canopy is no good with pavo20.. jello..
i never had jelly in pavo20 original canopy with O4 lite. even without soft mounting and 6 blades props
I converted my pavo20 to femto canopy. but man, it has crazy jello footage. i never had jello on pavo 20 canopy with o4 lite even without softmounting and i used 6 blades prop too. tried everything but no luck. i plan on going back on pavo20 original canopy, maybe femto only good with smaller motors
can you please share your rates?
Sure, scroll down to “My Freestyle Rates”: https://oscarliang.com/rates/#My-Rates
Hey Oscar,
Thank you for all the great content u are making!
Do u think the Femto can run on 3s? I saw a reddit post where someone tried it and was very please about the performance.
Maybe the 14,000KV of the motors are to high for 3s? isnt there a way to tune them down in betaflight?
The board seems to be able to do 3s.
Do u also know if there is a way to add GPS to the femto considering u are saying: ” With a total of 5 UARTs (only 2 in use), there’s plenty of expansion potential.”
Is there a way to add it, maybe on top?
The board can take 3S, but the motor KV are too high for 3S. Maybe you could use two-blade and also reduce motor output in Betaflight. I haven’t tried it myself so I can’t comment on how reliable this would be.
Are you asking where to mount the GPS? Definitely on the top. You could design some sort of 3D printed mounts, but personally I’d just use double sided tape and zip tie to secure it on the top of the canopy.
Thanks for your review of Pavo Femto.
I own a Walksnail aircraft and several VTXs. Would it be possible to purchase a Pavo Femto fuselage without the O4unit and install a Walksnail VTX?
Probably but check input voltage, mounting. I haven’t done it myself so I am not 100% sure.
Any Idea why they havent released a 04 Pro canopy for Pavo 20 and Pavo 20 Pro? It feels to me that the Pavo 20’s where the no 1 selling O3 Airunit Cinewhoop in the world. Thanks for all your work
Can you attach led on pavo femto? Yes? How?
Yes, there’s LED pad on the FC.
You can find the wiring diagram here for the flight controller: https://betafpv.com/products/f4-2-3s-20a-aio-fc-v1
Appreciate the review! Noticed mine came with default dynamic idle value set to 0, vbat sag disabled and thrust linearization disabled as well. Was wondering if you had played around with these settings and if you recommend adjusting these. Thanks.