
This tutorial explains the different flight modes in Betaflight and how to setup Betaflight modes. The process should be similar regardless the quadcopter, flight controller or radio you use.


If you are totally new to Betaflight, check out my Betaflight beginner’s tutorial.
Table of Contents
Modes In Betaflight
One of the features of Betaflight is the ability to configure multiple flight modes. Flight modes allow the pilot to switch between different settings for the flight controller, which can affect the behaviour of the drone.
You can find all the modes in the “Modes” tab in Betaflight Configurator.

Note that not all the modes are flight modes, some are feature related while others are event triggers. In this tutorial I will go over every Betaflight mode and explain what what they do.
In my opinion, most of the modes you probably will never use, so I made them greyed out below to indicate the lower importance.
Flight Modes
ARM
To take off, the quadcopter must be armed first. Once it’s armed, the motors will spin. You should disarm as soon as you land or crash, and the motors should stop immediately.
If you have the “MOTOR STOP” option enabled, the motors will not spin when the drone is armed until you increase throttle.
If you have problem arming your drone, there are many potential causes. In this article I will help you troubleshoot why you can’t arm a quadcopter.
ACRO
In Acro mode, the drone is flying without any assistance from the flight controller. Every movement will require direct command input from the pilot. This might be scary for new pilots but it’s true freedom as the drone will do exactly what you tell it to do.
Acro mode is the “ultimate flight mode” for FPV drone flying, pretty much everyone experienced flies in Acro mode. I have an article discussing why you should be learning Acro mode. The stick position dictates how fast the quad will spin around that axis. This can be changed with rates and expo – changing how fast it will spin at a set point of the stick travel.
Where is ACRO Mode? I can't find it... ACRO mode is not in the modes tab. When the drone is armed without selecting any other flight modes, it would be in ACRO mode.
Trivia: Acro mode is also sometimes called manual mode and rate mode…
ANGLE
In Angle mode, the drone self-levels when the sticks are released to the centered position. It limits the maximum angle the drone can tilt and so it won’t get out of control. It behaves like an assisted/stabilized DJI camera drone, making it easier for beginners to fly.
Angle and Horizon modes disappeared? Angle and Horizon mode requires the accelerometer to work, if these modes are missing in the modes tab, chances are you've disabled accelerometer in the Configuration tab.
HORIZON
Horizon mode is basically Angle mode with the ability to do flips and rolls when the stick pass a certain threshold. When you left the sticks back to center the drone will self-level.
ACRO TRAINER
Acro Trainer is designed for beginners to safely learn to fly in acro mode. It’s basically ACRO mode with a tilt angle limit that prevents your drone from flipping over leading to crashes.
Like Angle and Horizon modes, Acro trainer mode also requires both gyro and accelerometer to work.
GPS RESCUE
If you have a working GPS module in your drone, you can configure GPS Rescue mode, when it’s activated, your drone should fly back to where it took off. I have a tutorial explaining how to setup GPS Rescue mode.
FAILSAFE
It simulates failsafe which happens in the event of RC link loss. This is used for testing the drone’s behaviour in failsafe.
DO NOT have this enabled in a normal flight! This is used to test failsafe only. You can also test failsafe by turning off the radio, but it takes a few seconds to power the radio back on, and it’s safer to just test failsafe with a switch. If you assigned a switch to Failsafe mode, and activated it, your quad would be in failsafe, and your whole radio is locked out and you can’t control the quad anymore. This is great if you are testing things like GPS rescue mode, but remember to remove it from Modes tab as soon as you finish testing.
3D
Enables 3D flying: the throttle travel is halved and the lower half reverses the direction of rotation of the motors. This makes it possible (with suitable esc and propellers) to fly upside down.
Non Flight Modes
AIRMODE
Airmode is not really a flight mode, but a feature. It basically allows better control at zero throttle. This is particularly useful for freestyle and acrobatic flying.
Beware that Airmode can make your motors spool up unexpectedly on the ground/bench so be extremely careful when handling your quad when it’s armed. Although there are safety features to prevent this from happening you still want to be cautious about this.
AIRMODE is available as a feature in the Configuration tab. If you enable it there, Airmode will be enabled by default, and it would disappear from the Modes tab. If you leave it disabled in the Configuration tab, you have the option to enable/disable it anytime during flight using a switch by setting it up in the Modes tab.
ANTI GRAVITY
Anti-Gravity reduces dips (sudden pitch-down) on rapid throttle changes, see this post for detailed explanation.
Same as Airmode, if you have “Anti Gravity – Permanently enabled” turned on in PID Controller Settings, you won’t see this in the modes tab.
Mag
Heading lock.
HEADFREE
Head Free – When enabled yaw has no effect on pitch/roll inputs. The drone will fly as if it is in angle but without bearing. Whatever yaw position the drone is in, the other axes will always have the same effect.
HEADADJ
Heading Adjust – Sets a new yaw origin for HEADFREE mode.
CAMSTAB
Camera Stabilization.
PASSTHRU
Pass roll, yaw, and pitch directly from RX to servos in airplane mix.
BEEPERON
Previously known as BEEPER. It’s for activating the buzzer in the drone (if available), useful for locating a crashed drone. If you don’t have a buzzer, you can also setup ESC beacon and your motors will be beeping like a buzzer.
LEDLOW
Switch off LED_STRIP output.
CALIB
Start in-flight calibration.
OSD
It enables/disables Betaflight OSD – removing the text overlay on your FPV screen.
TELEMETRY
Enable/disable telemetry via switch.
SERVO1, 2, 3
Servo 1, 2, 3.
BLACKBOX
To start and stop Blackbox logging.
BLACKBOX ERASE
Erase all the Blackbox logs stored in the flash memory. Memory erasing can take a while, you should wait at least 30 seconds before deactivating this mode.
FPV ANGLE MIX
Apply yaw rotation relative to a FPV camera mounted at a preset angle.
CAMERA CONTROL 1, 2, 3
Control function 1, 2 and 3 of the onboard camera (if supported).
FLIP OVER AFTER CRASH
When you’ve crashed and stuck up side down, you can use this mode to “flip” your quad over and hopefully take off again, so you don’t have to walk all the way over to pick it up. It does it by spinning one side of the motors in the opposite direction, and it requires DShot ESC protocol to work.
It’s also known as the “Turtle Mode”, here is a tutorial on how to use it.
BOXPREARM
Previously known as PREARM.
This is a safety feature, it prevents the drone from accidentally being armed with just one arm switch.
You can set pre-arm to a switch and your quad will only arm if that switch is on. After arming, the pre-arm mode can be switched off, so a momentary switch is great for this.
BEEP GPS SATELLITE COUNT
Use a number of beeps to indicate the number of GPS satellites locked. Useful for LOS drones where you don’t have OSD.
VTX PIT MODE
Switch the VTX into pit mode (low output power, if supported).
It can enable Pit mode on your VTX if SmartAudio or Tramp Telemetry is configured. Pitmode is basically setting the output power of your VTX close to 0. It’s useful when you have crashed, and it minimizes the interference to other pilots who are still flying.
USER1, 2, 3, 4
User defined switch 1, 2, 3 and 4. Intended to be used to control an arbitrary output with PINIO.
PID AUDIO
Enable output of PID controller state as audio.
Paralyze
Permanently disable a crashed craft until it is power cycled. Designed for racing. When activated it shuts down VTX and RX to avoid interfering with other pilots who might be still flying. It can only be reset by unplugging the battery.
LAUNCH CONTROL
Race start assistance system, used exclusively in racing drones. I have a tutorial explaining how it works.
STICK COMMANDS DISABLE
Disable/enable stick command.
BEEPER MUTE
Disable/enable beeper including warning, status and BEEPERON mode.
READY
Added in BF4.4, you can now show ‘READY’ in the OSD using a switch. This is a niche improvement for racing situations where all pilot video feeds are on one central screen. The pilot can flick a switch to indicate that they are ready to fly, and the word READY appears on their OSD. The race director can then tell if all pilots are ready by looking at the central screen. On arming, the READY text disappears.
How to Setup Arm Switch
Betaflight modes can be activated using switches on a radio transmitter. But first you should setup those switches in your radio (by assigning those switches to channels in the Mixers page), I have a tutorial explaining how to do that in EdgeTX/OpenTX (works for all the mainstream radios such as Boxer, TX16S, Zorro etc..)
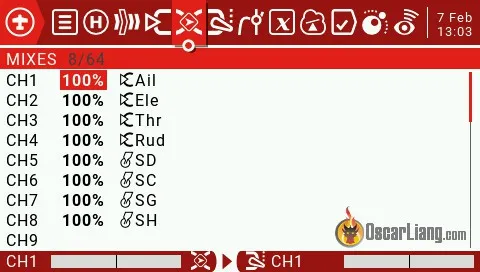
In this example, I will be using the “SD” switch on my Boxer radio for arming and “SC” switch for flight mode.
To do that, I will be assigning the SD switch to channel 5 (AUX 1 in Betaflight). Channel 1-4 are reserved for the two sticks: throttle, yaw, roll and pitch, so these channels can not be used for switches. ExpressLRS and Crossfire both support up to 12 channels, so you can assign up to 8 switches for Betaflight modes. Note that for ExpressLRS, CH5 is dedicated for arming only, and it’s always treated as a 2-position switch.
To use the SD switch for arming, go to the Modes tab in Betaflight, in “ARM”, click “Add Range”, select “AUX 1” in the dropdown (Remember, AUX1 is channel 5), and drag the range all the way to the right.
You have to choose what range of this channel you want to activate this mode. For a 2-position switch, the up and down positions correspond to 1000 and 2000.

When the value of the switch falls within that range (as you flip the switch), the drone would be armed.

Pro tip: if you are not sure which switch is which AUX channel, simply set the mode to “Auto”, then flip the switch on your radio, Betaflight will detect which AUX channel has been activated and automatically select the correct option for you. Note that this will only work if the switch you want to use is already configured correctly in your radio MIXES page.
How to Setup Flight Modes
Make sure Accelerometer is enabled in the Configuration tab for Angle mode and Horizon mode to work.

Assign another switch to a spare channel in the radio’s Mixer page. In this example, I will assign the SC switch to channel 6 (AUX 2 in Betaflight).
Go to the Modes tab in Betaflight Configurator, in “ANGLE” and “HORIZON”, click “Add Range”, select “AUX 2” in the dropdown, and drag the range to the appropriate values. Because the SC switch is a 3-position switch, the up, middle and down positions correspond to 1000, 1500 and 2000.

When neither ANGLE or HORIZON is selected, the drone would be in Acro mode.

Press the Save button, and that’s it!
Need Help?
If you have questions please join our form IntoFPV.
Edit History
- Sep 2018 – tutorial created
- Feb 2023 – updated for BF4.4
24 comments
Me podrías ayudar? he seguido tu pasos pero cambiando el armado en el botón SE y los modos de vuelo a SB. No me arman los motores. Gracias.
Oscar – do i need calibrate accelerometer to work to set up acromode? My calibrate accelerometer is greyed out. Why?
THX for it
How can I remove a mode? I added one and don’t need it, but I don’t see any option to disable the mode.
There’s a cross sign in the top right of each mode – click it to remove that mode.
You have a vast knowledge of a great amount of things, for you to be able to articulate, catalog and share this info has a great deal of who you are. I take my hat off to you Sir. A special person you are Oscar. I am a 63 year old retired CNC technician. Ive recently adopted this hobby, I used to fly RC Helis, well, I used to crash RC Helis. I could fly them straight to the crash site. Now Im hooked on building and crashing Quads. I Thank the stars for folks like you who make the difference ! Im impressed. keep up the awesome attitude and exemplary work!
tsk
Awesome Thanks!!!!
I use my motor as a beeper, but sometimes I press the beeper button in the middle of flight, is it okay if that happens?, because I now deactivate that feature because I’m afraid to damage my motor and esc
Nothing will happen if you activate beeper during flight if you are only using motors as beeper and doesn’t have an actually buzzer.
Thanks a lot for the answer oscar, now I will enable it again.
It’s disappointing that pre arm isn’t used more frequently. Such a good safety feature.
What’s the new calib mode in 4.3?
I have the DJI AIRUNIT everything is bound according to instructions. I can’t get the transmitter to arm the quad. I have bound it with and flown with crossfire receiver suite TX16S radiomaster now I want to fly with the Dji transmitter…crocodile5 baby LR HD NanoRX. I can’t get the DJI receiver to arm the quad…Help!
you need to connect the usb to your computer, connect everything and check what’s preventing the arming of the drone, remember if the drone has the usb connected it won’t arm, always put propellers off for testing
Yes. Let’s assume your target switch is AUX3
Set: arm mode, add range. set to AUX3, then set the range 33-100% (covers two of the 3 positions)
Set: angle mode, add range, set to AUX3, then set the range to 66-100% (covers one of the 3 positions)
AUX3 in position 1 will register somewhere between 0-32%. This would be the disarm position.
AUX3 in position 2 will register somewhere between 33-65%. This would activate the arm mode, but not the angle mode.
AUX3 in position 3 will register somewhere between 66-100%. This would activate the arm mode, and activate the angle mode.
You can experiment with your switches in betaflight, so you can make sure they activate in the way you prefer. Sometimes you’ll need to make adjustments to match your radio.
You will want to make sure your radio will trigger a warning if AUX3 is not in position1 when the radio is turned on. I would probably suggest setting up a pre-arm mode for SW1. That will give you a dedicated shutoff switch in an emergency, and prevent accidental switch bumps from arming the quad.
Hi
Is it possible to set Arm + Angle + Acro on a single three-position switch ?
0-not armed
1-Armed in Acro mode
2-Armed in Angle mode
thanks
Niro
Acro is the default, so if you set arm to cover the top two positions and set angle for the top third that should produce your desired result.
Please how should I solve this problem, my drone disarm automatically when I increased the throttle.
Hi did you find the cause of your problem (i had the same)
don’t know if this is something you can help me with I have the jumper T8SG plus I bought a cheer son CX 95S it’s running F3 Evo for the life of me I’ve looked everywhere and cannot figure out how to run this on my jumper I can turn the motors on in beta flight I just can’t get them to work with the control
hey, how to set default values for modes, that modes have when TX is not connected yet? for me they stay in center which is not good for my settings
ive set up drone with dx7 u can move drone about and works on betaflight but when u go to area where it shows movement from tx sticks nothing matches what tx sticks do ie right stick moves throttle event tho its in mode 2 and throttle moves left n right but tx shows its correct in movement os stick but not on betaflight any ideas
Hi,
There may be a bug with the Acro Trainer mode activation.
I have tried to configure it so that it activates with two switches by adding a second range so that it uses two auxiliary channel switch positions (and used logical AND for both ranges), but once i did this, the mode color (orange in BF 4.0) shows it is deactivated when both switches are in the correct set ranges, and then when one is outside it shows the Acro Trainer is activated (changes color to Orange).
Can you verify you get the same? and what the implication of this is?
Beginner quad pilot but many years RC flying. Been training on a toy quad clone of Emachines e58
My setup: DIY F450 using a Matek F405 STD with BetaFlight. Using Angle Mode there appears to be very little stability. I boosted up the PID values by 50% with no noticeable improvement. Suggestions?