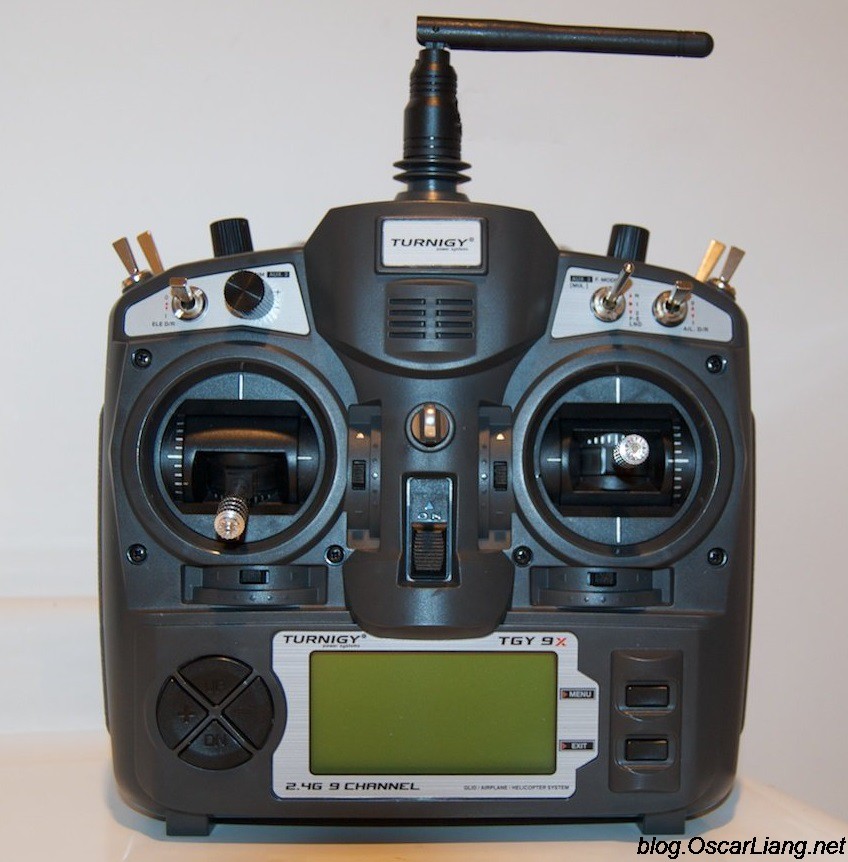
The Turnigy 9X is a cheap and powerful transmitter, I wrote an review about this product. For that money you get 2 sticks, 3 pots, 7 switches and a 128×64 LCD screen. The 9X transmitter is also known as the Eurgle 9x, FlySky 9x, Imax 9x and Turnigy 9x. In this post I will show you some of the very useful modifications to unlock the potential of the 9X RC transmitter to reach its next level. I will describe the basic transmitter modifications in this post and leave the links to some of the more advanced mods.
As I partly described in the review, there are some cons and pros about this transmitter either on hardware or software. Some of the mods are fixes to these problems while some are enhancements.
Table of Contents
Hardware Issues.
- AA battery holder – difficult to change battery or easy to get loose.
- Mediocre range from stock module – For the best range use a FrSky Module and antenna.
- No Programming header to change the firmware.
- No backlight on the LCD – Impossible to see the screen at night.
Software Issues.
- Annoying button beeps – Every time I press a button it makes a very loud beep.
- Inconvenient tree navigated menus.
- Complicated easy things – mixes, switches etc
Basic and Cheap Transmitter Modifications (detail in this post)
Lipo Replacement battery Install LCD backlight Speaker Mod FrSky 2.4GHz module
Advanced Modifications (details in another post)
Programming Header Socket Flash ER9X Firmware Use ER9X Firmware Telemetry MCU control of LCD light.
Replace Battery
This was probably the easiest one as I didn’t have to remove the back TX cover. I took measurements of the battery box (110mm x 30mm x 30mm) and then bought a new transmitter LiPo (or LiFe) from HK. Then I cutoff the battery connector from the old AA pack and soldered that onto the LiPo ( I triple checked the polarity here!). My battery also came with two power plugs and one balance plug so I cut off one power plug to have more room in the battery box. Below is a list of battery’s that will fit inside a Turnigy 9x. Don’t mind the “(Futaba/JR)” specification; they still work.
- Turnigy 2650mAh 3S 1C – This one seems to be the most popular one, and it gives the most space in the battery box for the connectors!
- Turnigy nano-tech 2100mAh 3S1P 20~40C LiFePo4 Transmitter Pack
- ZIPPY Flightmax 2500mAh Transmitter Pack (Futaba/JR)
Install 9X LCD Backlight
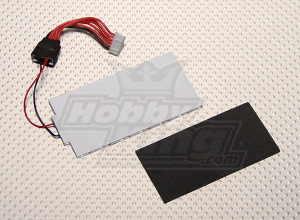
The stock radio does not include a back light, meaning that in low light conditions, the display can be difficult to read. HobbyKing have released a range of cheap LED based lights for the radio.
However if you want to flash the er9x firmware, you will not be able to turn this light on or off without some modification to the led board and an install of a switching system. The modification will require some soldering. Without this modification the LED will be on all the time.
The backlight isn’t like a desktop, laptop or television etc, it is more like a E-book reader display that doesn’t require a backlight during the day and therefore is impossible to see at night. I haven’t done this mod yet, but HK yas both blue and white backlight versions and gives a detailed guide on the product pages above. From the images at those links, it looks like the white versions gives a clearer image.
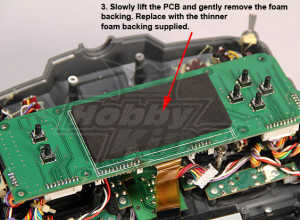
For full steps, you can follow the instructions on the backlight product page on the HK website.
But note that in Step 3, DON’T DO what the picture tells you.
Just cut-off some of extra foam but don’t try to completely remove it to avoid big mess.
Speaker Mod
Currently this mod does not require a specific version of the firmware. It simply uses the port on the cpu and sends the tones.In time it may be moved into a -haptic version of the firmware! I found this post very useful.
You will need a few part on your shopping list:
- A piezo speaker(ceramic/capacitor speaker). (this speaker needs to no more than 2.5cm to 3cm diameter.)
- a capacitor. (4.7u) seems to do the trick.
- a capacitor (10uf preferred – 2,2uF to 47uF could be used) – totally optional but “helps” and its very cheap! so it won’t harm!
- a 4mm or similar vibration motor to provide the haptic feedback.
- a 220 ohm to 1K resistor (this will improve safety with, virtually, any type of battery (any voltage)!
- a diode! 1N4001 will do the job!
Note! A normal speaker will work but its not totally safe! - it could burn the output from the controller, tests have shown a piezo has a much lower power draw so its safe to use
Note! Your 9x may come with either of the boards below. Simply choose the option to suit your 9x!
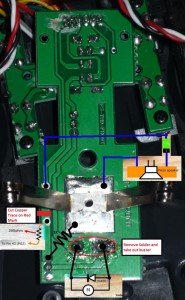
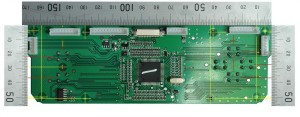
shows how you need to modify your radio. It should be largely self explanatory! The lead to the ‘free pin’ is a single line that is soldered to pin 43 on the cpu. This is marked in ‘red’ on the following image.
This pin is right next to the pins used for the frsky mod, so if doing that mod, then probably best to do this at the same time!
TX Module Upgrade
Stock TX module range is about 1Km. Frsky module with stock antenna range is 1.5km, but found some reports where the planes fly about 3km from the transmitter without problems. also, bought a 5db antenna, that increases the range. Great things about upgrading the module is to get the telemetry feedback and even failsafe. It returns from the plane two analog signals and a rs232 9600baud signal to the transmitter. Anyway, stock module works fine but there are some others that works better, like corona modules or FrSky.
In simple words, using other module allows you to:
- Have better range.
- Have the ability to fly around other radios without interference.
- Have better failsafe capabilities.
- Be the only technologies supported by certain flight control boards.
You can also just buy the Tunigy 9X transmitter without receiver and module, and buy your module and receiver separately. This transmitter works with various other non-Turnigy 2.4GHz JR compatible modules and receivers. Some modules are plug and play, some require minor modifications, do your homework before purchase.
The FrSky JR Compatible Telemetry Combo Module snaps into the back of the 9x like the current module and is much simple, but more expensive. Only thing to do is to remove the old antenna wiring going to the 9x stock antenna by cutting or unsoldering. See this video for detail instructions. He un-solders and keeps antenna wire, this way there is no modifications to the wire length and the original module can be reused in future.
Telemetry Mod
With the Frsky module and receiver you can do telemetry as well. That means you can see data of your plane on your transmitter like the voltage of the battery and signal strength etc.
However you will need to flash the transmitter firmware to another version, which I will talk about in the Turnigy 9X Advance Mod article.
Conclusion
After these hacks and mods, your Turnigy 9x has beomce so much better than the original! It has a stable and endurable battery, longer range, easier, easier programming connections, and in general is easier to use. In the next post I will be sharing some of the research I have done on some more advanced 9X transmitter Mod.




4 comments
Hi Oscar,
If you use a hair drier (or heat gun) to preheat the stock lcd back light foam, it peels off in one piece and not a large mess, shredding into pieces. Also Skip the old er9x, and flash openTx firmware. Yea, I moved onto a Taranis, but the 9x is still a great radio for it’s price. Also a 2S 18650 3200mAH pack is the best solution over the pricey Li-Po/LiFe solutions. The 9x uses a low cost linear regulator, so using a 3S Li-Po/Life battery with more energy is just turned into heat, lol.
Here is a pack installed in my Taranis
http://www.rcgroups.com/forums/showpost.php?p=25811065&postcount=1019
HI, that’s very good to know about these batteries, how do you change them ??
Great article thanx … Rough estimate on total costs for all these updates would really help though.
Yes. I know I’m being lazy by not clicking on the provided links. Sorry
A one liner in your post will still be highly appreciated. :-)