After testing different versions of the BetaFPV Pavo20 Pro—including the DJI O3, NightFire edition, and now the DJI O4 Pro—I can confidently say: they’re pretty much the same. But if you’re wondering which version to choose or how the O4 upgrade changes things, here’s everything I’ve learned.


New to FPV? Start with our Cinewhoop Buyer’s Guide: https://oscarliang.com/cinewhoop/
Table of Contents
Where to Buy
You can get the Pavo20 Pro O4 edition from the following vendors:
- BetaFPV: https://oscarliang.com/product-e2mg
- AliExpress: https://s.click.aliexpress.com/e/_oFVsz7F

Included Accessories:
- 1 × LED Strip Accessory Kit (Ice Blue)
- 4 × Spare Propellers
- 1 × USB-C Adapter Cable
- 1 × Spare DJI O4 Pro Air Unit 6-pin Cable
Note that battery is not included, get some Lava 3S 550mAh LiPo here: https://oscarliang.com/product-vrfd
Get some spare 2.2inch propellers here: https://oscarliang.com/product-8nfq
Specifications
If you’re familiar with the previous Pavo20 Pro with O3, the new O4 Pro version is essentially identical in terms of core hardware:
| Pavo20 Pro (O3 PNP) | Pavo20 Pro (O4 Pro PNP) | |
| Wheelbase | 93.7mm | |
| Battery Connector | XT30 | |
| Battery Slot | 20mm width, unlimited height | |
| FC | F4 2-3S 20A AIO FC V1 | |
| Frame | Pavo20 Pro Brushless Frame | |
| Motor | LAVA Series 1104 7200KV Brushless Motors | |
| Props | Gemfan 2218 3-Blade Propellers (1.5mm Shaft, 2.2″ triblade) | |
| Flight Time | 6:40 with 3S 550mAh LiHV | |
| Camera Filter Installation | Vertical | |
| RX Version | ELRS, TBS, SBUS | ELRS, SBUS |
| HD VTX Bracket | O3 Air Unit Bracket | O4 Air Unit Pro Bracket |
| Weight | 108g (with O3) | 107g (with O4 Pro) |
| Supported VTX | DJI O3 Air Unit/ Caddx Vista Kit / RunCam Link (with O3 Air Unit Bracket) | DJI O4 Air Unit Pro (with O4 Air Unit Pro Bracket) |
| Recommended Battery | 3S 450mAh, 550mAh, 650mAh LiPo/LiHV | |

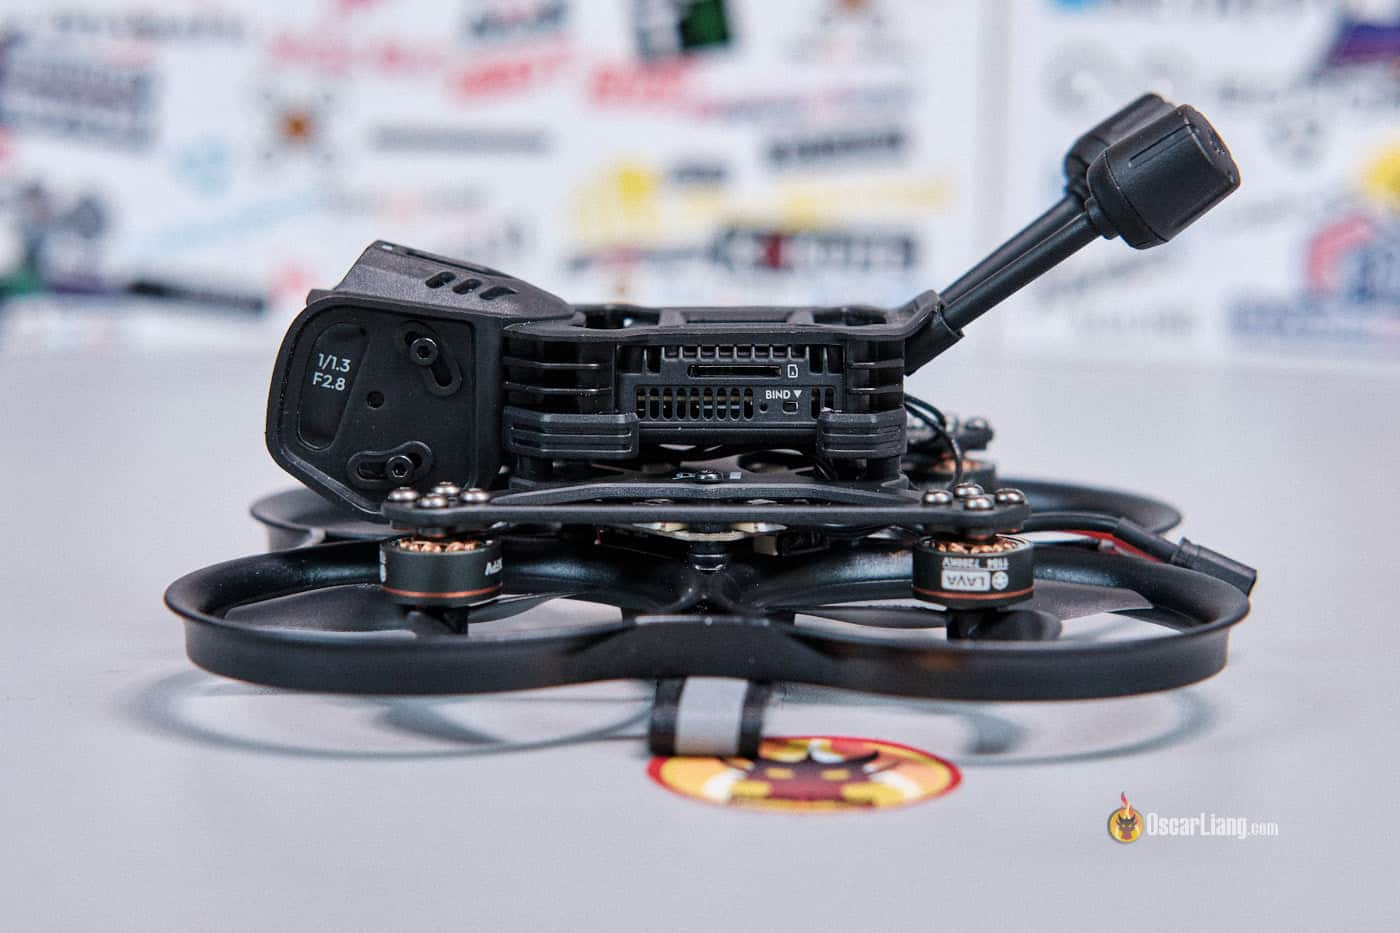
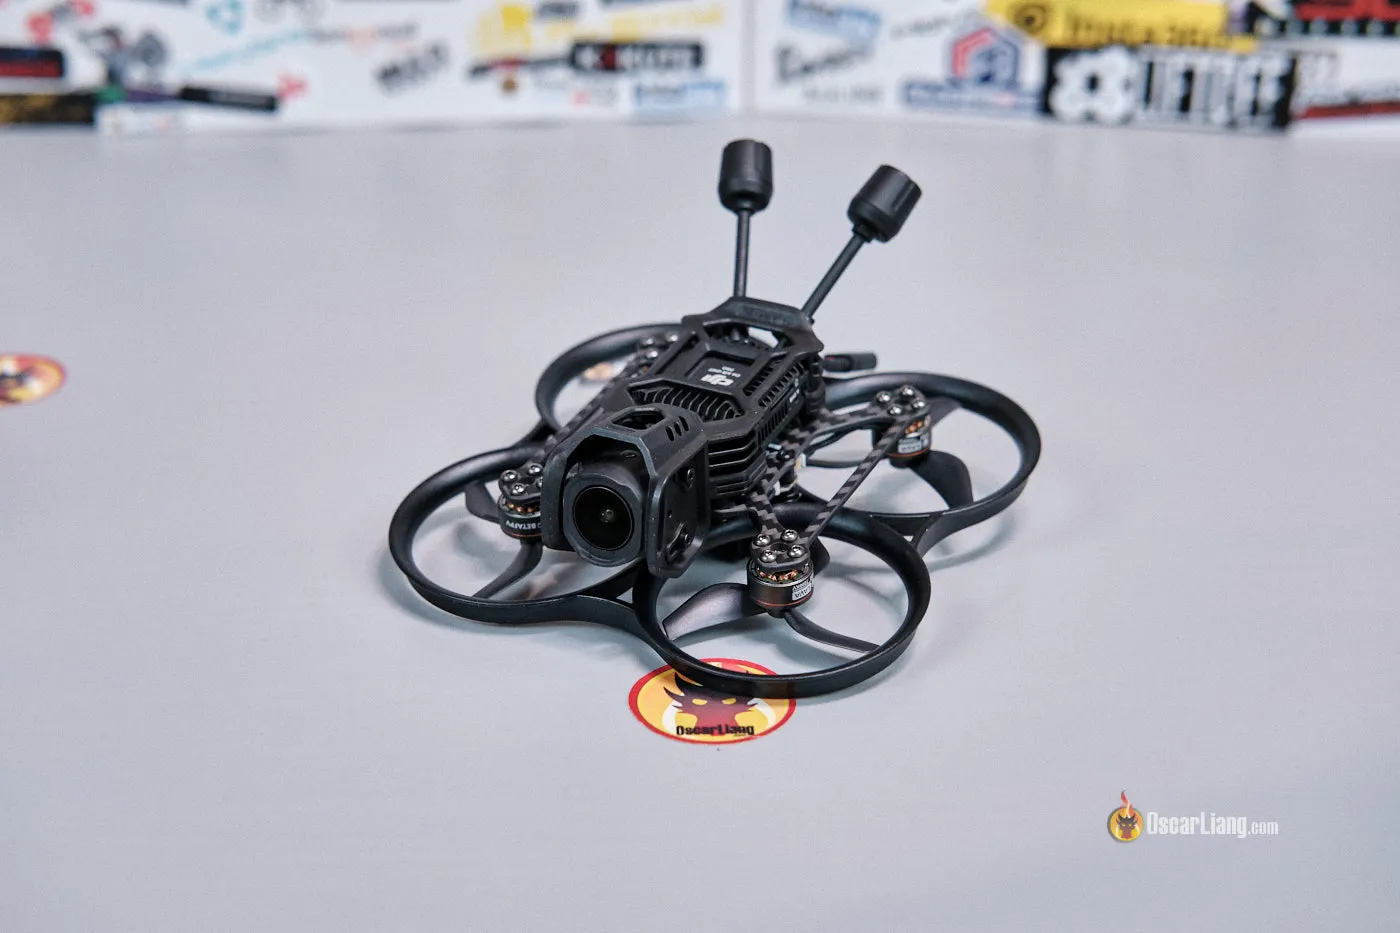
Design and Build: O4 vs O3 vs NightFire
Let’s get this out of the way: the pusher-style frame, motors, flight controller, and props are all the same across all these versions of the Pavo20 Pro.
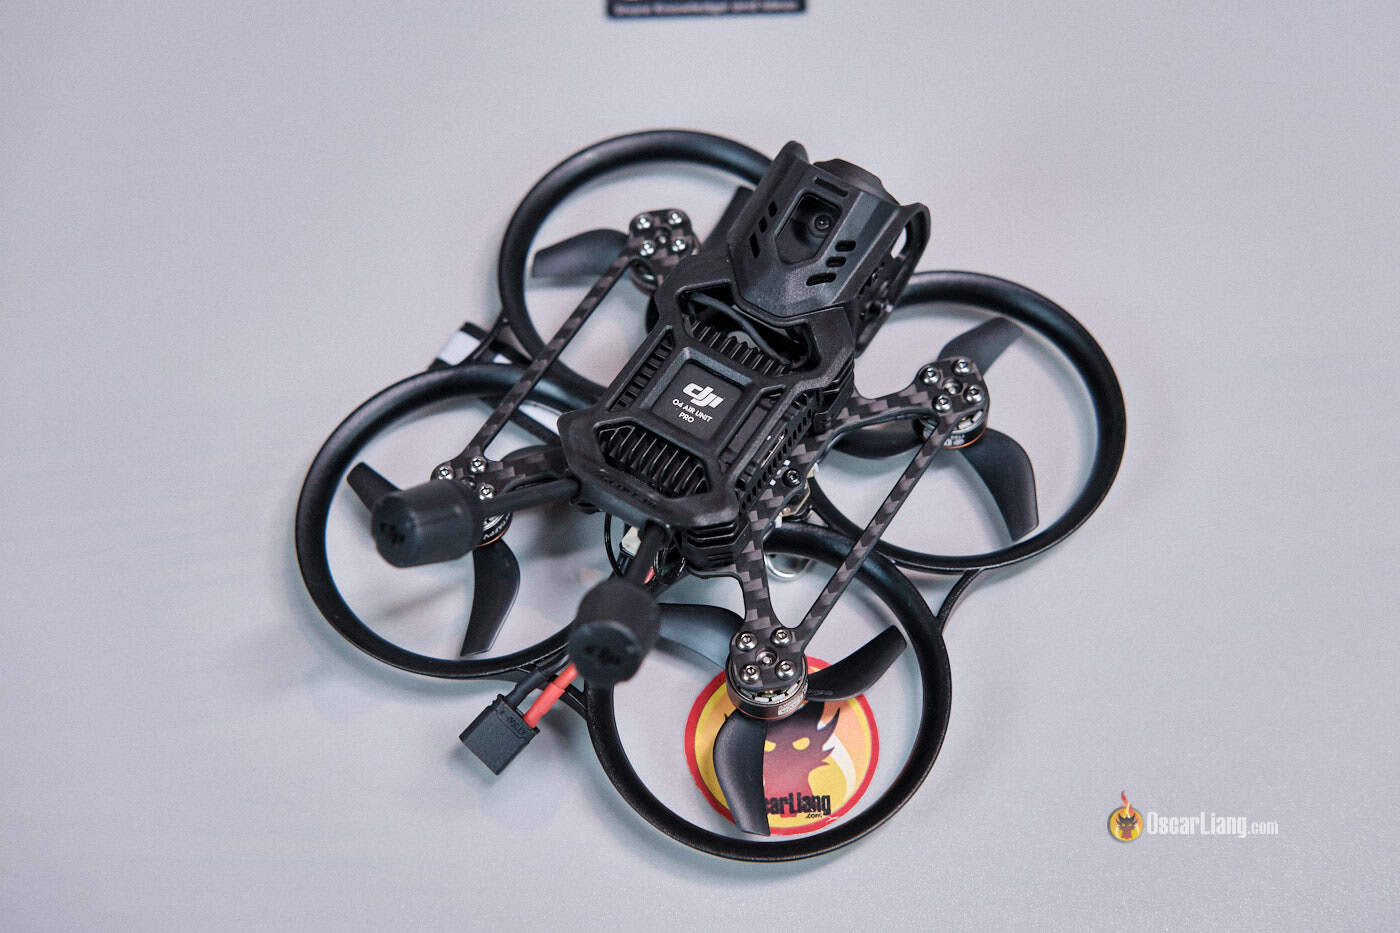
The main difference is the new camera cage, designed specifically for the DJI O4 Pro Air Unit. It’s a sleek, injection-molded mount that offers better antenna routing, and overall aesthetics. Compared to the O3’s mount, the O4 cage looks cleaner and feels more refined.

Surprisingly, the O4 version is slightly lighter than the O3, despite using the stock DJI O4 antennas. This is because the O4 Air Unit is lighter than the O3, though the weight difference is minimal and doesn’t noticeably affect flight performance.
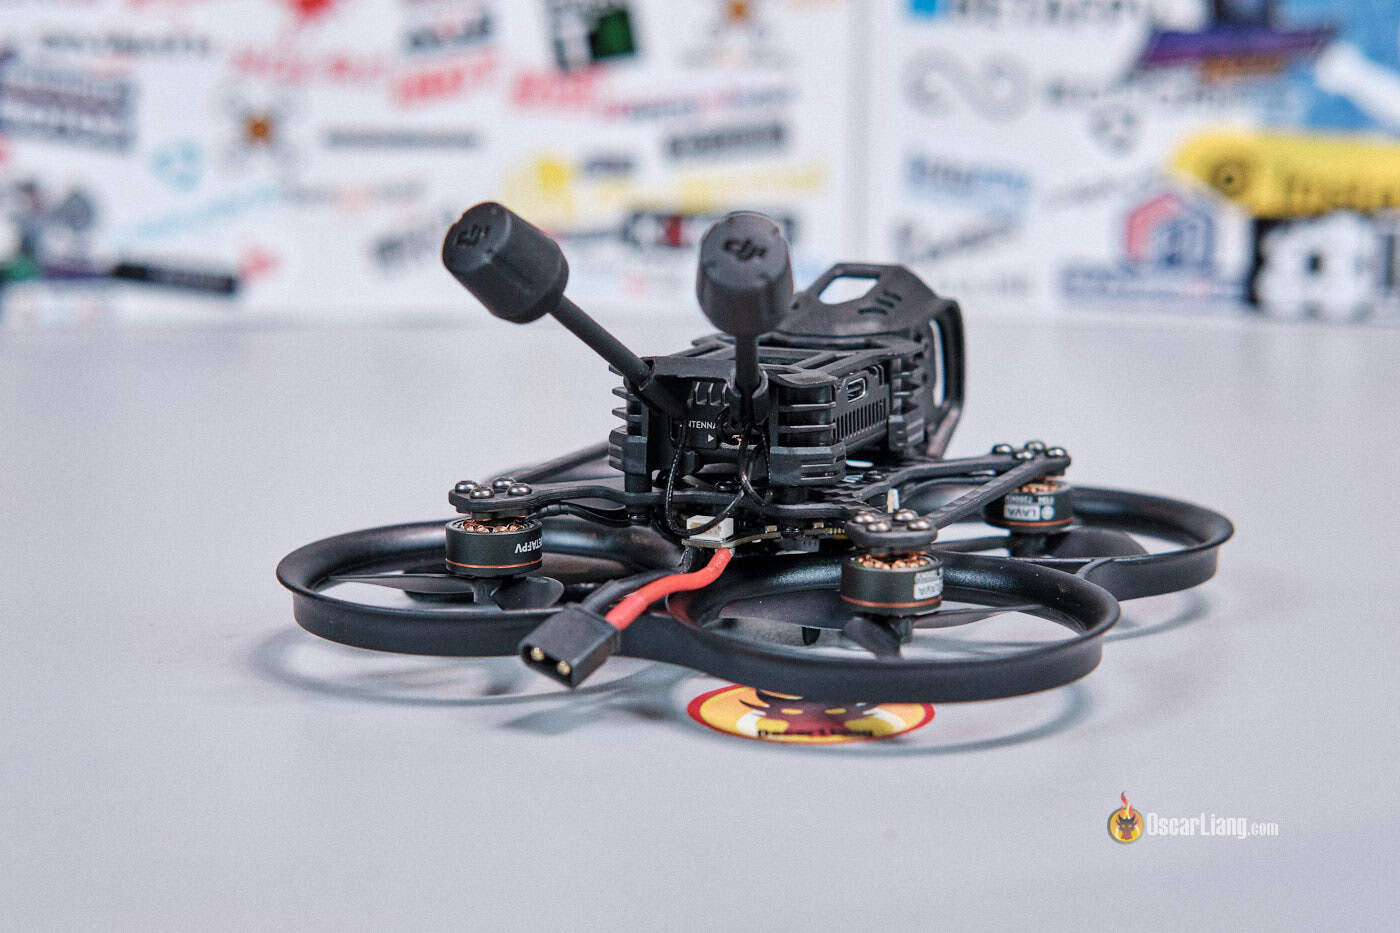
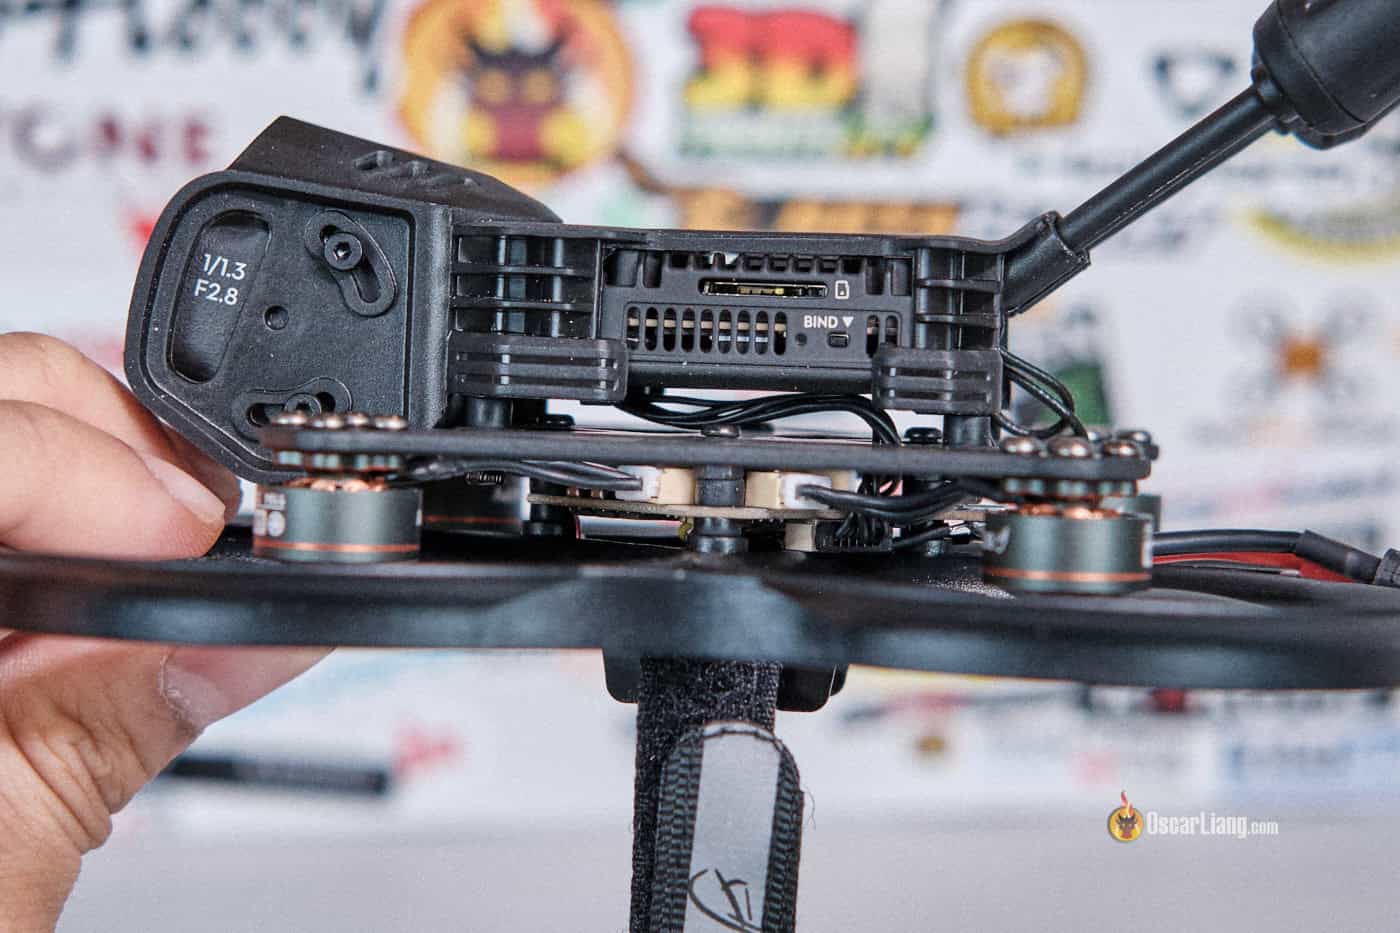
Using Original O4 Pro Antennas
One small gripe: I wish BetaFPV included shorter dipole antennas, like they did with the O3 version. They’re not only lighter, but also more durable in crashes. The stock O4 antennas are only press-fitted into the mount, meaning they can easily pop out during a crash and possibly damage the fragile U.FL connectors and wire.
If you’re concerned about durability:
- Consider gluing the antennas into place.
- Or better yet, swap them for dipoles to save ~4g and reduce risk.
Yes, you could argue that the stock antennas offer better range—but the real limiting factor here is the ELRS receiver antenna that is buried under the FC, not the video system. And since the Pavo20 Pro lacks GPS, you don’t really want to fly it far anyway. For this reason, dipoles should be fine.
Field of View and Prop Guard
You might notice the prop guard appearing in the bottom corners of your goggles. This is due to the ultra wide field of view (FOV) of the O4 Pro camera, especially when you are in 4:3 mode. However, once you run the footage through Gyroflow for stabilization, those prop guards usually get cropped out, so it’s not a major concern.
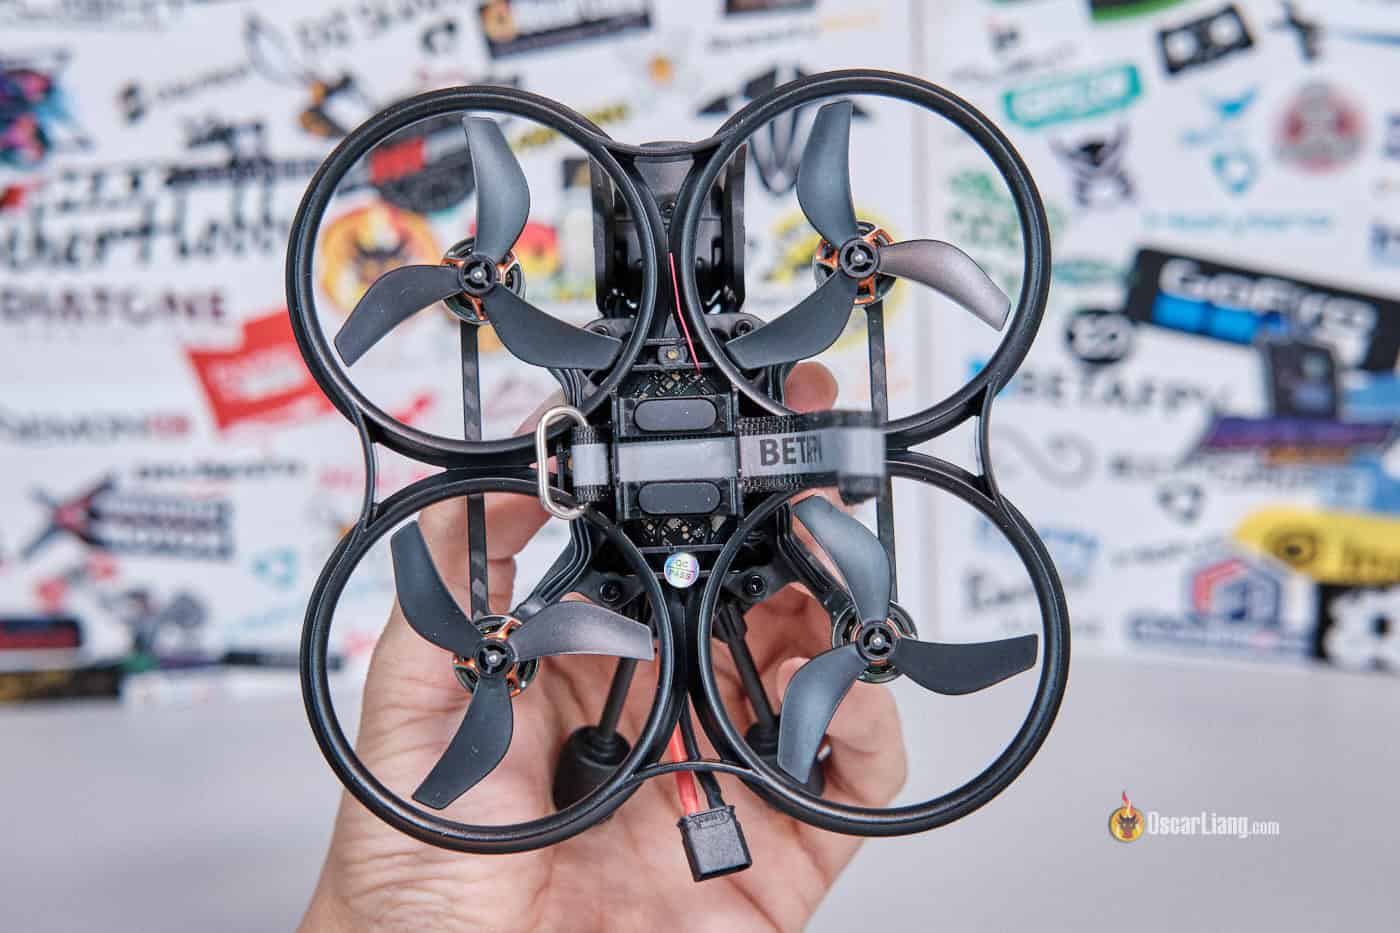
Battery Mounting and Payload
The drone uses a standard battery strap, giving you flexibility to use various 3S LiPo sizes, including 3S 450mAh, 550mAh and 650mAh. With a 3S 550mAh, the total AUW (All-Up Weight) comes in around 150g.
Note: the Pavo20 Pro is not designed to carry a GoPro or full-size HD camera. If you really want to add an external HD cam (e.g., Insta360 GO or Naked GoPro), you’ll need to 3D print your own mount—and keep it light. Additional weight will quickly affect both flight performance and battery life.
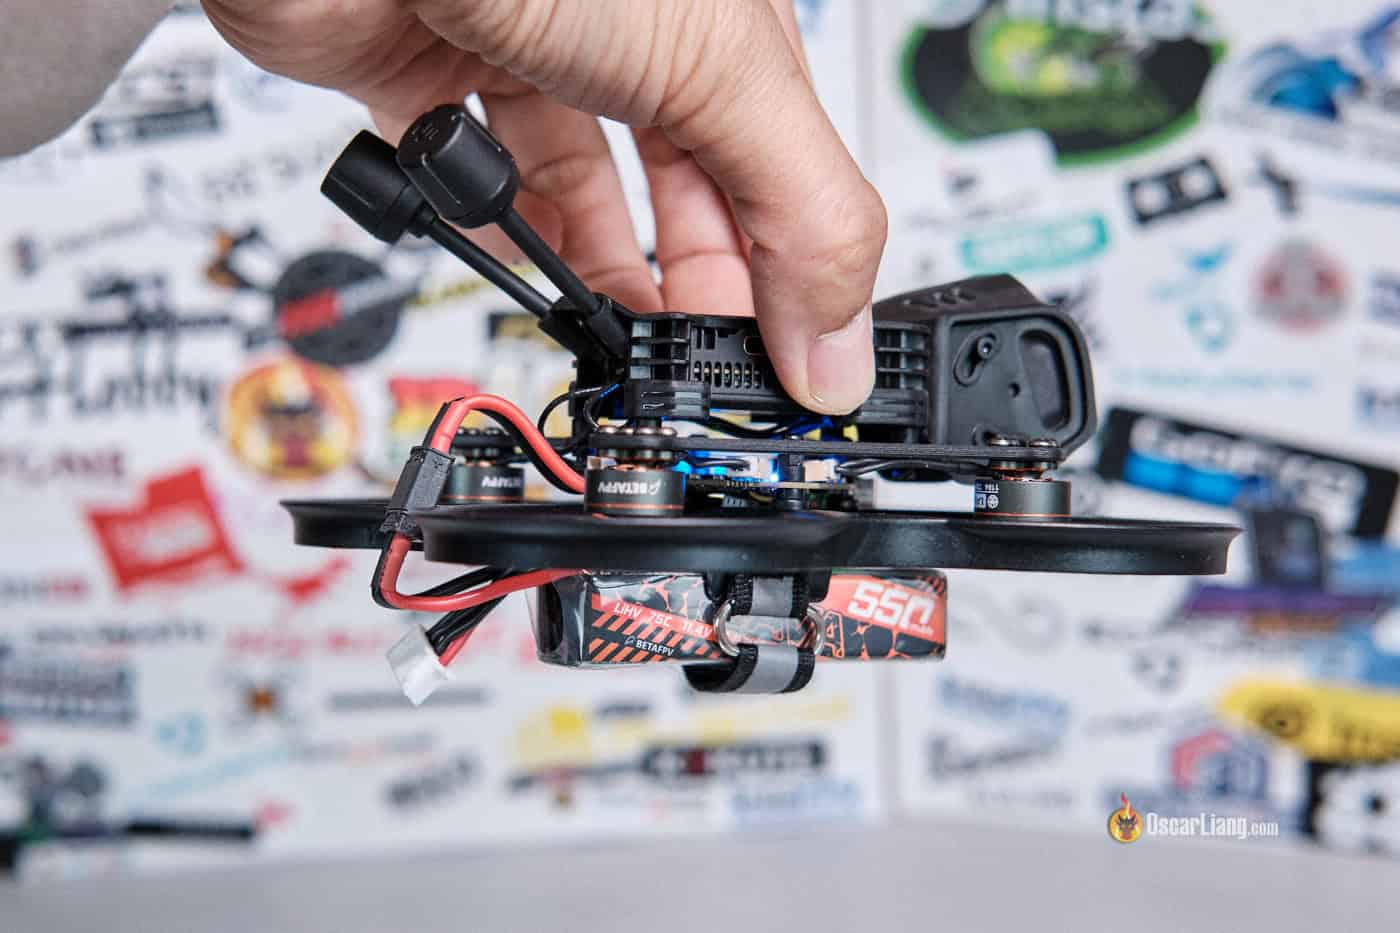
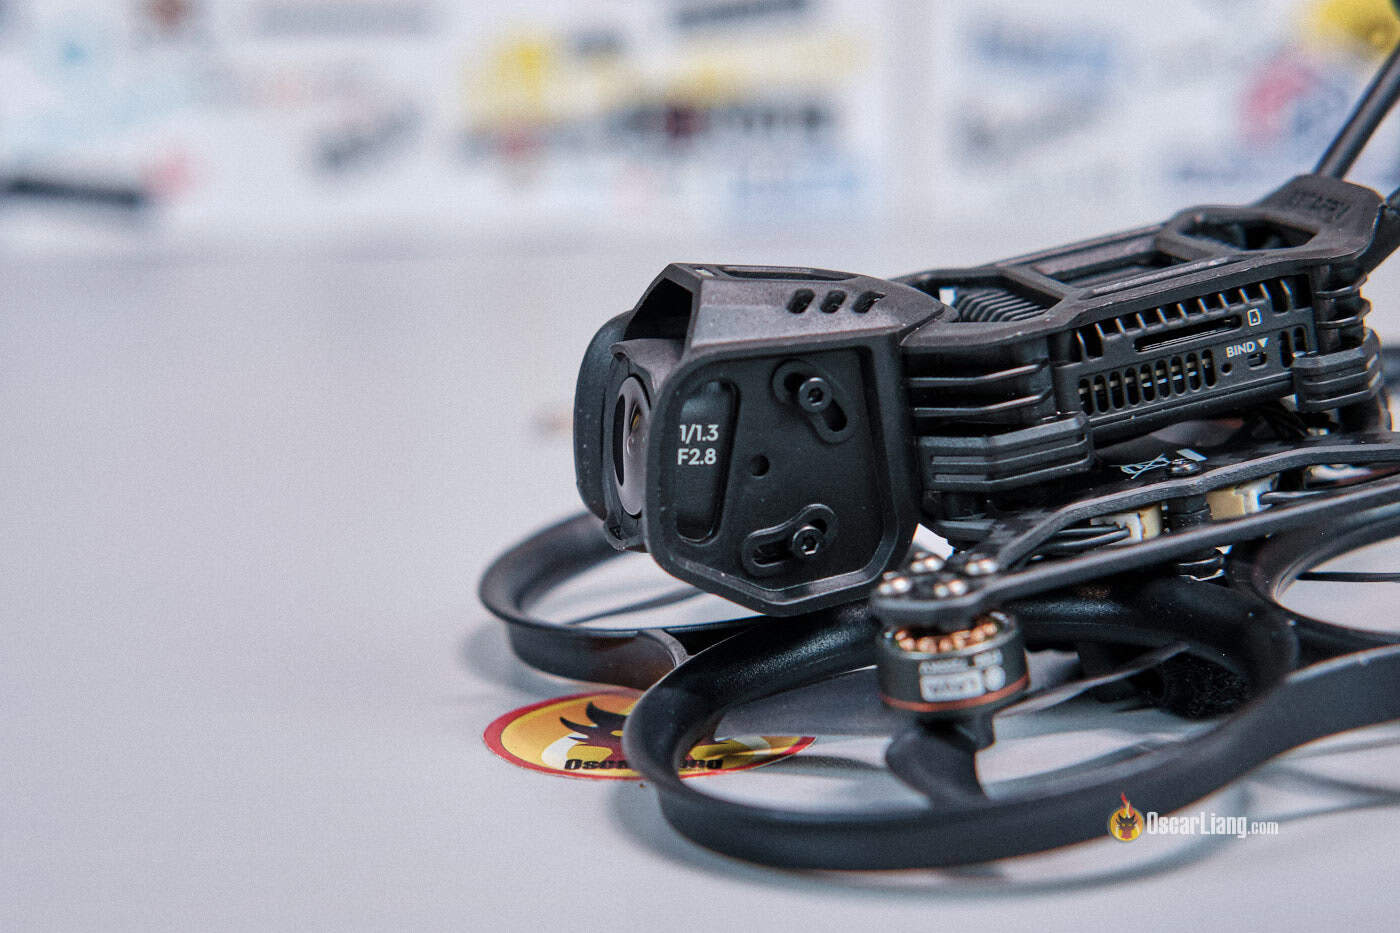
Accessibility and Maintanence
Accessing the DJI O4 Pro’s SD card and USB port is simple, thanks to the smart design of the frame and camera cage.

To save weight, BetaFPV replaced the standard USB-C port on the flight controller with a smaller 4-pin JST connector. That means you’ll need to use the included USB adapter when connecting to Betaflight—a small trade-off for a lighter build.

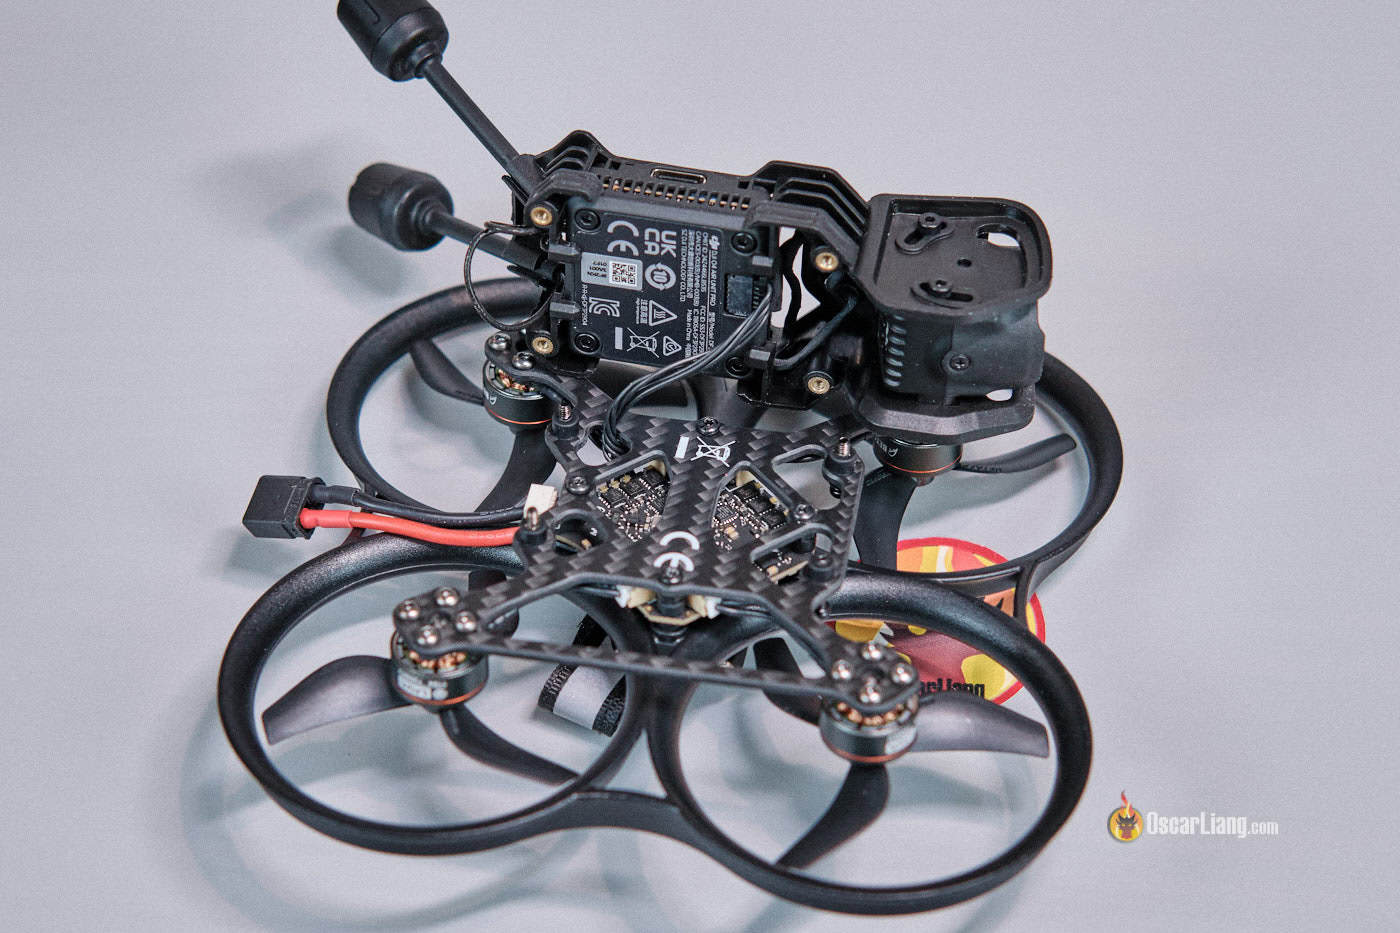
The drone’s construction is really simple. The camera cage is mounted to the drone’s body using only 4 bolts. It’s easy to assemble or take apart, which is helpful for quick repairs. The soft mounting for the camera seems to do a good job of eliminating jello.
Upgrading from DJI O3 to O4 Pro
Already flying the Pavo20 Pro with DJI O3 and thinking about upgrading?
Good news: You only need to purchase the new camera cage designed for the O4 Pro. No need to buy a whole new drone! The O4 mounts with the same four-screw configuration, and the adjustable camera tilt lets you fly with near-zero angle for cinematic-style shots.
This makes the Pavo20 Pro platform more modular, and a great long-term investment.
Flight Performance
In terms of flight characteristics, the Pavo20 Pro with DJI O4 Pro flies almost identically to the O3 and NightFire editions. Same power, responsiveness, handling, and control authority.
I tested it in moderate wind as well (10–12 mph) and was impressed by how well it handled. No noticeable jello even when flying aggressively, and it offers smooth control for both casual cruising and precision cinematic movements.
Let’s be realistic, though—this isn’t a freestyle drone. It doesn’t have the power or punch of an open-prop quad. But for low-speed, close-proximity cinematic flying, it’s ideal. The built-in prop protection also makes it safer to use around people or in tight spaces.
I am getting about 5 to 6 minutes of flight time on a 3S 550mAh LiHV battery, about 4 to 5 minutes on 450mAh and just over 6 minutes on 650mah. However, bigger battery doesn’t seem to offer significant longer flight time but makes it fly worse – 720mAh would be the biggest pack I would use with the Pavo20 Pro.
The Pavo20 Pro isn’t particularly loud by cinewhoop standards due to its relatively small size, but it’s still noisy enough that I wouldn’t recommend flying it indoors—unless, of course, you’re looking for a divorce :D If you want something suitable for indoor flying, you should stick with 1S tiny whoops. Check out my top recommendations here: https://oscarliang.com/best-tiny-whoop/#Best-75mm-Tiny-Whoops
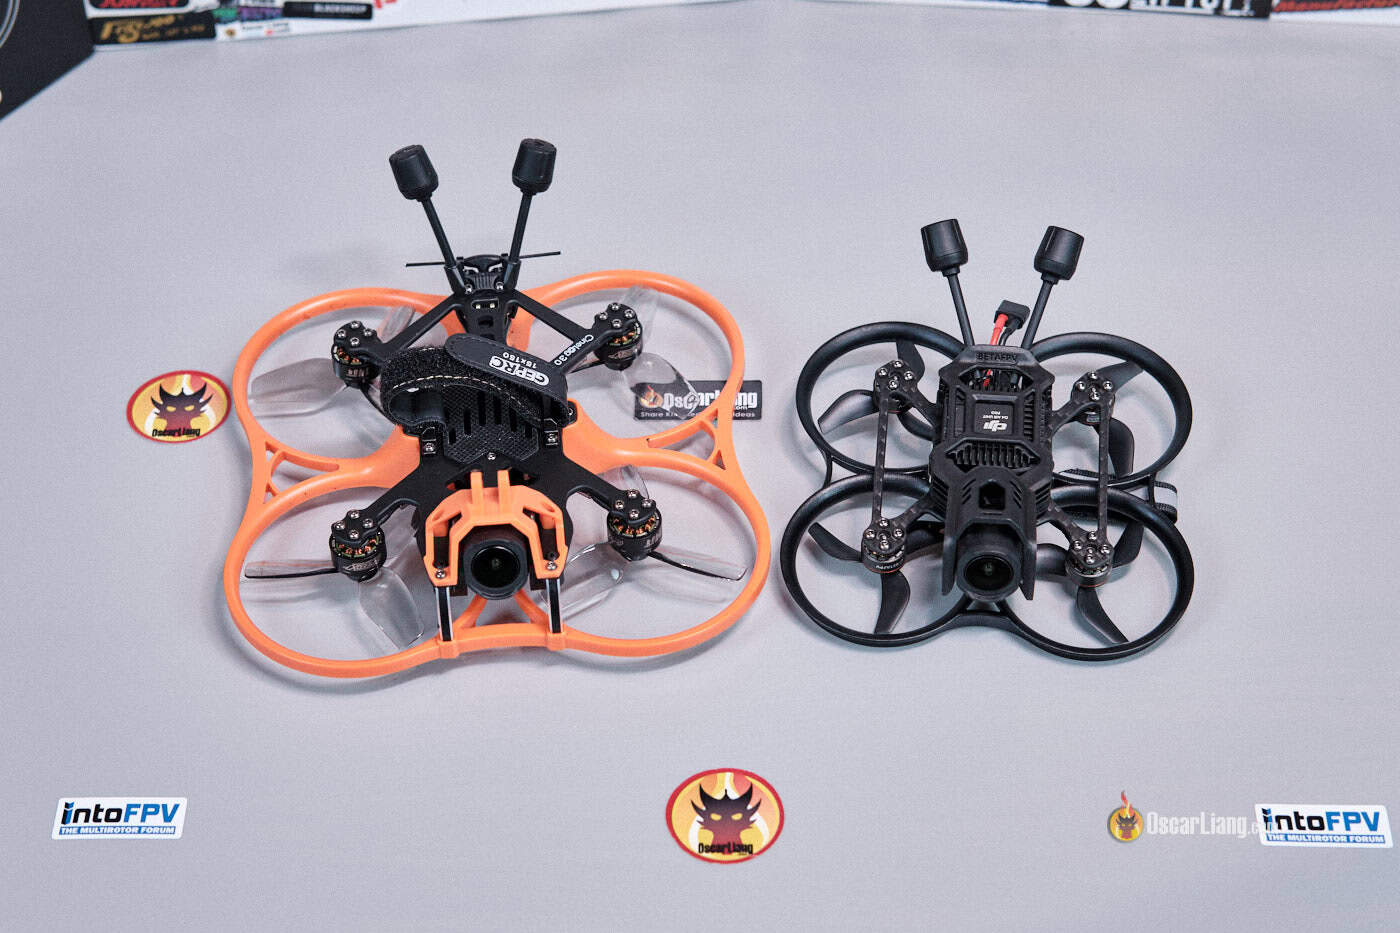
Pavo20 Pro vs GEPRC Cinelog30 V3
Compared to the GEPRC Cinelog30 V3 I recently reviewed, the Pavo20 Pro is:
- Smaller, making it more suitable for flying in tight spaces.
- Lighter, but with less power and payload capacity.
- More limited in freestyle ability due to its compact size.
The Cinelog30 V3, on the other hand:
- More efficient and offers longer flight time.
- More powerful and can carry heavier payload (even full size GoPro).
- It’s therefore more versatile in different flying styles.
However, both drones use lightweight plastic prop guards in order to keep the weight down, meaning neither is built to withstand hard crashes. But if I was going to crash I would rather pick the Pavo20 because it’s lighter the impact will be less, and unlike the Cinelog, the camera won’t pop out in crashes because it’s hard mounted which makes life easier.
How to Setup
Before the first flight, I did the following:
- Installed the two O4 antennas in the antenna mount.
- Removed the protective film from the camera lens.
- Plug in a smoke stopper, and connect a battery and test the drone and see if it powers up correctly. You should hear the ESC/motor initiation beeps.
- Personally I’d avoid installing the LED strip to save weight.
Firmware
- The flight controller (FC) board target is BETAFPVF405, and it comes preloaded with Betaflight firmware version 4.5.0. For stock CLI Diff, see here.
- ESC Firmware: Bluejay, 0.19 (C-X-70)
- ELRS Receiver Firmware Target: Generic ESP8285 2.4GHz RX, firmware 3.3.0
Betaflight Setup
- Bind the ELRS receiver – The best way perhaps is connect USB cable to the FC, wait 60 seconds until the receiver goes into WiFi mode (green LED flashes rapidly). Then connect to the ExpressLRS RX WiFi network, go to 10.0.0.1 in your browser, and enter your Binding Phrase on the webpage. Detail tutorial: https://oscarliang.com/bind-expresslrs-receivers/
- Activate DJI O4 Pro Air Unit – Guide: https://oscarliang.com/how-to-setup-dji-o4-pro/#Activation
- Pair the DJI O4 Pro with your goggles – Guide: https://oscarliang.com/how-to-setup-dji-o4-pro/#Pairing-DJI-Goggles-3-with-O4-Air-Unit-Pro
- Load the ExpressLRS preset according to your packet rate – Instructions: https://oscarliang.com/betaflight-presets/#Loading-RC-Link-Configurations
- Set up custom rates – My Rates: https://oscarliang.com/rates/#My-Rates
- Configure the Modes tab (arm switch, turtle mode, etc.): https://oscarliang.com/betaflight-modes/#How-to-Setup-Arm-Switch
- Set up OSD, you can copy my CLI lines: https://oscarliang.com/betaflight-osd/#My-OSD-Setup-CLI-Commands
Final Thoughts: Is It Worth It?
If you’re looking for the smallest cinewhoop with DJI O4 Pro support, the Pavo20 Pro is my top recommendation.
You can get the Pavo20 Pro O4 edition from the following vendors:
- BetaFPV: https://oscarliang.com/product-e2mg
- AliExpress: https://s.click.aliexpress.com/e/_oFVsz7F
The design is solid as it has proven previously with the DJI O3. It carries the full-size O4 Air Unit without feeling underpowered, and its small footprint makes it ideal for both indoor and tight outdoor environments. It’s not built for aggressive freestyle or crashing—but for smooth, cinematic flights, it performs admirably.
If you already have the O3 version, there’s not a huge reason to upgrade unless you want the better camera performance of the O4 Pro. But if you’re deciding between the two, go with the O4 Pro version. It’s just better all around.
11 comments
Hi Oscar, in Betafpv website you could either select ELRS or SBUS to be your Rx. Am I right to assume that with ELRS it would work on ELRS and DJI controller and selecting SBUS you could only use DJI controller?
I think both RX versions come with exactly the same hardware, it’s just different in the configurations?
If I select the SBUS protocol, can I bind with Futaba radio?
No. You’d need a Futaba compatible receiver.
New to FPV so I’m probably doing something wrong. But my Pavo 20 Pro drifts like crazy. Within 1 min of flight it’s pitching forward and to the left so hard it’s difficult to control. Tried calibrating accelerometer in Betaflight and accelerometer trimming using gimbal commands. Nothing seems to fix it.
Have you tried changing out the props? Also check weight balance, move the battery so that the center of gravity is in the middle.
It’s never gonna be perfectly stationary when you put it in Angle mode, it’s going to drift a little unfortunately.
Yes, tried both. Props were fine, but changed them anyway. I could handle a slight drift maybe, but it pitches forward and then picks up speed. The longer it’s in the air, the more it wants to pitch forward so it gets more and more out of control. I can tell the gimbal commands worked, because it drifts the opposite direction at the start of take off, but always ends up pitching forward again after a bit. I’m writing it off as a bad accelerometer and just learning Acro immediately instead.
I think I figured it out. The accelerometer definitely jitters but even in Acro it was unstable which didn’t make sense since it shouldn’t use the accelerometer.
Inspecting the frame again, I saw that BetaFPV chose plastic nuts between the frame and FC rubber dampers. Those nuts come loose easily and then push down on the dampers which results in vibrations at the FC which results in instability, jello, and accelerometer issues (in angle mode).
I’m going to replace them all with metal nuts and washers to get the same height as the plastic nuts. Pavo20 (non-Pro) has the same design and the same issues.
I am glad that you think that you did resolve Pavo20 Pro drifting (sideways) issue. Luckily it was some frame design issue rather than a malfunctioning FC.
I had Meteor65, and do have Pavo Femto; both started drifting to the right when hovering and in a very noticeable extreme. One of the motors within Meteor65 stopped turning, assuming it is an ESC issue within the FC -as this same issue is reported by other users.
I had contacted BetaFPV support in regard Pavo Femto, and since it was within the 30 days warranty, they had sent me a replacement FC. BetaFPV support was very helpful and responsive (Thank you Antony).
I have no other experience with different brands which produce whoops other than BetaFPV, since I am new into FPV. Thus, it is difficult to say by just flying BetaFPV hardware, if there is a pattern with these tiny FCs where the ESCs would malfunction at one point early on. It is a very strong possiblity it is an ESC issue.
I cannot be absolute on this, that the ESCs are the culprit, unless if I did test these ESCs within these FCs or diagnose them individually from other parts. I do not have the knowledge nor the experience frankly.
I had added a capacitor (and thank you Oscar for your article on capacitors) to Pavo Femto this time, to make sure no current surges are occurring damaging the board,, especially when activating the ‘Turtle Mode’. BetaFPV’s FC comes rather with a capacitor included.
I thank you Oscar for another great and definitive review for another great drone and whoop.
I ordered one at AliExpress from seller “feichao RC Toy Store” and got scammed! Caution! They’ve put some trash in the package instead of the Pavo and try telling me “but the package weight was right”.
Anybody else got scammed by this seller?
I personally have been using Aliexpress for over 3 years now, never had a problem. Have you reported the issue to AliExpress customer service? Also file a complain to Paypal (if that’s your payment method).