The DYS Lightening X220 is a neat ARTF package. It comes with pretty much everything you need to start flying FPV. In this review we will discuss the pros and cons about this racing mini quad.
Many thanks to DYS for sending me the Lightning X220 FPV Racing quad for review.
My Maiden Flight
Closer look
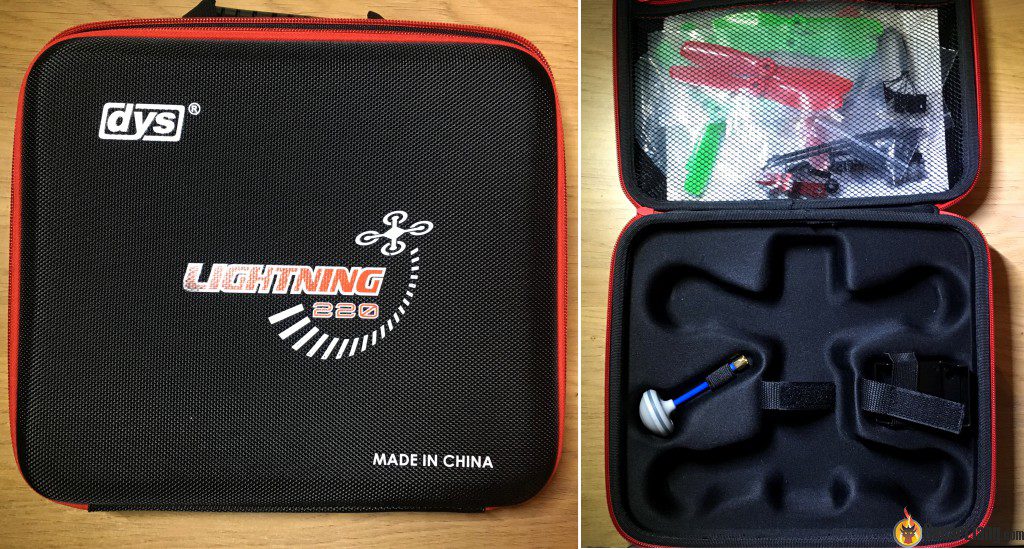
The DYS X220 comes in a very nice looking carrying case, which reminds me of the Vortex 250 Pro. They both use the SPRacing F3 style flight controller, but looking at a Vortex Pro again they are actually very different.
All electronics including ESC, FC and VTX are protected in an enclosed frame.
The FC has 8MB flash memory so you can use it for blackbox. Stock FC firmware is cleanflight 1.12 (19/Feb/2016).
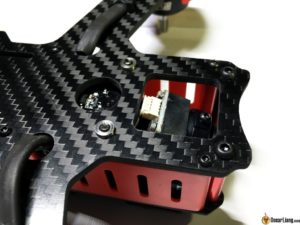
The camera is mounted on a vibration dampening platform which is unnecessary in my opinion.
The camera cable connector is exposed in the frame cut out. The connector touches ground when at landing or crash, not only it changes the camera tilt angle, also putting stress on the connector.
I think this kind of design was started by the ImmersionRC Vortex both 280 and 250 (which I don’t really like), and some manufacturers seem to just follow it (including the recent RCTimer RTF mini quad as well).
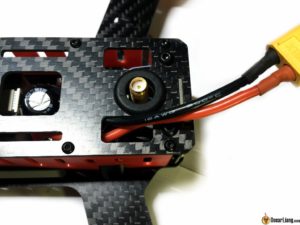
The video transmitter uses SMA antenna connector, it’s good to see that the connector ground isn’t shorting the carbon fibre frame.
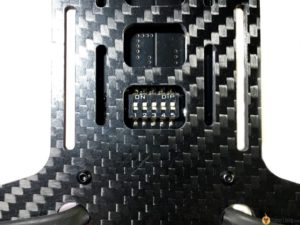
VTX is 200mW 30 channels, which can be changed with the dip switch located on the bottom of the frame.
The frame itself weights 130g. I really like the motor bumpers (protectors) and I think they are a nice addition, the arms are 3mm thick.
The OSD is a MinimOSD with MWOSD version 1.6.
I was planning to use X4R-SB (SBUS), but then I realized it didn’t come with the cable! It only comes with a PWM input cable, so I had to use D4R-II (PPM) instead. Pretty big fail in my opinion as it’s a pain to find these type of connectors.
It also comes with an antenna holder, but god knows how to install it! There is literally ZERO information about this on the internet, or the 2-page manual.
I was having difficulties mounting receiver inside the frame, so in the end I had to just mount it on top of the camera mount. I was quite disappointed at this point.
Quality control is also lacking. I found an ESC capacitor came off when I open the box. It’s there to clean up the noise generated by the ESC. I soldered it back to the ESC before my maiden flight.
Overall Impression
In terms of setting up it’s pretty much similar to the EMAX Nighthawk 280 Pro I reviewed before. But the X220 has better hardware and design IMO.
The number of huge capacitors used in this quad is a bit ridiculous :) I think there should at least be something holding them in place in case of vibration or crashes.
Firstly, key components are not built into one signal PCB like the Nighthawk, FC is connected to the PDB and other devices via cables, while ESC’s are soldered on the PDB. However I am not sure if you can replace the ESC individually.
These ESC’s are labelled as XMD20A not XM20A, even if you could, soldering looks like hell of a job (better not over prop it and fry one of them hey? :)
The motors (SE2205), ESC’s and FC are some of the best performing parts out there.
With the built-in MinimOSD you can adjust PID/Rates and monitor voltage with it. You can also update the MinimOSD firmware with these pins.
I feel like the Lightening X220 is for slightly more experienced users, who know Cleanflight pretty well and have flown FPV before. If you love flying, but hates building / soldering, then this is a pretty good choice.
However for complete beginners this quad might or might not make your life easier. as you still have to learn all the basics, the software, the hardware etc. Buying this quad could get you in the air sooner though, than building one from scratch.
Flying Experience
To get the most performance out of this machine, I flashed the FC to Betaflight before my maiden (I went for version 2.8.1). I didn’t update the ESC’s firmware and left it on stock 14.4.
Simply choose SPRacing F3 target, and change Manual baud rate to 256000, then flash.
Stock ESC settings:
This thing flew like a DREAM!
For PID tuning I only spent 2 mins hovering it in my room, and tuned it a little bit with Blackbox. It was so smooth and locked in, didn’t even have much prop wash in sharp turns.
I am very very happy with the quad’s flying performance, thanks to the top notch FC, ESC’s and motors. Power also seems to be very clean, I get little bit of lines jumping around when do punch-outs!
Things I found after my maiden flight:
- VBAT is directly connected to MinimOSD and not the FC, so buzzer won’t beep if low LiPo voltage
- VTX has built-in MIC
- Camera is pretty bad IMO, I started seeing jello when my props got bashed a bit (common problem with CMOS cameras), WDR is also not as good as the Swift
Things to improve for DYS
Most importantly, first thing they should do is to come up with better instruction and manual for assembly, and how to set it up. FAQ about basic troubleshoot would also benefit beginners.
Since it has a unibody design, break one arm mean you will have to replace the whole bottom plate. I think thicker arms would make this quad last longer – maybe 4mm arms?
The footage isn’t particular good in terms of image quality, we want a better CCD camera. Also it would be more robust to have it hard mounted inside the frame. Vibration dampening is unnecessary for CCD cameras.
I would love to see dedicated location/holder for D4R-II / X4R-SB size receivers, and its antenna holder.
VBAT should be connected to FC instead of OSD, so the voltage warning buzzer works
Please provide better quality control!
Spec and Features
Hardware:
FC
PDB
LED
Buzzer
- Flight Controller: SPRacing F3 FC (MPU6050 sensors, Build-in 8MB Flash)
- Motors: DYS SE2205 2300KV
- ESC: XMD 20A BLHeli with F396 processor
- VTX: 5.8G 200mW 30CH, SMA
- Antenna: SMA, RHCP
- Camera: 1/3″ CMOS Camera, FOV 160°
- OSD: Onboard MinimOSD
- Onboard Buzzer
- 7 WS2812 RGB LED’s
- Built-in BEC (5V – 3A)
- Weight: 340g (excluding battery)
Package includes:
1 x DYS X220 Racing Drone (with XT60 battery connector)
1 x 5045 3-bade Propellers (CW,CCW) (set of 4)
1 x 5045 2-bade Propellers (CW,CCW) (set of 4)
2 x Nylon lock nut (CW)
2 x Nylon lock nut (CCW)
1 x Nut spanner tool
1 x 5.8GHz Antenna (SMA)
1 x Antenna tubes and mount
1 x GoPro camera mount
1 x Battery strap
1 x Receiver cable
1 x Carry and storage bag
Requires:
1 x Radio TX and RX
1 x Video RX Ground Station or FPV Goggles
1 x 3~4S 1300~2200mAh LiPoly Battery


5 comments
could you please post (printsreen your PID-Settings?
many thanks
Hi,
Great review. However the fact that hobbyking recommends 1800mAh ~ 2200mAh is still weird in my opinion. You have 90mm between the camera platform and antenna to stick you battery. There is absolutely no room for anything bigger. Batteries with that size requirement are always 1500mAh or lower.
I can only achieve about 5minutes flight time with my 1500mAh, 25C battery, How about you?
yea i think 2200mah is too big, even 1800 is really pushing it.
I would suggest 1300-1600mah 4S :)
i Just put the battery on the bottom of the quad with the three bladed props and it seems to fly fine for me. the battery i got is a 2200mah 3s 75-90c.
hi, i just bought the lightning 220 and when i try to program it i can not and i do not know how to reboot it can you make a video showing how to do it.