
Are you looking to upgrade the gimbals on your Zorro radio? Look no further, check out these new Radiomaster AG01 Mini Gimbals. The are absolutely some of the smoothest gimbals I have used, with top notch build quality and CNC faceplate.

Table of Contents
Where to Buy?
- Radiomaster: https://oscarliang.com/product-csha
- AliExpress: https://s.click.aliexpress.com/e/_DF5o2j3
- Banggood: vhttps://oscarliang.com/product-jfzg
- GetFPV: https://oscarliang.com/product-kqtr
- RDQ: https://oscarliang.com/product-oxda
You can buy just one gimbal, but you get a discount when buying two.
In the box you get a manual, hex Allen key, spare screws and springs.

What’s Special About the AG01 Mini Gimbals?
The AG01 Mini Gimbals are more expensive than the Radiomaster Zorro (ELRS version). Yes, it’s ridiculous I know. Obviously they are not for everyone, but if you have the budget and are willing to spend extra to get the best possible stick feel, these are for you. Compared to the stock hall gimbals, they are superior and the difference in smoothness is noticeable.
They come with the latest “Sticky360” stickends.

They are basically the same as the AG01 gimbals I recently reviewed, just smaller. The AG01 Mini gimbals support both Radiomaster Zorro and TX12.

However, due to the compact size, they don’t offer the same spring tension adjustment as the full size version. Spring tension can only be adjusted from the back, not from the front of the gimbals. However you still have the stick travel adjustment on the front which is nice. The travel range is between 38 to 54 degrees. Personally I would just leave it at full travel to get the most resolution out of them. If you have smaller hands or for whatever reason you can’t reach full deflection then limit stick travel would help.
Here are the screws for adjusting spring tensions and throttle friction on the AG01 Mini gimbal.

Note that there is no ratchet on the AG01 Mini gimbals, so that’s something to beware of if you prefer to have ratchet on your throttle stick. But using ratchet is really rare for flying multirotors to be honest because it reduces your throttle resolution.
They don’t come with damping grease and lubricant oil like the full version, but these were applied on the gimbals in factory.
Here’s the manual.

Installing AG01 Mini Gimbals in the Zorro
It’s not the easiest job to install these gimbals in the Zorro, but it’s doable with a little patience and planning. Here I will walk you through the process.
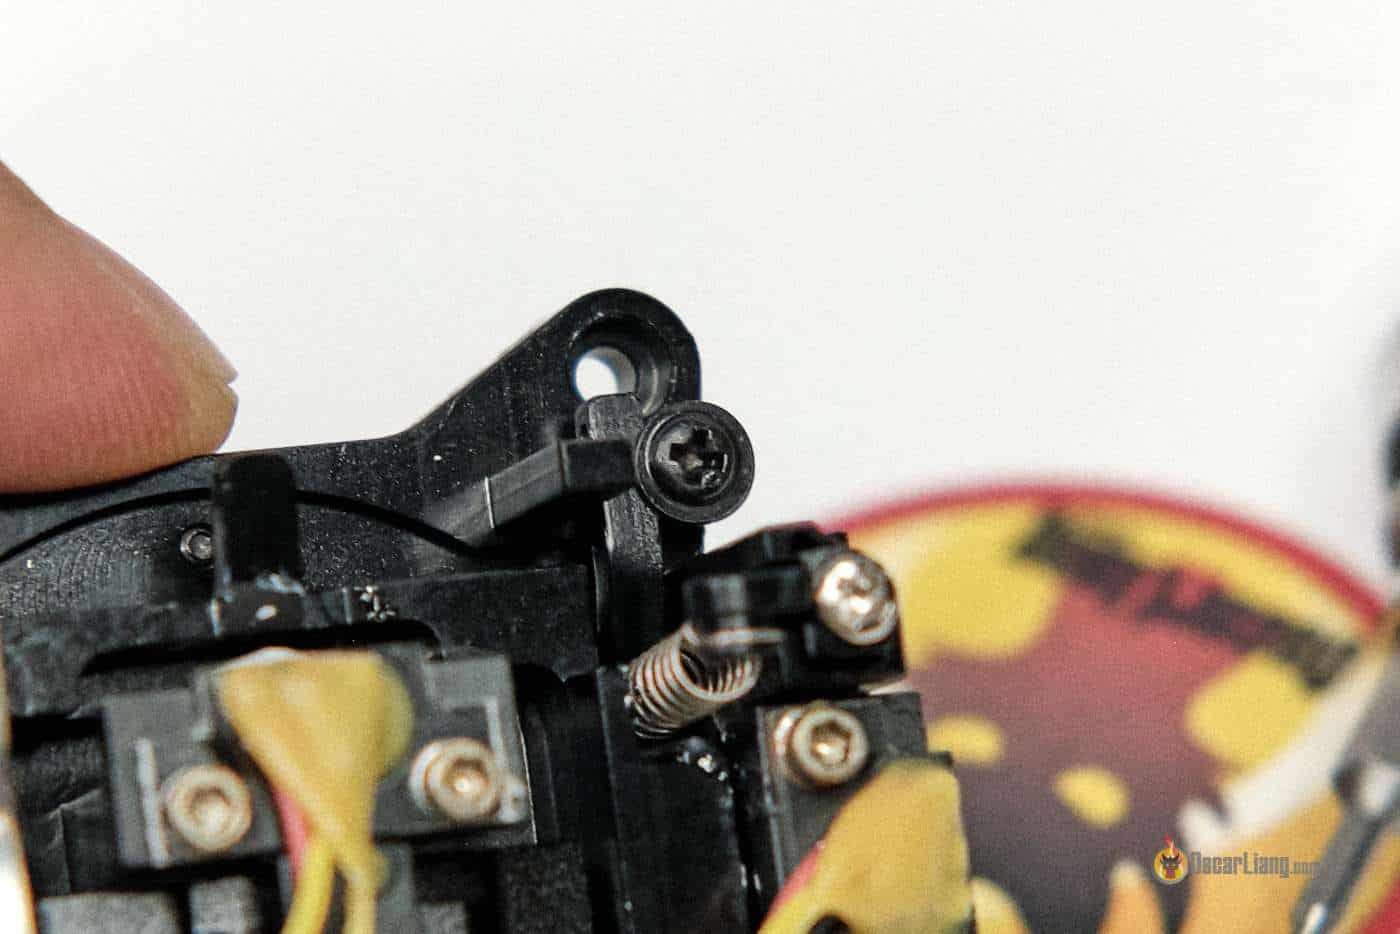
First of all, make one of the gimbals your throttle stick by disabling self centering. To do this, simply insert this black screw at the corner. This is how you switch between Mode 1 and Mode 2 as well.
Take the screws out on the back of the radio. There are 8 screws as circled in the following picture.

Gently remove the back housing, beware of the two ribbon cables connected to the PCB, you need to unplug them first.


One trick I used was to mark them with written stickers with words like “Top Left”, “Bottom Right” etc. according to which connector they were connected to.

Then unplug all the ribbon cables, there are 14 of them! You also need to remove the four screws on the PCB before you can pull the PCB away from the radio. There’s an extra ribbon cable on the back of the PCB that needs unplugging as you lift it up.
With the PCB removed, you now have access to the gimbals. Each gimbal is held in place by 4 screws.

Remove the stock gimbals, but leave the original metal plate in place.

Install the new AG01 mini gimbals, and put the PCB back in place and plug in all the ribbon cables. Put the back housing back on.

Once you are done, the first thing to do is to calibrate the gimbals by holding down the “SYS” key, press “Page >” a few times until you get to the “Hardware” page, and you should see “Calibration”.

Conclusion
The AG01 Mini gimbals feel just as smooth as the full size AG01 gimbals, but smaller. But are they worth it? It really depends. For most people, the stock gimbals are “good enough” and get the job done. But if you are willing to pay extra for the increased smoothness and accuracy of these gimbals, now you have an option.
5 comments
Would these mini’s fit in the dji remote 2?
I’ve upgraded the dji fpv remote (black box) with the full size AG01’s and I love it!
Can’t find a YTvideo about this.
BRGRDS Roland van Helden.
Hi Oscar
I’ve just installed the AG01 mini inside my Zorro but the throttle gimbal seems to not let’s say “fully lose” the self centering functionality – it tends to come back just slightly; if I do the calibration it sits in the range of -80 to -90 if I don’t touch it. What could be the issue here? I didn’t change anything on the gimbals before I put them inside and no cables are pinched/pulled.
there’s a piece of metal behind the gimbal that gives the throttle friction. Try loosen it completely and see if that works? If not try tighten it slightly so it grips the throttle stick just enough to prevent it from moving on its own?
Hi Oscar,
Will these fit in the jumper T-pro?
You think you could make these fit into the jumper t-lite radio?