Arduino uses FTDI chips to create serial port connection between computer and the chip, so you can program the Atmel chip inside the Arduino board, without the need of any ISP programmers. If we look at the schematic of Arduino, we will see that the RX and TX pins are connected to the FTDI chip (as we expected) (on Arduino board as pin 0 and pin 1) That means we can use those pins for using the FTDI chip itself.

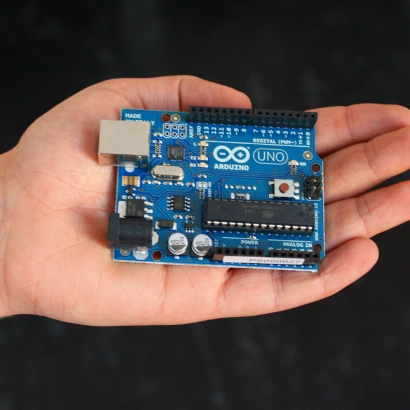
Buy the Arduino from: Banggood | Amazon
There are 3 ways I know you can turn your Arduino Board into a USB Serial Adapter.
1 – Connect RESET pin to GND
2 – Remove the Atmel Chip

3 – Upload a Sketch
The sketch basically stops the Atmel chip to interfere the communication between FTDI chip and your other device.
To do that, you don’t need to unplug the Atmel chip from its place. Before using your Arduino board as usb-serial converter you can upload that piece of code.
void setup(){ pinMode(0,INPUT); pinMode(1,INPUT); } void loop(){ } I hope it helps someone out there.
8 comments
You could just program the Arduino with the default “empty” sketch (i.e. empty setup() and loop() functions). Since all digital pins default to input mode after a reset, they will remain as input, since the empty sketch will not change the mode of the pins.
It should be explicitly mentioned that, for this particular usage, the Arduino “Tx” pin should be connected to the external serial device’s Tx pin, and the Arduino “Rx” pin the external device’s Rx pin (since the “Tx” and “Rx” labels on the Arduino board for from the point of view of the Arduino’s main ATmega32 processor, as opposed the Arduino on-board USB-to-TTL converter.
Finally, be very careful when connecting a 5 Volt Arduino board to an external 3.3 Volt serial device (such as an HC-05 or -06 Bluetooth module). Digital inputs to the 3.3 V eternal device should go through a two-resistor voltage divicer between the Arduino board and the external serial device. (Outputs from the external device to an Arduino input can be directly connected, since 3.3 V is above the “high” threshold of the 5 V Arduino inputs – the USB-to-TTL Rx signal in this case – which is labeled as “Tx” on the Arduino board).
So with 3rd method (sketch), is it possible to load a sketch on a pre-bootloaded ATMEGA without need to remove the chip from Arduino, all right? Thank you for explain!
Very interesting and helpful. Especially the third method.
Thanks a lot.
A year ago I tried the trick to use the Arduino Uno as an USB to serial converter by removing the ATMEGA328 chip from it’s socket and later also by connecting RESET to GND constantly. Both worked fine! But I’ve never thought of just setting digital pin 0 and 1 as inputs so they don’t interfer with the communication. What an Brilliant idea!
thank you so much for posting this!!! i needed an ftdi chip to program my steering wheel module from axxess and was too cheap to buy one and used my arduino to do it instead. worked perfectly!
hi, i’m using an arduino compatible and using methods 2 & 3, i’m able to see what the second device (ESP8266) transmits TO my computer. i am not able to SEND any commands from my computer. i have NodeMCU installed and i can see it boot up (see below). the ardino compatible uses a CH340 chip, not FTDI. it works flawlessly as both an Arduino and as an ISP for, say, ATtiny chips. all i want to do is to use the arduino as a USB/TTL cable. any ideas?
this is the output when i boot up the ESP8266. the output goes via the CH340 on the host arduino board to my windows laptop that’s running tera term (or just the arduino serial monitor; either works).
any ideas what’s wrong?
thanks!!
mahesh
NodeMCU 0.9.5 build 20150318 powered by Lua 5.1.4
lua: cannot open init.lua
Hi Oscar
The Arduino sketch really helped me out. Thank you!
It helped me writing: instructables.com/id/Arduino-1-wire-sniffer/
Thanks for writing it down and Greetings!