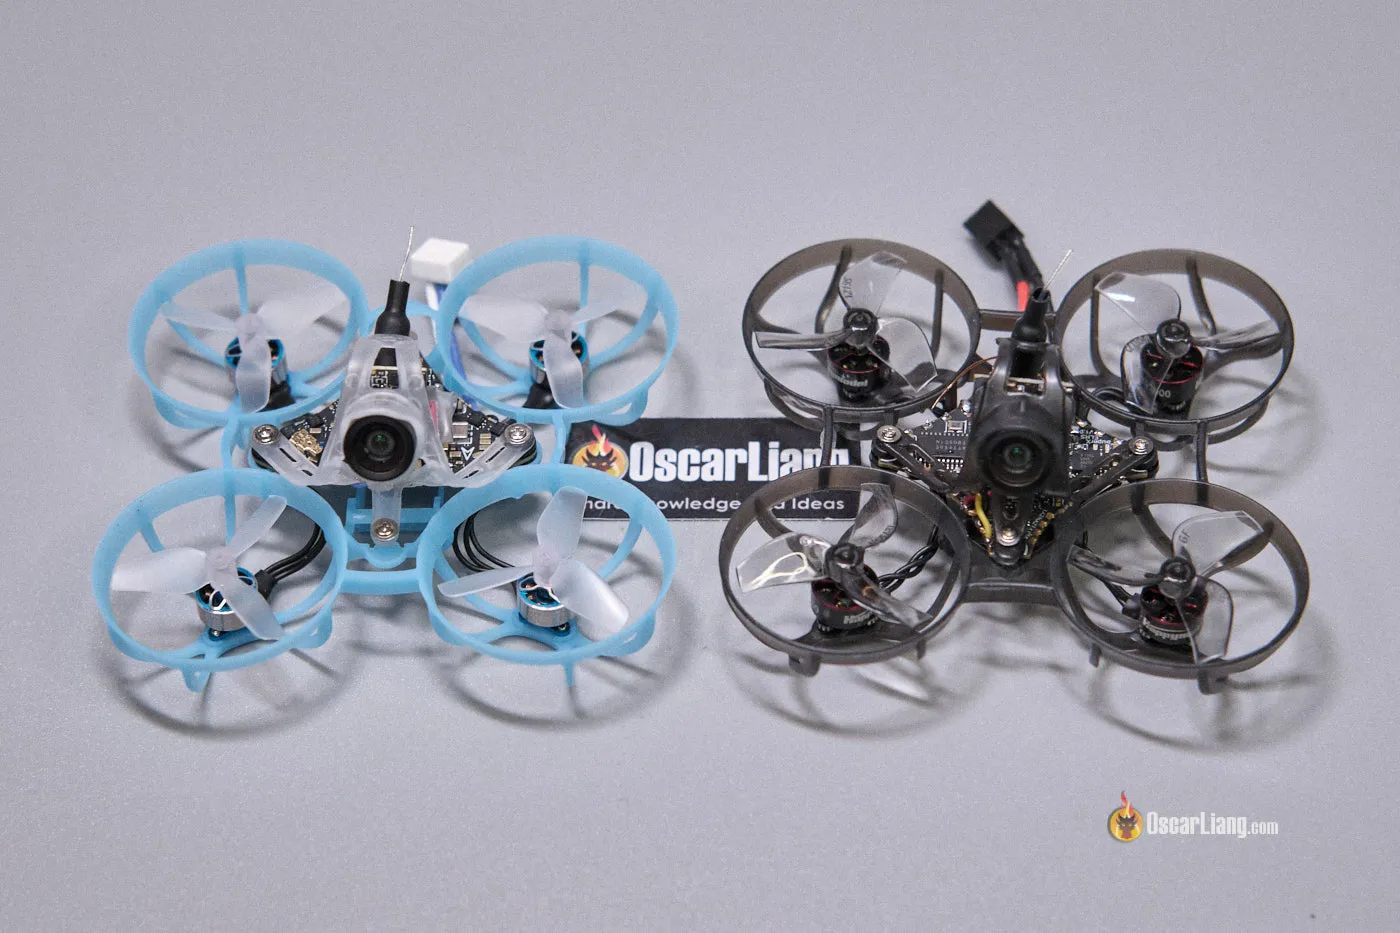
Tiny Whoops are incredibly popular among FPV pilots for their compact size and agility, making them perfect for indoor flying and tight spaces. However, getting the best performance out of your Tiny Whoop requires fine-tuning various settings in Betaflight, Bluejay, FPV, and your radio. In this tutorial, I will guide you through the optimal configurations to help you get the most out of your Tiny Whoop.

Don’t forget to check out these great accessories for Tiny Whoops: https://oscarliang.com/best-tiny-whoop/
Table of Contents
Use BT2.0 or A30 Connectors
As tested, BT2.0 and A30 has significantly better performance than PH2.0, less voltage sag and more flight time. If you are still using PH2.0, it’s time to replace them. BT2.0 and A30 has comparable performance, and they are semi compatible so it doesn’t really matter too much which connector to get.
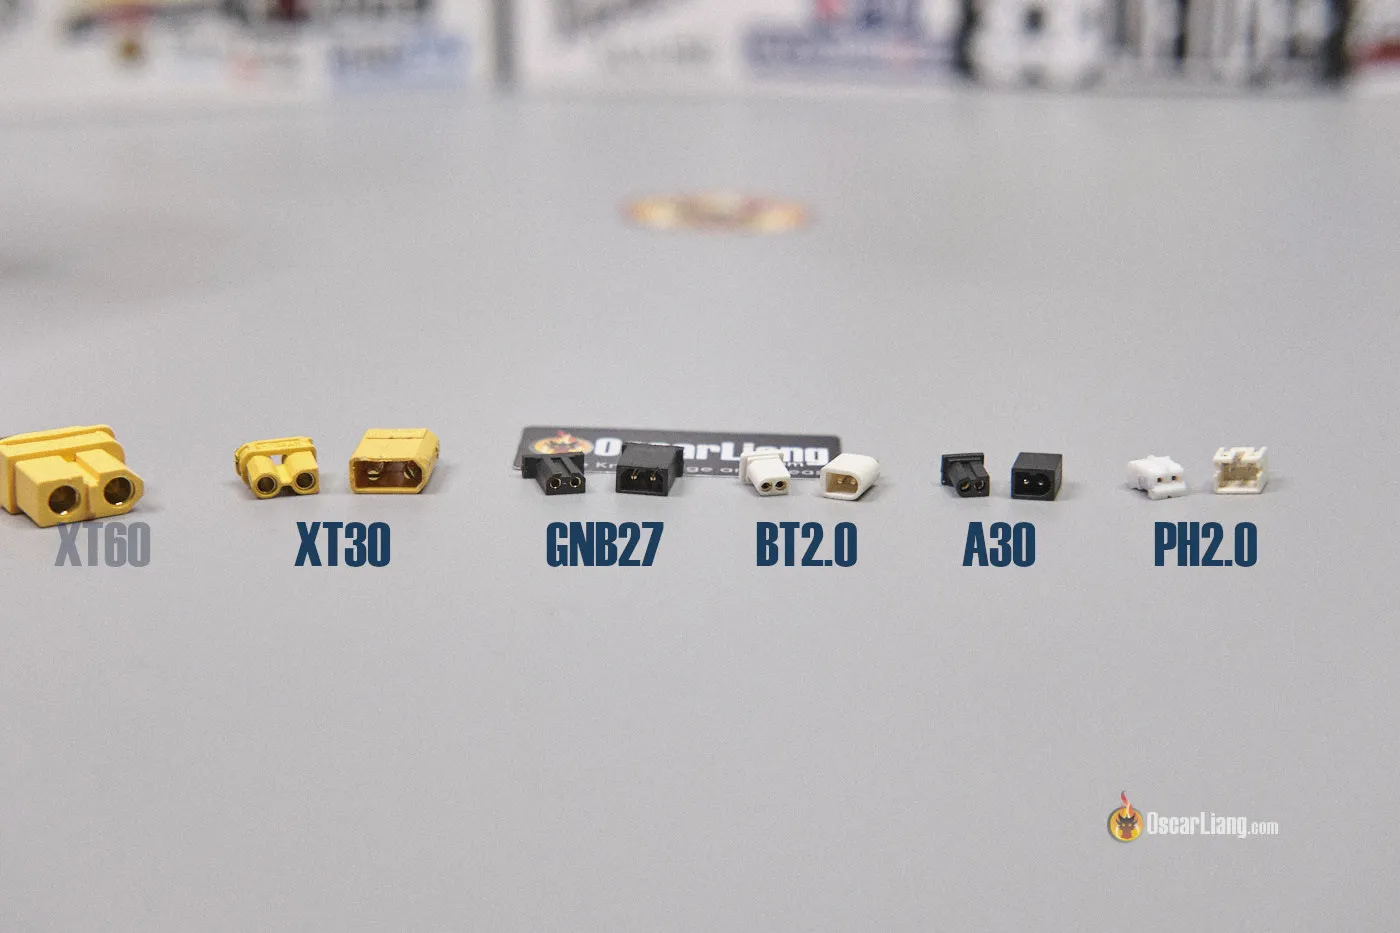
Purchase BT2.0 and A30 connectors here: https://oscarliang.com/best-tiny-whoop/#LiPo-Battery-Connectors
FPV System Setup
If you are flying indoors, there’s usually little need to run higher than 25mW power on your VTX. This maximizes your flight time and reduces VTX overheating.
It’s common to have a 5GHz WiFi router in the house, so choosing a VTX channel that’s far from the WiFi frequency band might enhance your video quality, e.g., Raceband channel 8. For more tips about choosing FPV channels: https://oscarliang.com/fpv-channels/

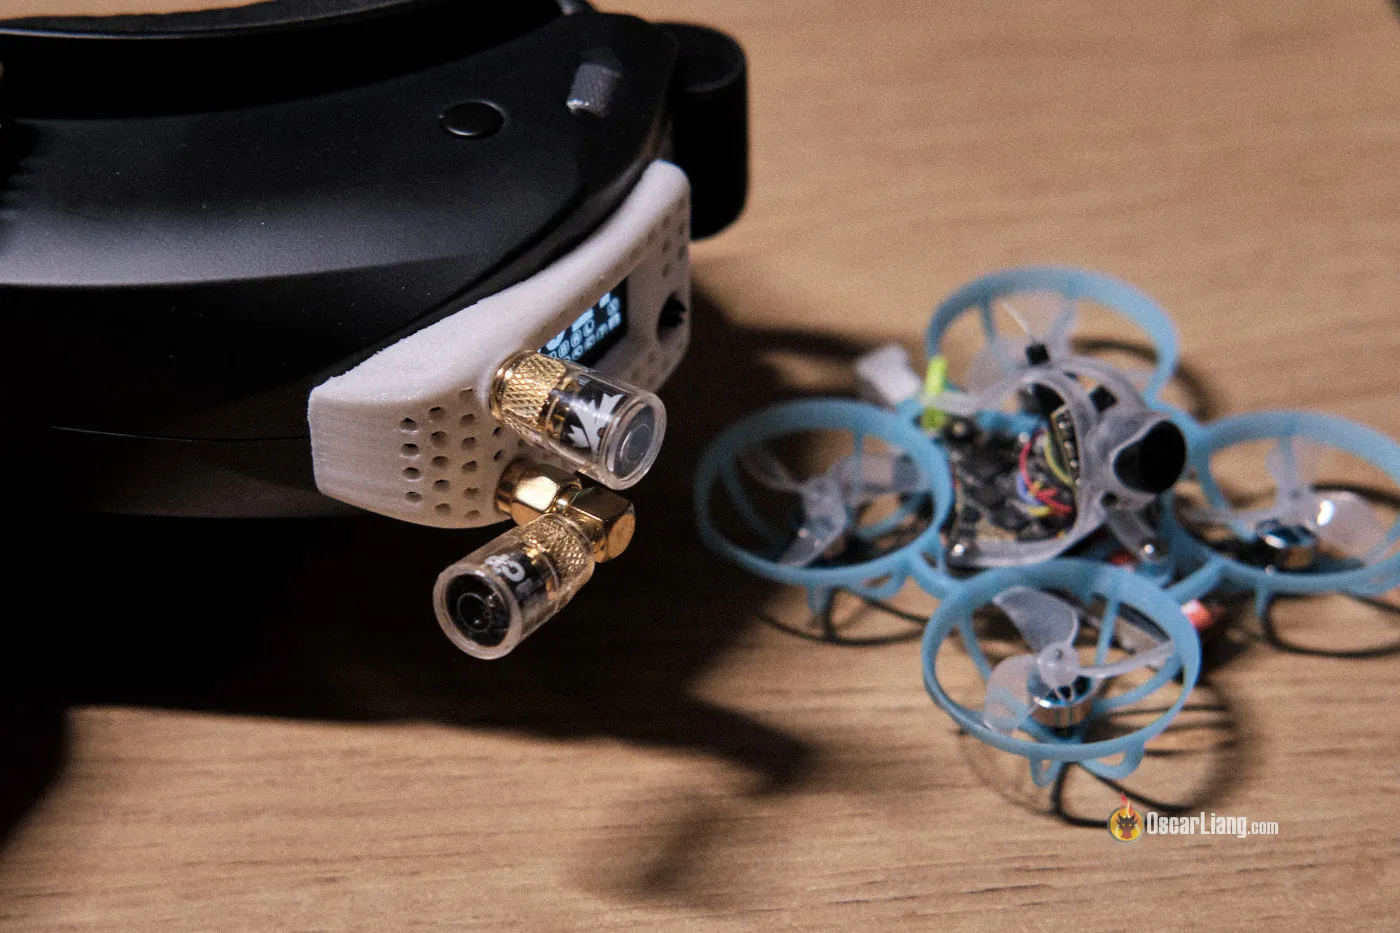
For convenience, I usually use two stubby antennas on my FPV Goggles, pointing at 90-degree to each other. They are lighter and more compact. The polarization direction (RHCP or LHCP) usually doesn’t matter as most Tiny Whoops use a lightweight dipole antenna, which is linearly polarized. If you don’t know what to choose, RHCP is a more popular choice for analog FPV. See my antenna recommendations: https://oscarliang.com/best-fpv-antenna/#Antennas-for-VRX-and-FPV-Goggles
Radio Link Setup
Assuming you are flying indoors and using an ExpressLRS radio link, consider choosing the lowest power level, e.g., 25mW or 10mW if available. This will considerably increase your radio battery life.

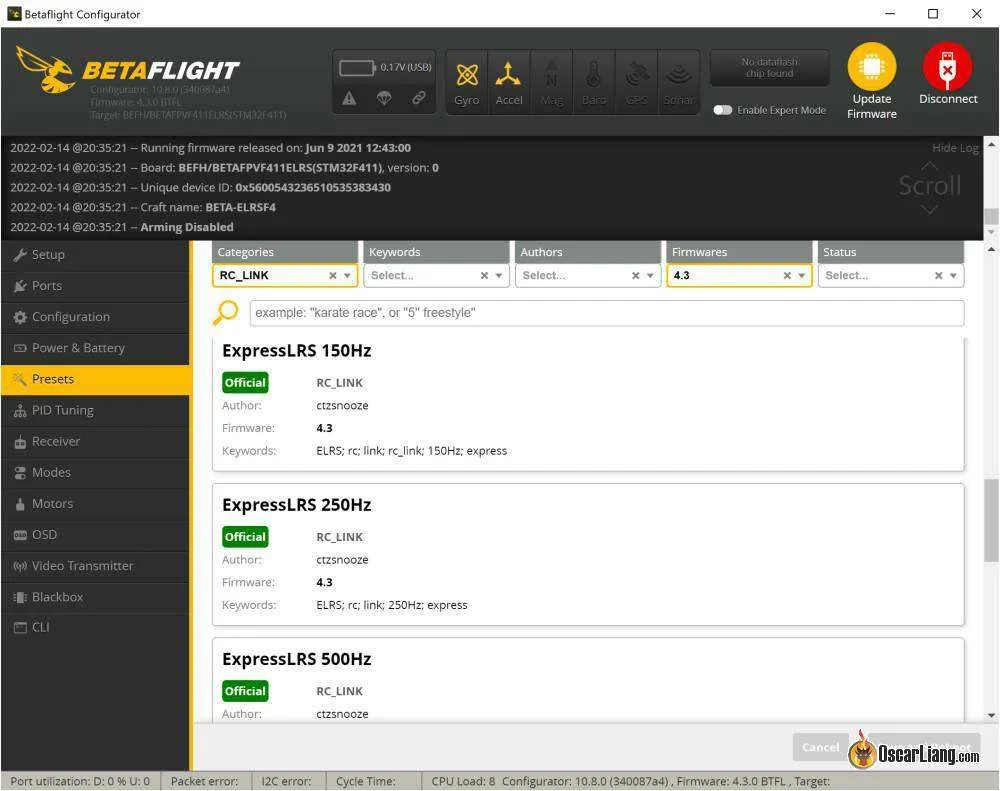
When it comes to packet rates, consider using 500Hz or even F1000Hz for minimal latency. For most people, it might be difficult to even tell the difference between 150Hz and 500Hz, so I wouldn’t worry too much about packet rates. Personally, I just use 250Hz to keep it consistent, as I use 250Hz on all my other quads.
Don’t forget to apply the ExpressLRS preset according to your specific packet rate to avoid unwanted vibrations.
Flashing Bluejay Firmware
It’s highly recommended to flash Bluejay to your ESC for two reasons:
- It allows higher PWM frequency.
- It allows bi-directional DShot, which enables RPM filters in Betaflight.
Follow my tutorial on how to flash Bluejay: https://oscarliang.com/bluejay-blheli-s/

Choose a PWM frequency that suits your needs. 24KHz provides better motor performance, leading to more responsive and precise control, while 96KHz maximizes flight time. 48KHz provides a good balance between responsiveness and efficiency. I tested different PWM frequencies on my BetaFPV Air65, and here are the flight times:
- 96KHz: 4:00
- 48KHz: 3:40
- 24KHz: 2:50
Props In vs Props Out
Props in and props out refer to the motor spin direction and propeller mounting. I have a tutorial explaining it in more detail: https://oscarliang.com/reversed-motor-prop-rotation-quadcopter/
Props in is the default configuration in Betaflight, but props out is more popular in Tiny Whoops. By default, you should start with props out on a Tiny Whoop, as it seems to generally fly better and has become the standard. However, if you experience issues with washout during corners and descents, the props in configuration might fix it. Don’t take my words for it, try different configurations to see what works best for you.

Betaflight Configuration
Why Tiny Whoop Pilots Fly in Angle Mode
Tiny whoop racers often prefer angle mode for several reasons:
- Ease of Control: Angle mode automatically levels the quad when the stick is centered, making it easier to control, especially in tight indoor spaces.
- Self-Righting: In angle mode, the quadcopter corrects itself immediately after hitting an obstacle, allowing for quick recovery and continuous flight.
- Precision: The deflection of the stick corresponds to the angle of the quad, providing precise control which is beneficial in race scenarios.
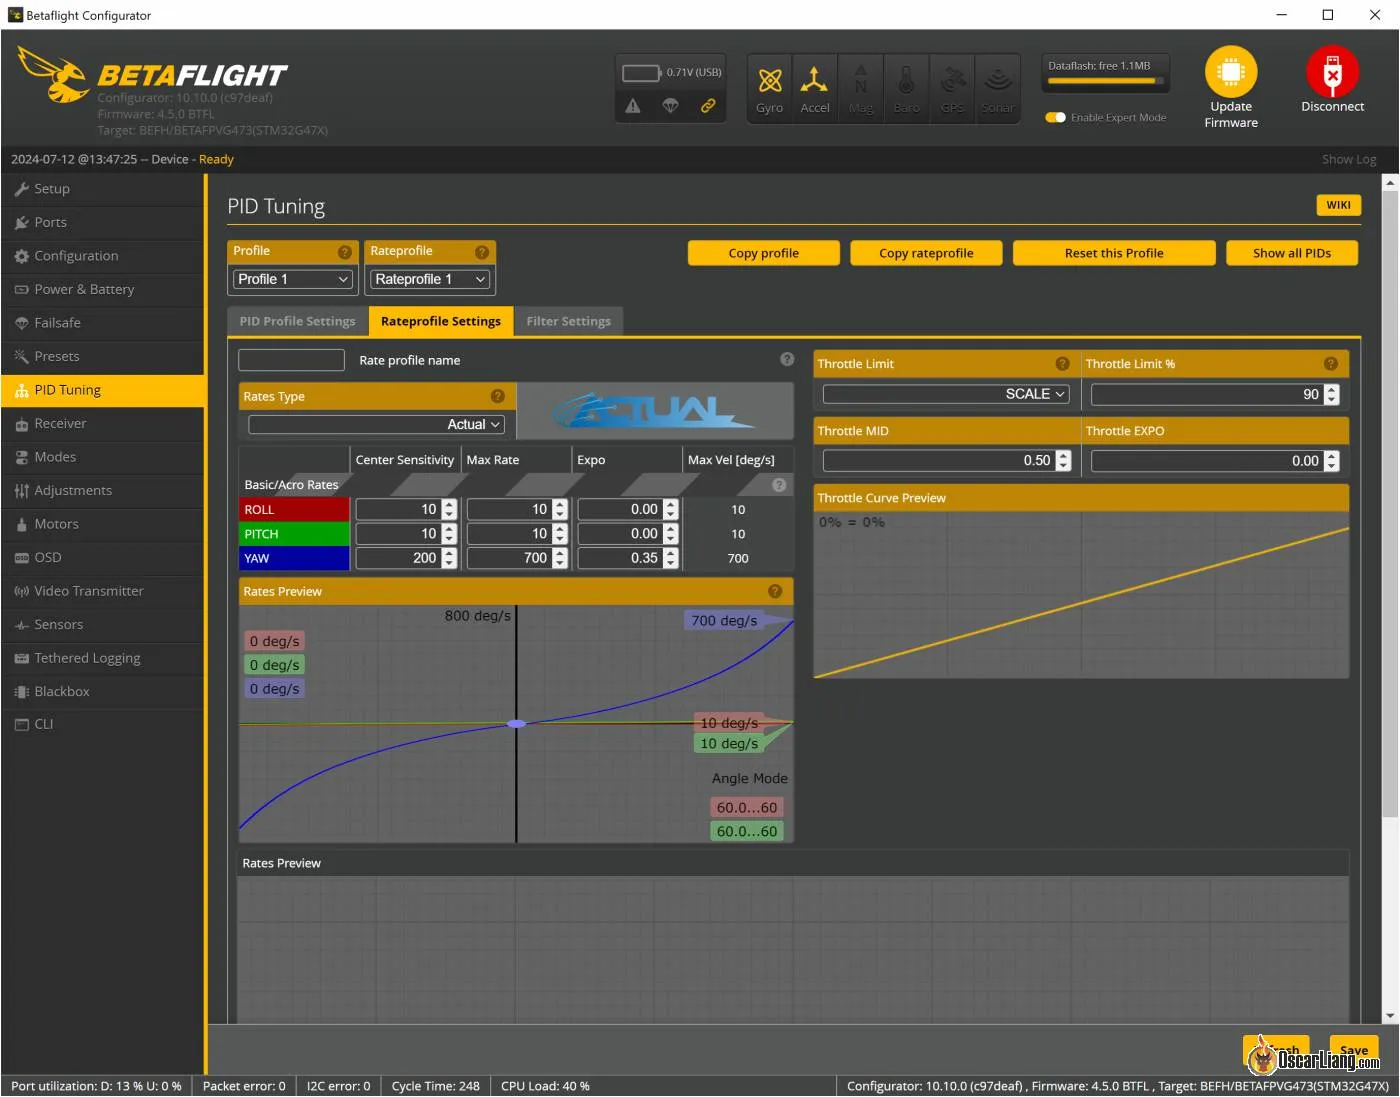
Angle Mode Settings
- Angle Strength: 90 (If you feel this is too tight, reduce this number).
- Angle Limit: 60 (This controls how much tilt you can do in Angle mode before it limits it, kind of like rates and expo in a sense. 80 is the highest I would go here. If it feels too twitchy, reduce it to 65 or even lower. I prefer 60 to 65 when flying indoors).
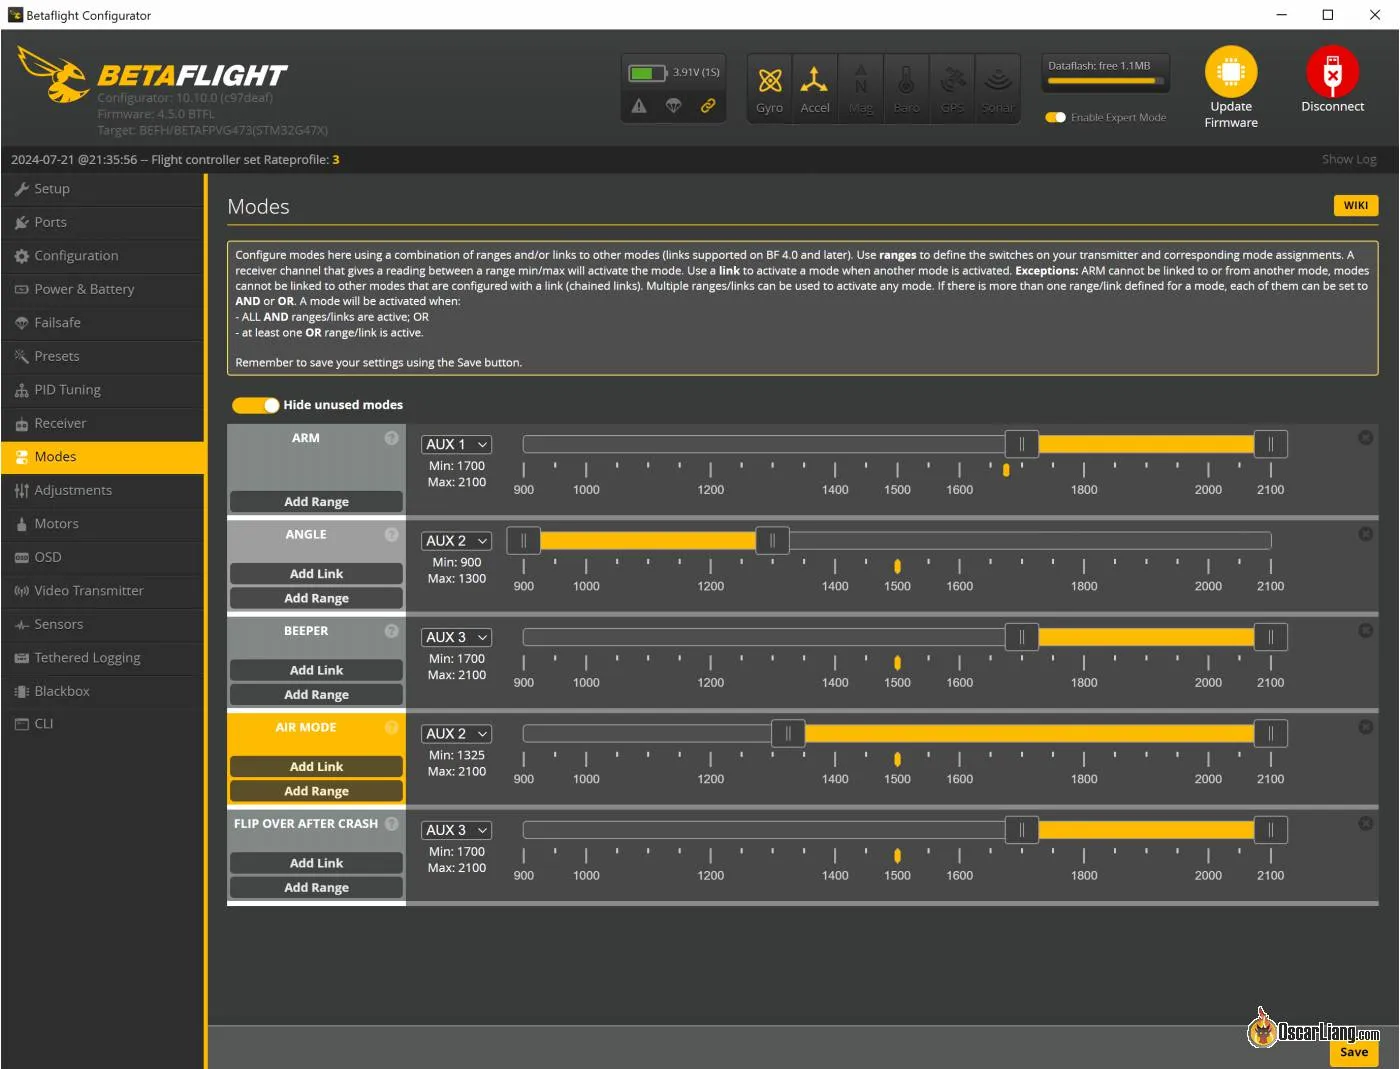
Disabling Airmode
I usually disable Airmode in the Configuration tab when flying in Angle mode. This helps with crashing; the whoop doesn’t overreact and freak out, allowing easier recovery.
If you also fly in Acro mode, you can assign Airmode to the same switch as Angle mode so that when you deactivate Angle mode, Airmode is activated automatically.
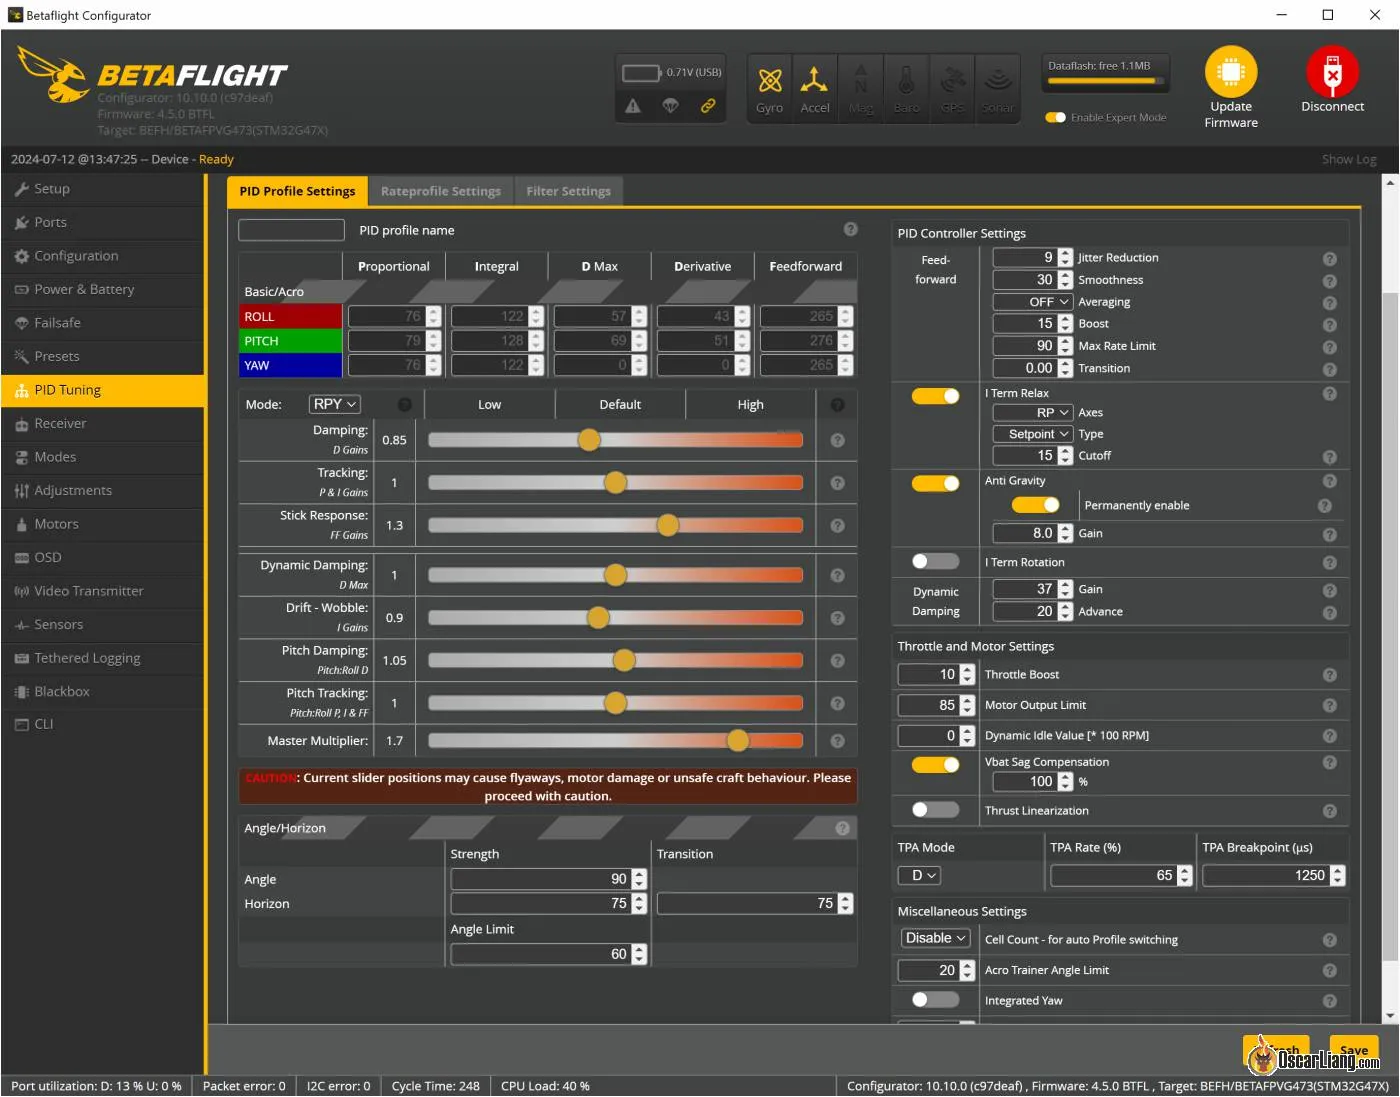
Throttle Scaling
In the Rates tab, I set the throttle limit to Scale and 90%. This is because I almost never use 100% throttle when flying indoors. Scaling it down will give me more throttle resolution. You can even set it to 80% or lower for more relaxed cruising.
To determine how much to scale down, try putting throttle percentage on your OSD, record yourself flying as fast as you can, and watch the DVR to see the maximum throttle you typically use. If you use 100% throttle, then don’t set any throttle limit at all. But if the maximum throttle you use is lower, scaling down your throttle will provide more resolution.
You are not losing flight performance by scaling down throttle, your motors are still capable of running at 100% whenever it needs to stabilize the quad. It’s different from “Motor Output Limit”, which puts a cap on how fast the motors can run and will make your whoop less responsive.
Other Settings
- Throttle Boost: 6-10 (Recommended if you set a throttle scale of 90% or lower; it makes your quad’s throttle more responsive).
- VBAT Sag Compensation: 100% (Makes the quad feel more consistent through the whole battery pack but also more risky as you might forget when to land).
- Motor Idle: 8% to 10% (In the Motors Tab).
- Battery Voltage Settings: Set the Minimum Cell Voltage to 3.1V and the Warning Cell Voltage to 3.3V in the Power & Battery tab. This ensures you don’t over-discharge your batteries. Set Max voltage to 4.4V.
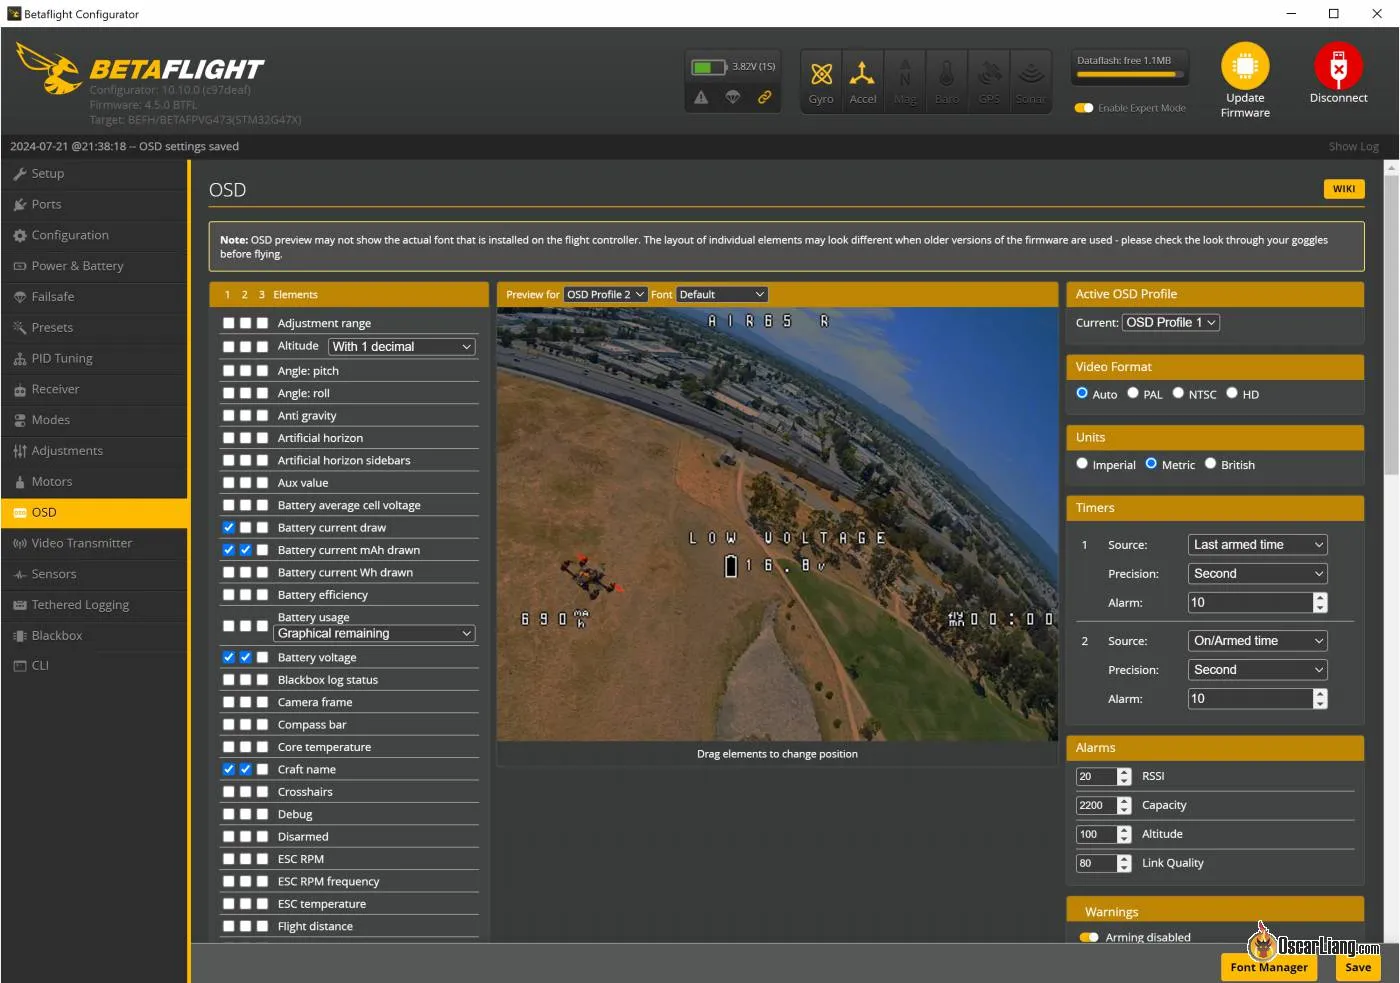
- OSD Setup: Run a minimal OSD setup with only essential elements like battery voltage, flight time, and warnings to avoid distractions.
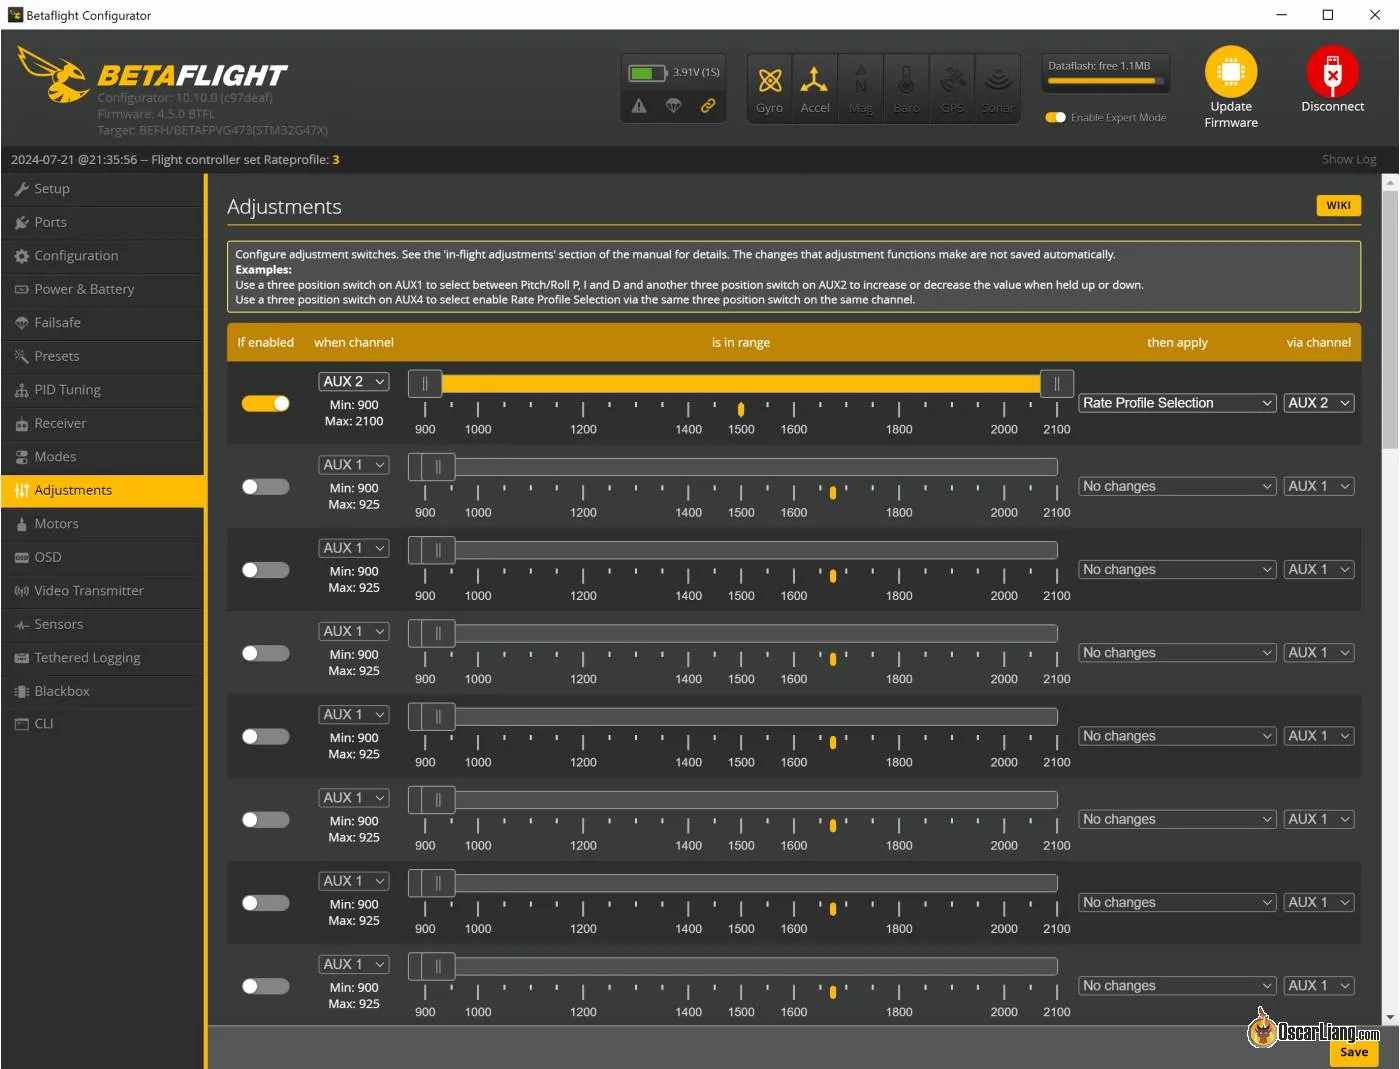
Switching Rate Profiles
If you fly in both Acro and Angle modes, you might want to use different rates. You can set up different rates using Rates Profiles, and the best way to switch rate profiles would be using the “Adjustments” tab. If you are just flying in Angle mode, you can ignore this section.
For example, if you use AUX2 (a two-position switch) to switch between Angle and Acro mode, when it’s in the low position 1000, it’s in Angle mode, when it’s in the high position 2000, it’s in Acro mode.
In the Adjustments tab, enable the first available slot:
- Set “When Channel” to the switch for switching between Angle and Acro mode (AUX 2 in this example).
- Extend “Is In Range” to the whole range.
- Set “Then Apply” to “Rate Profile Selection.”
- Set “Via Channel” to “AUX 2” again.
In this example, when in Angle mode, it will switch to Rate Profile 1, and when in Acro mode, it will switch to Rate Profile 3. Note: It’s skipping Rate Profile 2 because I am using a 2-position switch. If you use a 3-position switch, it will allow switching among Rate Profile 1, 2, and 3.
Enable Crash Recovery in Betaflight
What is Crash Recovery
Crash Recovery is a feature in Betaflight that helps your quadcopter stabilize itself after hitting an obstacle. This feature can be particularly beneficial for Tiny Whoop pilots, especially those flying in tight spaces or participating in races. When enabled, Crash Recovery allows the flight controller to correct the quadcopter’s position faster than human reflexes can, making it easier to regain control and continue flying.
Why Use Crash Recovery?
Crash Recovery can significantly enhance your flying experience by:
- Automatic Self-Righting: When your quadcopter hits an obstacle, the flight controller uses the motors to bring it back to a stable position quickly.
- Reduced Downtime: By automatically correcting the quad’s position, you can avoid the need to use turtle mode or pick up the quad after a crash.
- Improved Flight Performance: Especially useful for tiny whoops in indoor environments, where crashes are more frequent due to confined spaces.
How to Enable Crash Recovery
To enable Crash Recovery in Betaflight, follow these steps:
Open the Betaflight Configurator. Go to the CLI tab. Type the following command:
set crash_recovery = ON
set crash_dthreshold = 80
set crash_gthreshold = 600
set crash_setpoint_threshold = 500
set crash_recovery_rate = 150
save
Tuning Crash Recovery Settings
Betaflight provides several parameters to fine-tune the Crash Recovery feature, ensuring it performs optimally without false triggers. It’s a lot of take in, if you don’t want to go through this, I think the default works pretty well for tiny whoops, you don’t necessarily have to change any settings unless it’s causing you an issue.
- crash_recovery: Enables or disables Crash Recovery. You can also set it to “beep” to test the feature without actual recovery actions, but not useful for quads without a buzzer, such as a tiny whoop.
- crash_dthreshold, crash_gthreshold, crash_setpoint_threshold: These parameters control the sensitivity of Crash Recovery. Adjusting these can help prevent false triggers:
-
- crash_setpoint_threshold: Based on your stick position, this prevents recovery from triggering during intentional flips or rolls.
- crash_gthreshold: Based on gyro readings, this sets the rotational speed threshold to trigger recovery.
- crash_dthreshold: Based on D-term values, this detects when the quad is genuinely out of control.
-
- crash_delay, crash_time: These parameters add a delay between detecting a crash and initiating recovery:
- crash_delay: Time in milliseconds to wait before starting recovery.
- crash_time: Maximum duration for which recovery attempts will be made.
- crash_recovery_rate: Controls how aggressively the quadcopter attempts to recover. Higher values mean faster recovery but can lead to oscillations if set too high.
set crash_recovery_rate = 100 - crash_limit_yaw: Limits the yaw rate during recovery to prevent spins.
set crash_limit_yaw = 200 - crash_recovery_angle: Defines the angle to which the quadcopter will try to recover.
set crash_recovery_angle = 10
Conclusion
Setting up your Tiny Whoop with these configurations and tips will significantly enhance your flying experience. Remember, these are starting points, and you might need to fine-tune settings based on your specific hardware and flying style. Happy flying!
3 comments
Thanks a lot. It realy improoed my flying. I did not think about angle mode.
Chris just did an amazing video on bluejay settings here, and how you can counteract some of the downsides of 96khz. The really interesting part was the 15 vs 22.5 timing results.youtu.be/EhYKeZfSQIw?si=n0OMlLeZiN4srUng
Nice Article. I recommend to mention switching to BT2.0 or A30 from PH2.0 in same article for completeness.