Someone asked me what my ground station setup is like. After seeing some really professional FPV ground stations on the internet (like the one above), I am now a bit reluctant to call mine ‘the ground station’, because literally it’s just a monitor + a radio transmitter. Well, a video receiver, a DVR and a few bits too. But since there are curious people, here is my two cents.
Currently I only use my ‘ground station’ to fly my FPV Drone, and another mini tricopter just for line of sight, so I am trying to keep my gear to the minimum. No need for telemetry, minimal DIY work and soldering, and it should be cheap.
Equipment
As mentioned, my ‘ground station’ is really simple, we have the following.
- Turnigy 9X Radio Transmitter
- ImmersionRC 5.8Ghz Video Receiver
- 7-inch FPV Screen (cheap ‘blue screen’ ones)
- Hobbyking DVR SD Digital Recorder
- Voltage Alarm
How To Assemble My FPV Ground Station
Table of Contents
Turnigy 9X Transmitter
I first did the modifications to 9X radio transmitter, and flashed it with er9X firmware. It adds a lot more functionality to it and the menu is more intuitive. I also replace the stock receiver with a Frsky DJT, which is more reliable and better range.
FPV Monitor and Video Transmitter
I use a FPV monitor mount to put my display on top of the radio transmitter. It’s a cheap 7 inch security camera monitor, and it shows blue screen when there is no signal. To tackle that, I run a DVR between the radio receiver and the monitor. While it’s recording my FPV footage, I can also prevent blue screen, when there is not signal (or the signal is weak) from the VRX.
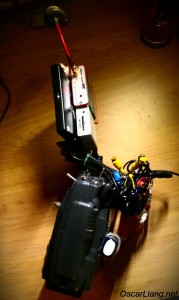
Both the DVR and Video receiver are mounted at the back of the monitor by some Velcro. The cabling is a mess, because they are the original wire which I could have shortened to a suitable length. But like I said this setup requires the least amount of work so I will keep it that way. :-p (It’s also good when I decide to sell them, I might be able to get a better price for keeping the original wires intact, LOL)
Monitor and other FPV equipment are all powered by 3S lipo, and JST connectors are used.
Using 5.8Ghz as video frequency also helps to keep the profile down. The receiver, and antenna tend to be smaller than 1.2/1.3Ghz.
Power
I power the radio transmitter with a 2600mah 3S Lipo. The monitor, DVR and video receiver are powered from a separate 900mah 3S Lipo. The 2600mah Lipo can last about 10 to 12 hours, and the 900mah Lipo can run for 1 and a half hour.
I could actually power all of these by the 2600mah battery, but again that requires some more modifications. Also as I mentioned, I sometime fly LOS only, so I can just leave the FPV gear unpowered. The only draw back is, you have two batteries to charge, and it’s a bit heavier to hold with your hands. But in fact it’s easier for me, I only need to charge my transmitter battery once a month, and my FPV gear battery before my flight (which only takes 10 mins). The weight is not a big problem either once you get used to it.
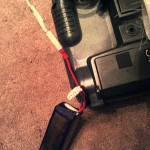
For the 900mah 3S Lipo battery, I have a voltage alarm on the back of the transmitter, so I know when to swap it out to avoid over-discharging.
Sunlight Shield for Display
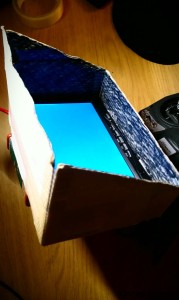
I made a DIY sun shield for the monitor, with cardboard and tape. works like a charm. When not in use, I can remove it and fold it, and put in my backpack.
And You Have it!
With this setup, I can easily fit my mini quad and the ground station all in my backpack. Some concern about having the 2.4Ghz radio transmitter so close to the 5.8Ghz video receiver, is that going to cause any interference or other electrical issue? For me, I have been running this setup for over a year now, and I have not had any problem with it yet.
I could do a better job on the presentation, and make it look a bit more stylish. But as a practical person, who else is going to look at my ground station apart from myself normally? As long as it works, then I am happy. :-D


3 comments
How do u power it? Can you show me the connection? I bought this and clueless how to power it because it came with one cable only
replied in the group :)
anyway, the open end of the wire should be soldered to your choice of female battery connector (e.g. XT60 or JST), the other end (cylinder connector) should connect to the monitor power plug.
i will try to upload a picture of the cable tonight in the group!
Very nice work !!!