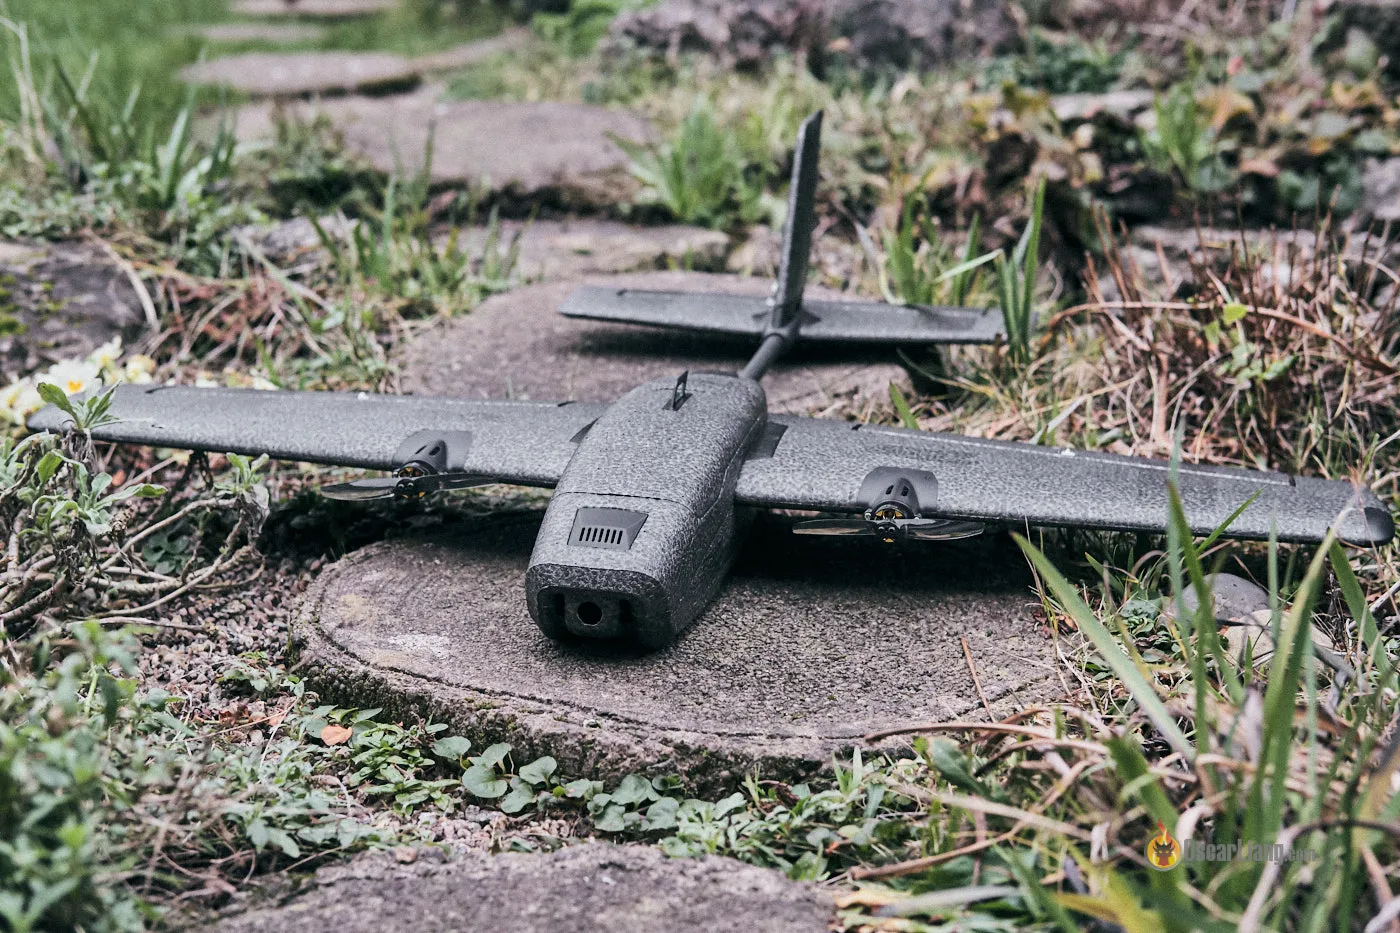
So I successfully built and flew the Heewing T1 Ranger without a flight controller. In this post I will install a flight controller (Matek F411 WTE) in the Ranger which will enable some really cool INAV features such as Auto Launch, GPS Return to Home, Loiter, Self-Level Mode. This will also be my first time using INAV, I am excited to learn a new FC firmware.


Table of Contents
Why Use a Flight Controller in Fixed Wings?
I really enjoy the simplicity of flying fixed wings without an FC. Simply connect the ESC and servos to a PWM receiver, configure the Mixes in the radio, and you are good to go!
So what are the benefits of using a flight controller you may wonder. Well, the initial setup might seem complicated, but it makes launching and trimming much easier and can potentially save you from bad throws or an untrimmed model. This is a game changer especially for beginners.
You also get to enjoy all the fantastic GPS features such as return to home and loiter which are essential when you go into the mid-range or long-range territory. With the help of autopilot flight modes, you can literally take your goggles off, sit down and relax while the flight controller will do all the work for you. How cool is that?
Parts List
You will need a Hee Wing T1 Ranger PNP kit, here it here:
- AliExpress: https://s.click.aliexpress.com/e/_DB4nGIN
- FPV24: https://oscarliang.com/product-1nn1
- GetFPV: https://oscarliang.com/product-a0av
- NDB: https://oscarliang.com/product-jeth
- BuddyRC: https://oscarliang.com/product-pmro
I have a guide on how to put it together: https://oscarliang.com/hee-wing-t1-ranger-no-fc/


The flight controller I am using is the Matek F411 WTE.
It’s a popular option for fixed wings, and a perfect fit for the Heewing T1’s twin motor configuration as it has two motor outputs. It has enough UART for the devices I plan to use (just GPS, receiver and Vista). You can choose to direct solder or use servo header pins.
It’s a stack of two boards, the top board manages all the low power peripherals such as GPS, Camera, VTX, LED, Receiver and so on, while the bottom board is responsible for connecting the drive train such as the battery, motors and servos. The two boards are connected via header pins, so you can easily take them apart for soldering.
You can get the Matek F411 WTE flight controller from:
- Banggood: https://oscarliang.com/product-unvg
- Amazon: https://amzn.to/3F5lhCG
- AliExpress: https://s.click.aliexpress.com/e/_DmmZOFL
- RDQ: https://oscarliang.com/product-k8q9


Other components:
- Radio Receiver (Happymodel EP1 Dual): https://oscarliang.com/product-vud8
- GPS (Holybro M8): https://s.click.aliexpress.com/e/_DlaJxsp
- Upgraded Motors (so I can safely use 4S, get the 2750kv): https://oscarliang.com/product-cgwb
- Propellers (Gemfan 4024×2): https://amzn.to/3SSzAQR
- Upgraded ESC (the original ones burned down): https://s.click.aliexpress.com/e/_DlylIgV
- Battery: 4S 1500mAh LiPo or 4S 2800mAh Li-ion (self made)
The stock ESC burned out during flight. They worked ok for a few flights on 4S but didn’t last long (even though I scaled down throttle to 75% to compensate for the higher voltage).

I replaced them with the Emax Bullet 30A ESC, which are absolutely tiny and are actually rated for higher current than the stock ones, so hopefully they will be more durable. I also soldered a 220uF capacitor to the ESC power for reducing voltage spikes.

I also upgraded the motors to lower KV ones – Flywoo 1404 2750KV. They are the same size as the original motors but the lower KV means they are more suited for 4S without the need to mess with throttle scaling. These motors are the same motors from the Flywoo Explorer and they are some of the most efficient motors for 4-inch props.
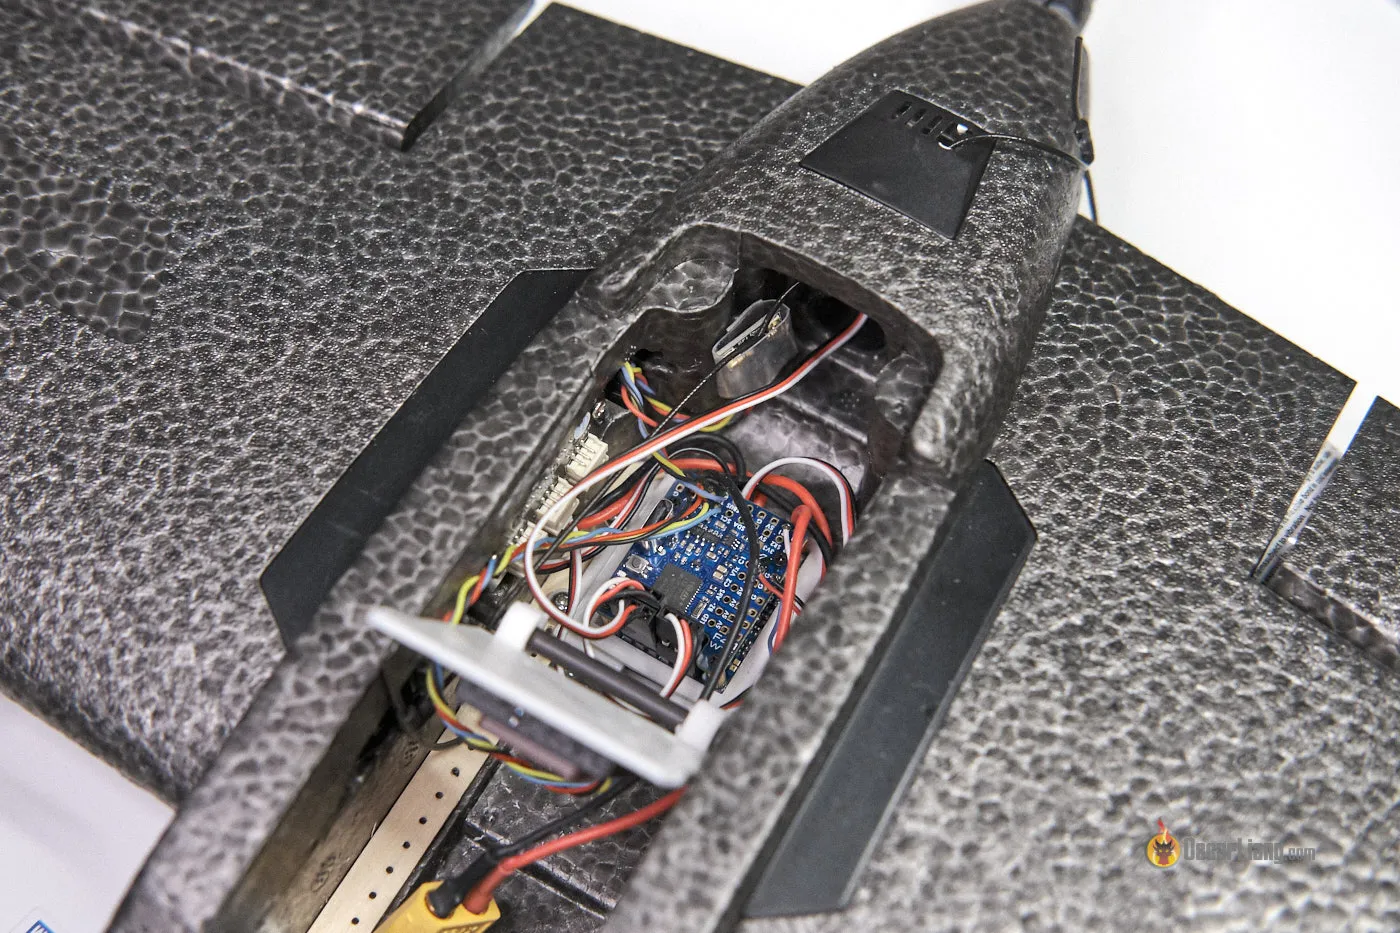
Wiring Diagram
Here’s a wiring diagram on how I connect all the components to the Matek F411 WTE FC.

You will need to desolder the XT60 cable and ESC power wires from the power distribution board, and solder them to the flight controller’s PDB. Cut the servo connectors off the ESC signal and ground, and solder them to the FC.

Then solder the GPS, radio receiver and Vista to the FC. I am using a connector to connect to the Vista so I can unplug it whenever I want if I am working on it on the ground to avoid overheating.

I 3D printed a mount for installing the FC: https://www.thingiverse.com/thing:5385530
I took the GPS mount and Vista mount from this 3D design: https://www.thingiverse.com/thing:5180208/files. With the Vista mount, I removed the camera part using a cutter, as I will be mounting the camera outside of the fuselage using this 3D part: https://www.thingiverse.com/thing:5768633


With the Vista, your probably want better cooling, consider additional ventilation. I cut some more holes on the bottom fuselage and in the rear hatch, and glued the vents from this design: https://www.thingiverse.com/thing:5346766

I also made this cable staples to get the wires out of the way: https://www.thingiverse.com/thing:5876617
This is the battery mount I am using (it allows me to use a proper 200×20 battery strap): https://www.thingiverse.com/thing:5402006

How to Setup INAV
This is my first time using INAV, so I tried to keep the setup to a minimum. My goal for maiden flight is to make sure auto launch is working properly, do some basic auto triming and auto tuning, and make sure return to home is working. INAV 6 has been released, but it’s still in Beta so I am using INAV 5.1 because it’s more stable and there are more resources out there.
- Flash FC to latest stable version (5.1).
- Upon first connection to the configurator, you should select a model, select Airplane with a tail.
- Go to the Calibration Tab and calibrate Accelerometer. At the first step, always have the accelerometer facing up regardless the board orientation, then you do the rest of the calibration at any order, doesn’t matter.
- Go back to the Setup tab and check the 3D model. Move the model around, and see if the 3D model is moving in the same direction. Pay attention to Pitch/Roll degrees at the top left as well, they should be around zero when the FC is on the bench, a couple of degrees error is fine (e.g. +/-2 degrees). If it’s more than that, you can try to adjust it in board alignment in CLI.
- Go to Mixer, make sure the servos are set to the right outputs.
- In the Outputs tab, test the motor and servos and make sure they are moving as intended. You can reverse it here as well
- If motors are working in Motor tab, but doesn’t work when you arm it, it could be because it hasn’t got a GPS lock yet (6 satellites).
- Setup modes. I will have one switch for arm, one switch for horizon mode, acro mode and manual mode. Another switch for return to home. In my maiden flight I will also have switches for Auto Level (auto trim) and Auto Tune, you can remove Auto level and auto tune after maiden flight. Auto Launch is enabled by default so no switch is needed.
- In Failsafe tab, set it to RTH if you are using GPS. Check failsafe by turning off radio, the Failsafe icon (parachute) in the configurator should turn red. And when you turn the radio back on it should turn white.
Other settings:
- In Configuration tab, make sure to enable “Continuously trim servo on fixed wing”, and “Permanently enable Launch Mode on fixed wing”.
- CLI: set fw_level_pitch_trim = 3.8 (this is the pitch offset, the slight nose up for level flight during cruising)
- If you are using the stock motors and use 4S, go to CLI and type: set throttle scale = 0.75
Auto Launch settings are in Advanced Tuning Settings. The only thing I changed was Idle throttle (to 1200) and Launch throttle (to 1800).
You should simulate launch before going to the field. If you are doing this at home, consider setting the Idle throttle and Launch throttle lower for safety. Arm the plane, throw it like how you would normally launch in the field, but don’t let go of the plane. It didn’t detect my launch, so I had to lower Threshold Velocity and Acceleration for it to work. Enter these in CLI:
set nav_fw_launch_accel = 1500 set nav_fw_launch_detect_time = 40
Screenshots of the INAV Configurators:


Maiden Flight
What to do on your maiden flight in 13 steps.
- Pick a calm day
- Check everything is working before heading to the field, check if you get GPS lock and if you can arm it. Check if failsafe is working (does the parachute icon turn red when you turn off the radio? Does turn white when you turn it back on?).
- Perform a CG check and “high five” check, that all control surfaces are moving in the right way.
- Familiarize yourself with where the RTH switch is (and the manual switch) in case of emergency.
- When you get to the field, wait for GPS lock.
- Auto Launch only works in a non-navigation flight mode, that means you can be in acro, manual, angle or horizon mode. Make sure you have not got altitude hold enable by mistake.
- Arm the model, you can now select the exit flight mode including navigation mode, after launching the plane will go into that flight mode. Raise throttle to the exiting flight mode throttle, then the motor will start spinning at the idle throttle. As soon as you throw the plane, the motor should spin up to the Launch throttle you set in the Auto Launch settings, and it should climb up at the Launch Angle. Once in the air, it will be in the flight mode you selected before throwing it. You can take control by moving the roll/pitch stick.
- Now switch to Horizon mode, and enable Auto Level, try to fly straight and level, Auto Level will adjust the trim for you. It takes average of the trim that is required in order to hold it nice and level over a period of time. Once it’s flying level, you can disable Auto Level. Auto Level adjustment is only saved when you disarm.
- Now land and disarm to save the auto trim, then take off again and switch to manual mode this time. Confirm if the servos are trimmed properly, it should fly pretty much level when you are not controlling it. While in manual mode, you can also check roll and pitch rates, and decide if you should increase or decrease them in the settings later on.
- Now switch to Acro mode, initially the controls might feel sloppy because of the default PID values are pretty conservative. Enable Auto Tune, and go through the Auto Tune process: Move the roll stick from middle position to the right, then left for a few dozen times. Repeat that for Pitch. Then do it again until the plane is responding well and it feels just like it is in manual mode. The longer you fly in Auto Tune, the more snappy it should get. To save the PID tune, you need to disarm (but don’t unplug the battery yet), pull both sticks down, and push both sticks outward.
- Take off again to fly in manual and acro mode back to back to confirm they feel as close as possible. Once you are happy with the tune, you can remove Auto Tune, and replace it with something you are more likely to use such as GPS Loiter.
- Now that your plane is trimmed and tuned, put it in Loiter mode and GPS Return to home and make sure they are working as expected too.
- When you get home, back up your settings. (type diff all CLI and save it in a text file)
That’s it, happy flying.
21 comments
Did you split the wing servos that were connected to the same connector?
Do the motors need to be separated too? Do they work asynchronously and participate in turns?
You can see the wiring diagram here: https://oscarliang.com/heewing-t1-inav-matek-f411-wte/#Wiring-Diagram
All servos have their own servo outputs, so no, I didn’t split them.
For Motors you can use the same output and a split connector, because I am not using differential thrust. But in my build I connected them to different motor outputs and configure both motor outputs to the same value. It’s up to you how to do it.
Hi Oscar
Thanks to you for this nice tutorial!
Did you keep the -45 weight for aileron and -60 for elevator on the radio from your other tutorial (without flight controller) or with Inav you set it only with rates?. Let me know 😊
You can set the rates in iNav (outputs tab), no need to do that in the radio.
Thank you for this post. I like your INAV settings and I appreciate the maiden flight checklist. It worked like a charm!
Hello
I need help.
I have FC MATEK F411-WSE.
How to connect DJI AirUnit (not O3) to my FC?
Greetings from Poland
Robert
I’m struggling to have voltage reading of my battery in inav with the same FC. Does it work ok for you after you plugin the battery?
Yea, everything works as expected.
hi, Oscar. I have a question for you because you have the both of drone and a fixed wing knowlege. Have you ever tried to use a drone buzzer for a fixed wing airplane? Basically I am using ‘GEPRC Super Buzzer’ for a FPV drone, connecting to a FC’s buzz/LED output, controled by a transmitter’s Aux switch, and working fine.
Then I tried to use the buzzer to my airplane which is installed ZOHD. It’s kinda a Gyro-ESC-FC and just connects a S-BUS receiver(futaba). There is a AUX output. However, as soon as connecting ,the buzzer kept making a sounds, and transmitter’s switch does not work. I connected the buzzer to rudder slot, and the buzer keeps loud.
Thus, my guess is that buzzer connection on a drone’s FC treats different way compared to motor/servo.
Let me know if you succeed to assemble a drone’s buzzer for your airplanes, thanks!
You will probably need a buzzer that can be controlled by PWM signal if you want to connect it to PWM receivers, typical buzzer might not work as they work by voltage level only and won’t be able to read PWM signals. Check out the Vifly Finder 2: Review: ViFLY Finder 2 Lost Model Alarm
Oscar, thanks! That buzzer is working with an airplane. I did not use PWN connection because I connect an AUX slot on a Gyro device due to using a s-bus receiver to gyro. Only problem is when connecting a battery to Gyro, the buzzer already starts buzzing and flushing until detecting transmitter signal, then buzzer stops beep, unlike we can set default condition by BF config. However, I found the device I want, many thanks!!
Can fc 411 WTE be used iNav version 4.1 or does it have to be Version 6 or above?
Thanks in advance.
Cheers
:)
Hi Oscar
Can I use iNav version 4.1 in a new Matek fc 411 wte or does it have to be 5.1 or above? It,s really disturbing be as I’ve read so many bad reports on iNav 5 and 6. It seems Matek is now forcing us to using Version 5 or 6.
I’m a fixed wing flyer.
Hello.
IS it possible to put air unit inside ?
Thanks
Nice one! I also just start building my first fixed wing with fc.
Is it for fixed wing fc’s also super important to softmount them because of vibrations? Or is it less important comparing to quad copters?
Thanks for this guide Oscar. Did you set up the led lights as well?
Hi Oscar, great post. I have the same setup, but I flashed with INAV 6.0 and the DJI OSD is networking.
Have you upgraded to 6.0 yet or Ill have to downgrade to INAV 5.1?
Thank you!
Thanks Oscar! I built the ranger almost exactly as yours by following your post. Your settings and launch instructions helped me get in the air! I do get a bit of twitching from the servos but not sure if that’s due to the 3S 2200mah that I’m using but it flies well. Thanks!
That’s awesome to hear!
Hey Oscare, thanks for thw awsome and helpful post! 1 question, why your servo 1-2-3 are not 1500 in the MID ?
Because they have been trimmed in flight (using Auto Level in INAV).