BetaFPV’s latest offering, the Aquila16 FPV kit, is a comprehensive package designed for those eager to dive into the world of FPV flying. This beginner-friendly kit includes a small drone, radio remote, FPV goggles, batteries, a charger and other accessories. In this review, I’ll explore its features, performance, and how it stacks up against the Cetus X and Cetus Pro FPV kits.

New to FPV? Check out my beginner’s guide for getting into FPV drone flying: https://oscarliang.com/fpv-drone-guide/
Table of Contents
Where to Buy?
The Aquila16 FPV kit is available at these retailers:
- AliExpress: https://s.click.aliexpress.com/e/_Dm8dmUN
- Banggood: https://oscarliang.com/product-aasw
- BetaFPV: https://oscarliang.com/product-98ib
- FPV24: https://oscarliang.com/product-yj5n
The kit arrives in a sleek carrying case, perfect for transportation and protection. Inside, you’ll find the Aquila16 drone, a Literadio 2 SE transmitter, VR03 FPV goggles, two LiPo batteries, a charger, and accessories like spare propellers and a screwdriver.

Inside, the kit is neatly organized, containing everything you need: the drone (Aquila16), a radio transmitter (Literadio 2 SE), FPV goggles (VR03), two LiPo batteries, a battery charger, manual and accessories such as spare propellers, a screwdriver and USB-C cables.

Aquila16 Drone – A Closer Look
Resembling the DJI Avata, the Aquila16 is a 1S tiny whoop – a small drone with protective ducts all around the propellers. Its sophisticated dark gray finish gives it a professional touch.

Weighing 47g (73g with battery), it’s a bit heavier in its class due to its robust plastic construction that houses the electronics and strengthens the propeller guards.

The camera angle is adjustable, allowing for slower indoor flights or faster outdoor flying.

It is possible to access the flight controller by removing 4 screws under the Aquila16. The motors and the camera are connected with connectors, practical if they need to be changed!

The kit comes with two 1S 1100mAh batteries with BT2.0 connectors. Unlike traditional drone batteries that need to be strapped on to the drone, it slides into the drone and locks itself in place. It’s a very sturdy connection, battery didn’t disconnect in all crashes during my testing. It’s a sleek design and looks professional, but it also means you can’t use other batteries other than BetaFPV’s proprietary batteries.


Unique to the Aquila16 is the optical flow sensor. A typical FPV drone tends to drift slightly when hovering. But with the help of the optical flow sensor, the Aquila16 can hold its position more accurately, making it a much less scary experience for new pilots. Whether or not this is a beneficial feature, I will discuss later in the conclusion.

You can connect the the drone to your computer using the provided USB adapter, this should allow you to change flight controller (FC) config in the BetaFPV Configurator. I did this before with one of the BetaFPV Cetus drones. However the process for the Aquila16 wasn’t documented on their website, nor in the manual. I was also having driver issues when attempting to connect the drone to my computer, not the most user friendly experience. Anyway, you shouldn’t need to change any config, as the drone flew just fine out of the box, so it’s not something I’d be concerned about.

Aquila16 Specifications
- Battery: Aquila16 Special Battery|1100mAh (Default), 650mAh (Optional)
- Camera: C02
- Camera Angle Adjustment: 15°-30°
- Charger Used: BT2.0 Battery Charger and Voltage Tester V2
- Flight Controller: Aquila16 V1.0
- Flight Modes: N/S/M Mode
- Flight Time(4.35V-3.4V): 8 mins
- Frame Material: Black PA12
Battery Charger
The included charger can charge two batteries simultaneously, requiring just over an hour to fully charge both. You need to power the charger from a USB power source (USB Type C port). Maximum charging power for each port is 5W, when charging 2 batteries it’s 10W.
When charging the LED is red, when finished it’s green.

It doubles as a voltage checker – simply connect the battery to the “Test” port.

Radio Transmitter
The BetaFPV LiteRadio 2 SE radio (reviewed), now with an ExpressLRS RF module, is basic but functional.

It has no screen, the battery is integrated and not easily removable. There is no bay to install an external module. It has an power button, two 3-position switches, two 2-position switches, a Bind button and a Setup button on the back. At the bottom, there’s a USB-C connector for charging and connecting to a computer to play FPV simulators. The gimbals feel cheap but gets the job done.


FPV Goggles
The VR03 FPV goggle, while basic, is effective for beginners on a budget.
It has integrated battery and DVR support, but their single-screen design might not suit everyone, especially those who prefer binocular-style goggles for better focus. It’s not as comfortable to use compared to the high end binocular goggles, but it should get you started just fine.
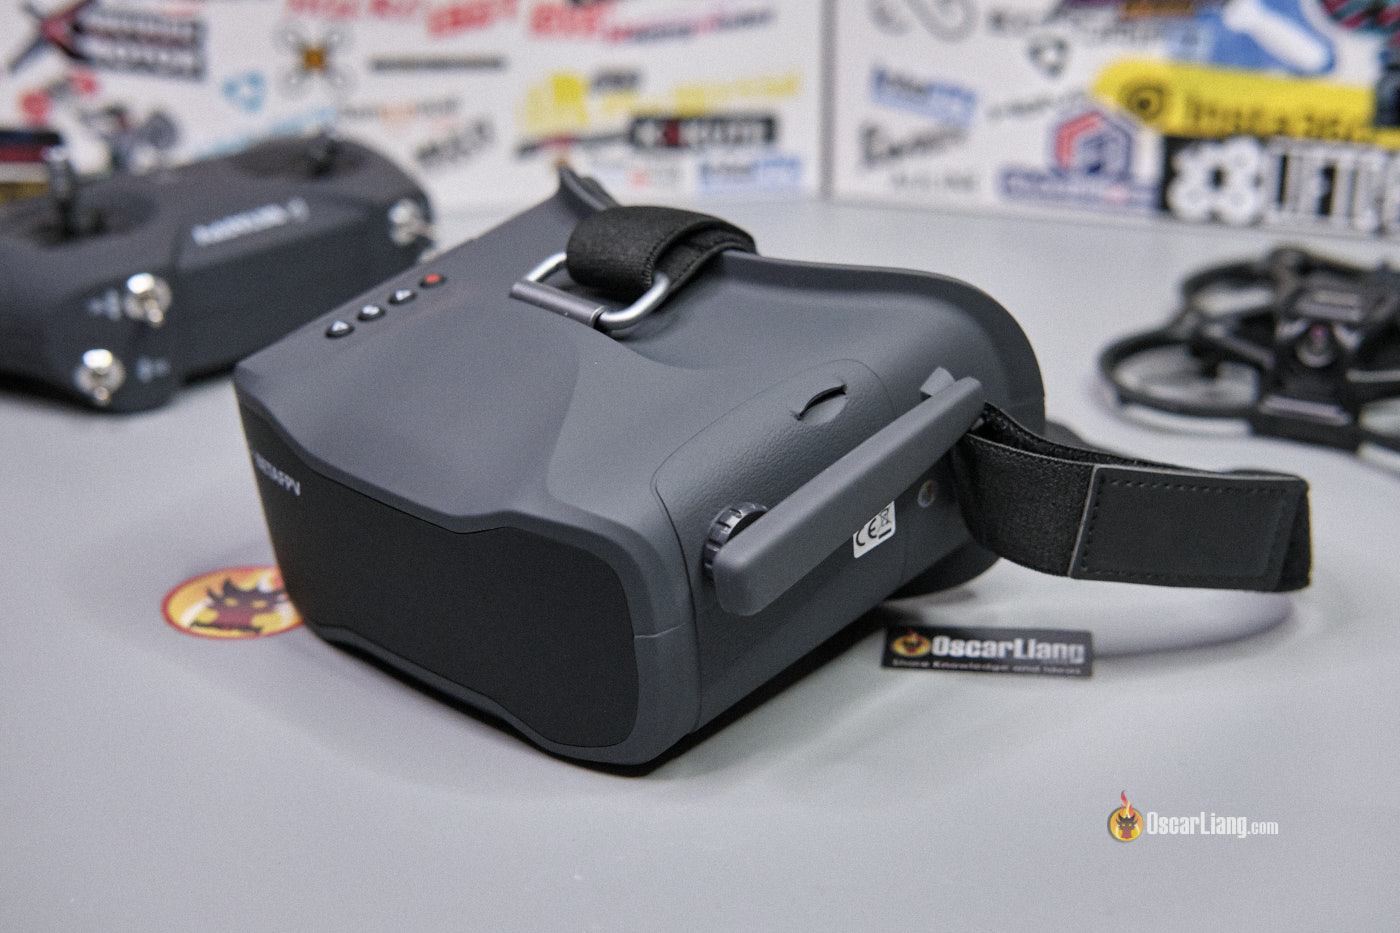
It supports 5.8GHz analog FPV system and offers a frequency search function. Note that the DVR requires an micro SD card to work, which is not included.
There is a USB-C connector for battery charging, an on/off button, 4 buttons for controlling the headset menu, and a foldable antenna.


DVR is similar to what you see in the headset. File format is .avi with resolution of 640×480 pixels at 30 fps. New video files are created every 5 minutes.
Flight Modes and Speed
The Aquila16 features three flight modes: Normal, Sport, and Manual. Each mode offers a unique flying experience:
- Normal Mode (Position Hold): This mode is similar to flying a DJI camera drone. It utilizes sensors to maintain height and position. Leaving the throttle stick at the center holds the drone steady in its current spot. Throttling up causes ascent, while re-centering the throttle stick halts it. Throttling down initiates descent. This mode significantly simplifies throttle management for beginners during hovering.
- Sport Mode (Angle Mode in Betaflight): Allows for more dynamic flight while maintaining some stability assistance.
- Manual Mode (Acro Mode in Betaflight): Offers complete manual control, ideal for experienced pilots.
Additionally, there are three speed settings: slow, medium, and fast. These alter the drone’s rates, affecting how quickly and sensitively it responds to radio stick movements. The selected flight mode and speed are displayed in the lower right corner of the FPV screen, with battery voltage and flight timer in the bottom left.
How To Set Up For First Flight
The Aquila16 FPV kit includes a detailed manual that thoroughly explains the setup process. Here’s a quick overview of the steps I followed before my initial flight:
- Charge the drone batteries, radio, and goggles using USB-C cable.
- To power on the radio, press and hold the power button until you hear three beeps. Activate the FPV goggle by turning it on (screen turns on).
- Connect the battery to your drone, the light should come on. The drone should be already bound to the radio, so you’ll gain control via the transmitter 10-15 seconds after powering up.
- For video feed, press the ‘S’ button on the goggles to enter the menu. Then, press and hold the ‘S’ button to initiate frequency scanning. The system will automatically select the channel with the strongest signal and you should get an image from the drone.
The FPV Experience
Everything just worked out of the box. Right from the start, the Aquila16 impressed me with its stability and smoothness. The adjustable camera tilt is versatile, allowing for varied flight styles and environments.
Although it’s heavier and less agile than typical tiny whoops, its crash resistance, precision, and control make it ideal for beginners. It’s not overpowered, which is great for new pilots, and offers remarkable flight time – I averaged about 8 to 9 minutes indoors. However, it’s less suited for outdoor flying in windy conditions and lacks the power for freestyle maneuvers.
Video quality in the goggles is what you’d expect at this price point. It’s a budget drone, so don’t expect the high-end digital system imagery. However, the goggles are comfortable enough, with minimal light leaks, and the DVR feature is a nice touch for sharing flights or locating the drone after crashes.
Compatibility with Other Hardware
The VR03 FPV goggles are compatible with any analog 5.8GHz VTX.
The LiteRaido 2 SE in the Aquila16 kit works with any drone equipped with 2.4GHz ExpressLRS (ELRS) receivers (V3 firmware).
You can control the Aquila16 drone with any radio equipped with a 2.4GHz ELRS module (V3 firmware). For binding instructions, see this tutorial: https://oscarliang.com/bind-expresslrs-receivers/
Conclusion: Should I Buy It?
If you’re intimidated by the speed and power of typical FPV drones, the Aquila16 kit is a fantastic choice. It’s a comprehensive, ready-to-fly package that doesn’t require additional hardware or complicated setup.
This kit is especially suitable for young pilots or those who might find simulators boring. Its safe indoor flight capability makes it an engaging and practical learning tool. While it doesn’t fully replicate the FPV experience of larger, powerful FPV drones, it’s an affordable and low-risk introduction to the hobby.
The Aquila16 FPV kit is available at these retailers:
- AliExpress: https://s.click.aliexpress.com/e/_Dm8dmUN
- Banggood: https://oscarliang.com/product-aasw
- BetaFPV: https://oscarliang.com/product-98ib

When comparing it to other BetaFPV kits like the Cetus Pro, the Aquila16 stands out with a more polished design, better flight performance, and enhanced capabilities. However, the choice between the Aquila16 and the Cetus X is more nuanced. The Aquila16 is better for total beginners due to its ease of control, while the Cetus X, with its Betaflight support and slightly more power, caters to those ready for outdoor flying and a more advanced experience.
Personally, I would have preferred Betaflight firmware support on the Aquila16, as it’s the standard for most FPV drones. Learning the BetaFPV Configurator is a little pointless especially after you graduated from the Aquila16, you will probably never use it again.
The optical flow sensor, while useful for stability in hover, doesn’t add much to the FPV flying experience. In my opinion, it isn’t really helpful for teaching people how to fly FPV drones. I would rather not have this feature and lower the cost of the drone.
I would recommend skipping “Normal mode” entirely. If you don’t have access to an FPV simulator, start out with Sports Mode. If you do have access to a sim, you can practice in Manual Mode as it’s the ultimate flight mode for FPV drones. Mind you, when flying indoors, it’s recommended to use Angle mode for safety. Only use Acro mode when flying outdoor unless you are confident with your skills.
In conclusion, the Aquila16 is a strong contender for those starting in FPV, offering a balance of simplicity, safety, and enjoyment.
5 comments
thanks, awesome review this helped a lot!
I flew the Aquila with my Zorro R/C and it was easy to bind and to fly. But, the mode settings and button settings are different. And, I though I had a dead spot in the throttle, but it was just how the Aquilla is programmed to use the optical flow function. I love the Aquila EXCEPT: I can do flips in horizontal mode with my Darkstar20, but can’t do them with the Aquila unless you go into manual mode (and I’m not quite ready for that). Always love your reviews, thanks, great job!!!
I bought a bnf version of this hoping to bind it to my Radiomaster transmitter with Ranger ELRS module. I haven’t received it yet, and upon further research, this may not have been a good idea. I have not been able to find any channel information on how to configure a third party ELRS radio. I’m not a beginner, and realize it is a beginner setup, but I liked the “mini avata” aspects of the Aquila. The other option is to buy a retail Lite Radio 2 ELRS and hope that will work with the Aquila as the included radio would have. Do you have any idea how the radio is set up for this drone? And if running it with the radiomaster is possible?
The Aquila16 drone should work with any radio with ExpressLRS module, including the Radiomaster transmitter with Ranger ELRS module you mentioned. You just need to bind the drone to the transmitter.
There are a few ways to bind as documented here: https://oscarliang.com/bind-expresslrs-receivers/
Hi!
Thanks for the review! i couldnt find any information about the flight controller, im thinking about mounting a RunCam Thumb which is connected via cables to the flight controller. Do you know if its possible to solder it to the Aquila?