Whether you’re a beginner or an experienced FPV pilot, capturing stunning and smooth footage is key to showcasing your skills and sharing your adventures. This guide will walk you through GoPro camera settings, and I will offer tips and best practices to help you get the most out of your GoPro when filming your FPV flights. We’ll cover the best GoPro settings from frame rate, shutter speed, FOV, stabilization, to color grading, ensuring you have all the knowledge needed to create cinematic videos that truly capture the essence of FPV flying.


To learn more about HD Action Cameras for FPV, check out this post.
Table of Contents
GoPro Options for FPV
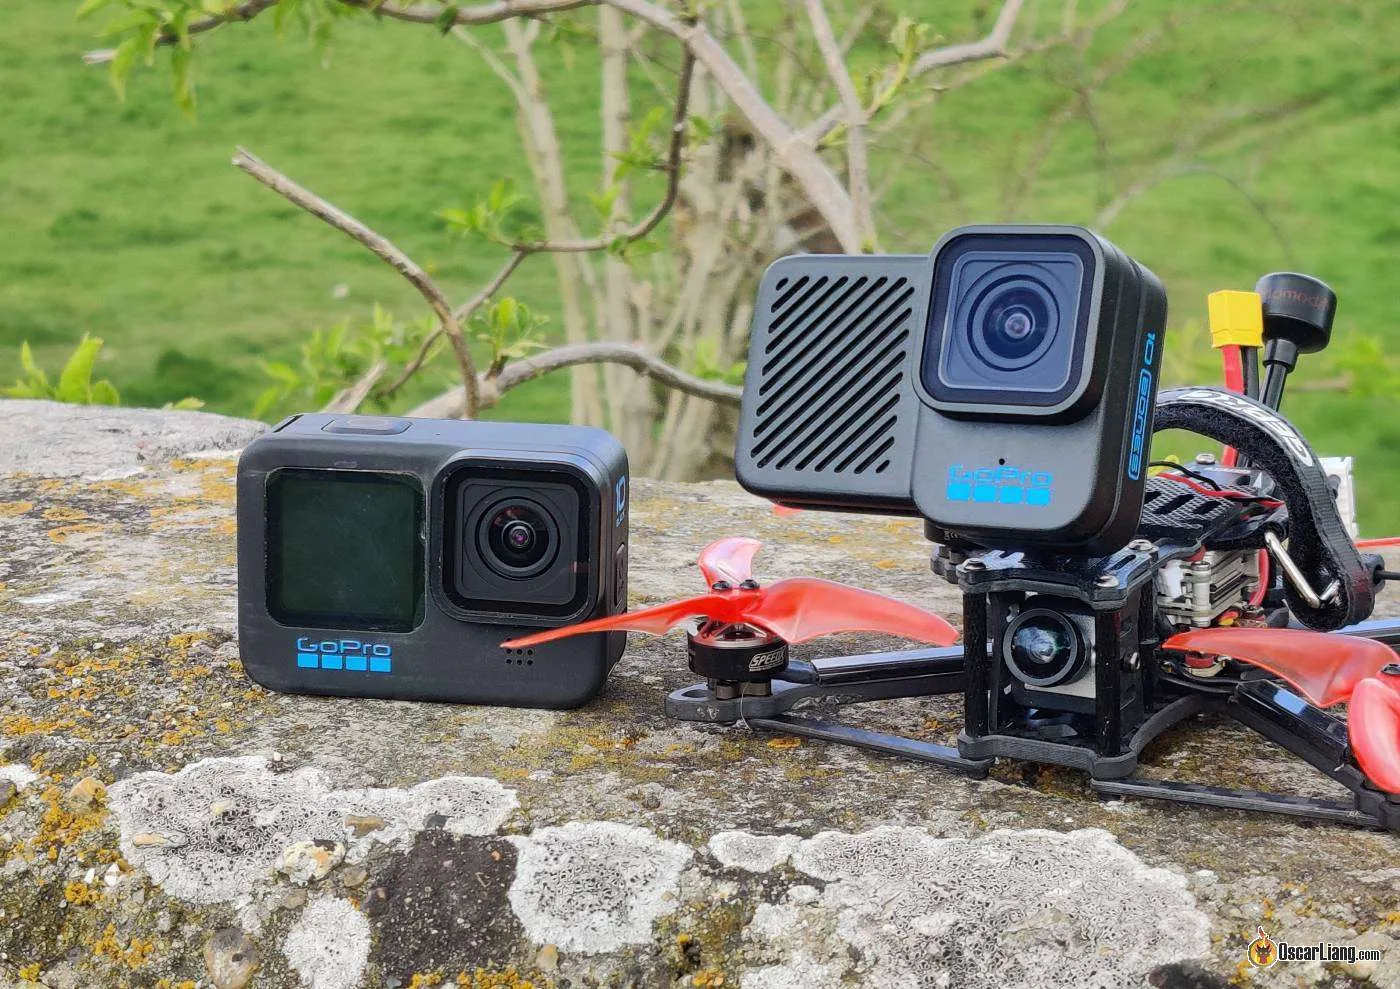
GoPro Hero 13
Product Page: https://amzn.to/3TSMOyD
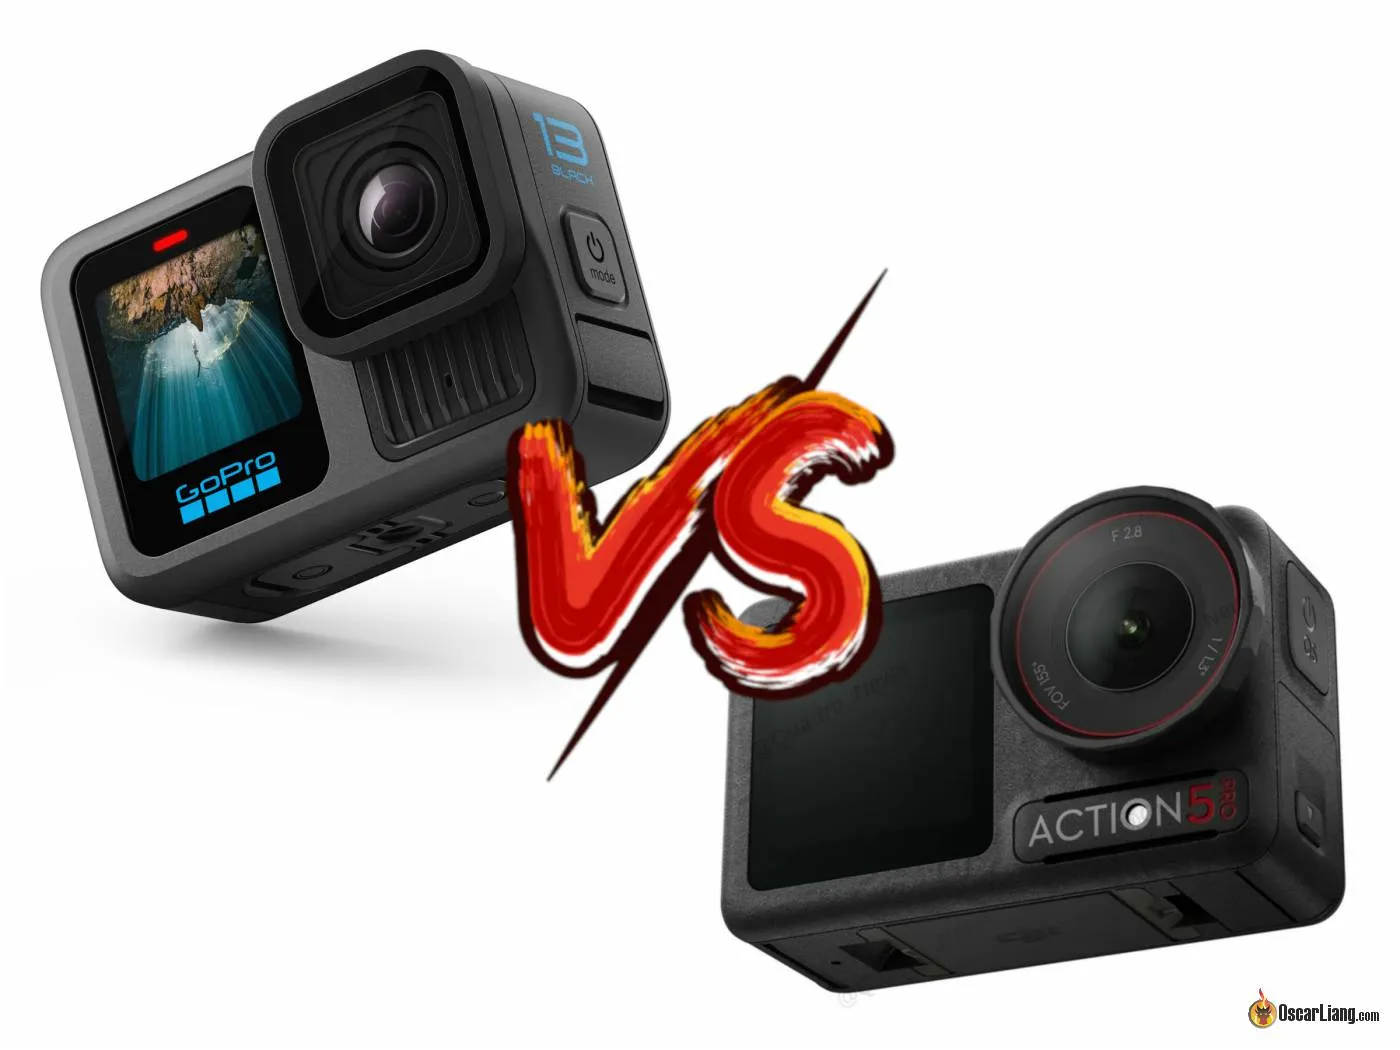
Before 2020, GoPro was the clear leader in action cameras for FPV drones. However, in recent years, DJI has significantly closed the gap, making it harder to recommend one over the other.
If you prioritize the best log profile and the most flexibility in post-production and color grading, the GoPro Hero 13 remains your best bet. Its flat color profile offers plenty of room for tweaking colors to your liking.
However, for everything else, the DJI Osmo Action 5 Pro is highly competitive. It’s lighter than the GoPro, has a more modern design, boasts significantly longer battery life, and delivers impressive results straight out of the box with minimal effort. Its built-in stabilization is top-tier, the audio quality is clearer, and it handles dynamic range and low-light situations slightly better than the GoPro. Plus, it’s even slightly cheaper. See my buyer’s guide here: https://oscarliang.com/gopro-13-dji-action-5/.
GoPro Hero 12
Product Page: https://amzn.to/3Erf2bR
Building on the Hero 11’s foundation, the GoPro Hero 12 introduces advanced filming capabilities, including 5.3K and 4K at 60fps, and a versatile 8:7 aspect ratio for diverse cropping options. Its Hypersmooth V5 stabilization ensures shake-free footage, while the horizon locking adds a professional touch. The camera’s extended battery life and hydrophobic lens further enhance its usability. Compatible with previous GoPro accessories, and offering features like 10-bit video for post-production flexibility. Learn more here: https://oscarliang.com/gopro-hero12-black/

GoPro Hero 11
Product Page: https://amzn.to/3RZnEL7
The GoPro Hero 11 offers two exciting new features for FPV pilots: 10-bit videos and a 8:7 aspect ratio image sensor. This sensor allows for 16:9 and 9:16 cropping, making it ideal for social media use. The camera films in 5.3K and 4K at 60fps and 2.7K at 240fps, and features Hypersmooth V5 stabilization and horizon locking. Accessories and ND filters from previous models are compatible.


GoPro Hero 11 Mini
Product Page: https://amzn.to/3XqMQNu
The Hero 11 Mini is a smaller, lighter version of the Hero 11. It’s slightly better for FPV drones due to its reduced weight (about 20g lighter) and $100 lower price tag, while retaining the same capabilities and performance.
GoPro Bones
Find the GoPro Bones here: https://amzn.to/3LpHsaW
The GoPro Bones is essentially a stripped down GoPro Hero 10 – it’s lighter and more compact which makes it more suited for FPV drones. It offers the same image quality and performance as the GoPro 10. It has built-in heat sinks, and can be powered direct connection from the drone eliminating the need for a separate battery. Check out my review for more details: https://oscarliang.com/gopro-10-bones/
360 Cameras
GoPro also offers 360 cameras, check out this comparison guide for more detail.
Best GoPro Settings

These tables below provide my best settings for the latest GoPro Hero 11 and 12, but should also work well on older models. Video stabilization is essential for a cinematic look in your videos, you have three options: Hypersmooth, Reelsteady and Gyroflow. Hypersmooth is built-in, thus more convenient but offers less control, while Reelsteady and Gyroflow requires extra rendering but allows for customization. Between Reelsteady and Gyroflow, the former is paid while the latter is free. Personally I prefer Reelsteady, I think it gives better result in most situations. Learn more about image stabilization here here: https://oscarliang.com/stabilize-fpv-videos/. But Gyroflow also produces decent result, learn more here: https://oscarliang.com/gyroflow/
For Reelsteady & Gyroflow
| GoPro Settings | |
| Resolution & Frame Rate | 5.3K 30fps or 60fps |
| Shutter Speed | 1/60 for 30fps, 1/120 for 60fps, or Auto* |
| Aspect Ratio | 8:7 (if unavailable, select 4:3) |
| Lens (FOV) | Wide ** |
| Hypersmooth | Off |
| Timer | Off |
| Protune | On |
| 10-bit | On |
| Bit Rate | High |
| White Balance | Auto, or set manually to match scene between 4500K (sunny day) and 5500K (cloudy day) |
| ISO Min | 100 |
| ISO Max | 100 ** |
| Color/Profile | Select Flat/Log if you want to color grade, otherwise choose Normal/Standard |
| Sharpness | Low |
| Raw Audio | Off |
| Wind | Auto |
| GPS | Off |
* Only use Auto if you are NOT using ND filter; Otherwise, set a fixed shutter speed for cinematic look.
** The Wide lens setting under 8:7 aspect ratio (or 4:3 in older models) are full sensor image that provides a wider field of view than Hyperview/Superview in 16:9. Reelsteady in GoPro Player will automatically stretch it to 16:9 Hyperview/Superview after rendering.
*** In specific situations, set ISO Max higher for extra flexibility (e.g., 400 or 1600 in low light).
For Hypersmooth
| GoPro Settings | |
| Resolution & Frame Rate | 4K 30fps or 60fps |
| Shutter Speed | 1/60 for 30fps, 1/120 for 60fps, or Auto* |
| Aspect Ratio | 16:9 |
| Lens (FOV) | SuperView (or HyperView if available) |
| Stabilization | Hypersmooth On |
| Timer | Off |
| Protune | On |
| 10-bit | On |
| Bit Rate | High |
| White Balance | Auto, or set manually to match scene between 4500K (sunny day) and 5500K (cloudy day) |
| ISO Min | 100 |
| ISO Max | 100 ** |
| Color/Profile | Select Flat/Log if you want to color grade, otherwise choose Normal/Standard |
| Sharpness | Low |
| Raw Audio | Off |
| Wind | Auto |
* Only use Auto if you are NOT using ND filter; Otherwise, set a fixed shutter speed for cinematic look.
** In specific situations, you might want to increase ISO Max for extra flexibility (e.g., 800 or even 1600 in low light). 100 to 200 normally works well during day time.
For Lowlight/Night Flying
Settings are mostly similar to those above, with a few differences. ND filters aren’t needed/recommended for lowlight and night shooting. These settings assume you are using a GoPro Hero 11 with Reelsteady for stabilization.
| Resolution & Frame Rate | 4K 30fps |
| Shutter Speed | 1/120 for 60fps or 1/60 for 30fps |
| Aspect Ratio | 4:3 |
| Lens (FOV) | Wide |
| Stabilization | Off |
| Protune | On |
| 10-bit | On |
| White Balance | 4000K |
| ISO Min | 100 |
| ISO Max | 800 * |
| Color/Profile | Flat/Log |
| Sharpness | Medium |
| Raw Audio | Off |
| Wind | Auto |
| GPS | Off |
* Increase/decrease ISO MAX for your particular environment.
Resolution
Go with 4K for the best possible image quality and bitrate. You may use a lower resolution if you want higher frame rate such as 120fps or 240fps because 4K or 5.6K typically only allows 60fps. Keep in mind that higher resolutions result in larger file sizes and require more processing power for editing and rendering.
FPS
FPS (frames per second) is the frame rate, it can significantly influences your video’s look and feel.
Many pilots prefer 60FPS for smoother playback on social media platforms like Instagram and YouTube, while others may prefer 30FPS. Although 24FPS is popular in filmmaking, it might not look as good for FPV videos due to rapid drone movements. For slow-motion footage, consider higher FPS options like 120FPS or 240FPS, which may require lowering the resolution in older cameras.
Aspect Ratio
The native aspect ratio for the latest GoPro image sensor is 8:7, while older models have a 4:3 sensor. Choosing the native aspect ratio makes use of the full sensor information. It allows you to export the video vertically or horizontally later on for different social media platform. Using a non-native ratio results in cropping at the top and bottom of the sensor so it results in a smaller FOV if you have export it in a different aspect ratio later on. When using Hyperview and Superview, the image is dynamically stretched from 8:7 or 4:3 to 16:9.
If you plan to use Reelsteady, it’s best to select 8:7 or 4:3, as the software will export a 16:9 clip for platforms like YouTube. When using the built-in Hypersmooth stabilization, choose 16:9.
Lens
Lens settings determine the field of view (FOV) of the image. The available lens options depends on the camera and selected resolution/FPS/stabilization settings, which include Linear, Wide, Superview, and Hyperview (from the narrowest to the widest FOV).
FPV videos typically use the widest FOV possible, as a wider vertical field of view gives image stablization more image to work with. A wider FOV also looks better for FPV videos. Unless you’re using Reelsteady for video stabilization (in which case, choose Wide), it’s recommended to select Hyperview (or Superview if Hyperview isn’t available).
Hypersmooth
As discussed in this article, there are two ways to stabilize GoPro videos: Hypersmooth and Reelsteady. Hypersmooth is built into Hero 7, 8, 9, 10, and 11 models and works well for most applications. However, FPV pilots often prefer Reelsteady, as it tends to produce better results for FPV videos and is more flexible.
If you plan to use Reelsteady or Gyroflow, make sure to TURN OFF Hypersmooth in the camera; otherwise, leave it ON. The Boost or Auto settings may not be ideal for FPV, as they can crop the image a bit too much and cause excessive zooming in and out. These settings, however, are well-suited for sports videos.
10-Bit
Currently, only the GoPro Hero 11 Black can shoot in HEVC 10-bit, capturing 64 times more colors than its predecessor which is in 8-bit. While the difference may not be significant on a standard computer screen, 10-bit recording brings action cameras closer to professional filming quality. You can still opt to use 8-bit if desired.
Bit Rate
Bitrate is essential to achieve high-quality footage. A higher bitrate records more information from the image sensor.
The newest GoPro provides two options: low (either 45 or 60Mbps) and high (100Mbps). I always recommend setting the bitrate to high. Although this means bigger file sizes, it’s a small sacrifice for preserving image quality.
Shutter Speed
Shutter speed affects the exposure of your image by controlling how much light enters the sensor. It also influences the appearance of your image, with faster shutter speeds producing sharper images and slower speeds introducing more motion blur. A moderate amount of motion blur is desirable in FPV videos for a “cinematic” look.
If you’re not using an ND filter, you can just set the Shutter Speed to Auto, the camera will handle it for you to get an ideal exposure. You may set Shutter Speed to a fixed value which will give you a more consistent look, but you should use ND filters to get a correctly exposed image. This post explains in more detail why you should use ND filter and how to select the correct ND.
The general rule of thumb is to set the shutter speed to 1/60 for 30fps, 1/120 for 60fps, 1/240 for 120fps, or 1/480 for 240fps. Using a lower shutter speed than the suggested value may result in overexposure and excessive motion blur.
When using a fixed shutter speed, be sure to equip your GoPro with the appropriate ND filter for proper exposure. I recommend an ND16 filter for sunny days, ND8 for cloudy days, ND4 for early mornings and sunsets, and ND32 for snowy days.
You can get ND filters based on the camera model here:
- Hero 12: https://bit.ly/46MEi8v
- Hero 11 and 11 mini: https://amzn.to/3VkEsiF
- Hero 9, 10, 11 and 11 mini: https://oscarliang.com/product-gm8h
- GoPro 8 – https://amzn.to/2MiJzxq
- GoPro 6 and 7 – https://amzn.to/2TUAKxU

If you’re unsure which ND filter to use for proper exposure, it’s generally better to underexpose than overexpose, as it’s easier to recover detail in shadows than in overexposed areas.
EV Comp
EV Comp stands for Exposure Compensation. In most cases, you can leave EV Comp at the default setting (zero).
When the camera adjusts exposure, it looks at the entire image and calculates an average value for the current exposure, bringing it up or down to a middle grey value.
Adjusting the EV Comp value tells the camera to either brighten or darken the image from the optimal exposure it perceives.
If you’re filming a subject that is darker or brighter than the background and leave EV Comp at the default setting (0), your image may appear overexposed or underexposed. In this case, you’ll want to adjust EV Comp. However, for FPV, we typically film the entire environment, so there’s usually no need to make significant adjustments.
White Balance
White balance determines the color temperature of your footage, it’s crucial for capturing accurate colors.
Unless you’re filming indoors where light sources (e.g., halogen light bulbs) might alter the environment’s color unnaturally, the best range for it would be around 4500K to 5500K in outdoor environment.
Auto white balance can work effectively most of the time, but experienced users usually set it manually to match the scene, because there might be instances where the Auto settings is just off which compromises the overall look of your footage. Setting it to a fixed value ensures consistent white balance, and allows you to fine tune it later in post-production. For example, you may use 4500K when shooting on a sunny day or 5500K on a cloudy day. If you’re unfamiliar with adjusting white balance in post, feel free to just set it to auto and let the camera to handle it for you and save yourself some headache.
Some recommend using the ‘Native’ white balance and correcting it in post. However, in my experience, using ‘Native’ can sometimes result in a dull coloration that’s challenging to correct later on.
So, here’s how I normally do it to achieving good looking colors: First, check what the ‘Auto’ setting looks like. Then, select a white balance level that emulates the same look. This way, the white balance stays locked, as opposed to randomly changing throughout the video as it does in ‘Auto’ mode.
ISO
Recommended Setting: Always set ISO Min to 100, and adjust ISO Max based on lighting conditions (100, 200, 400, or even 1600 are acceptable values; I usually go with 400)
ISO is the digital enhancement of light sensitivity in your camera’s image sensor. It helps adjust the exposure of the image by amplifying the signal. A higher ISO increases light sensitivity, which improves visibility in low-light environments, but it also introduces and amplifies digital noise, resulting in a grainier image.
For the best results, keep your ISO settings as low as possible to minimize noise and maintain image quality.
When setting ISO Min and Max, you’re establishing a range of ISO values the camera can use, rather than fixing the ISO value. For example, if the minimum ISO is 100 and the maximum is 1600, the camera can use ISO values from 100 up to 1600, depending on lighting conditions.
A high ISO Max provides flexibility, especially when using a fixed shutter speed, as ISO becomes the primary way the camera adjusts exposure. However, if you want the most consistent and clean image possible, it’s best to keep your ISO Max as low as possible given the lighting conditions.
When shooting outdoors during the day without flying under trees or in shadows, set ISO Max to 100 for the most consistent image. If you do fly in shadowed areas, you can set the ISO Max higher, such as 400, for added flexibility. If you’re flying in and out of a house, for example, you can even set the ISO Max to 1600 to account for the changing lighting conditions.
Sharpness
The high sharpness setting in GoPro cameras can be overly intense and unappealing. By setting sharpness to low or medium, you have the flexibility to adjust sharpness in post-production using a video editor to achieve the desired level.
Color/Profile
In older GoPro cameras, this option is called “Color”, in the new Hero 12 it’s called “Profile”.
GoPro offers two color options: Normal (aka Standard) and Flat (aka Log). Choose Flat/Log color if you plan to color grade in post-production, otherwise choose Normal/Standard.
- Flat/Log – Retains more image detail and flexibility, allow greater freedom for color correction and color grading in video editing software
- Normal/Standard – Produces vivid colors and high contrast
Flat/Log Color is ideal for those who plan to color grade their footage in post-production. It retains more image detail, providing more flexibility when adjusting colors and contrast. However, Flat Color footage is not designed for direct consumption. If you’re new to creating FPV videos and unfamiliar with color grading, you may want to stick with Normal/Standard color for now.
Learning color grading can significantly enhance your videos when done correctly. To get started, consider using a professional video editor, such as DaVinci Resolve, Adobe Premiere, or Final Cut Pro X. I have a tutorial to help you get started with Davinci Resolve: https://oscarliang.com/how-to-use-davinci-resolve/
If you are new to color grading, check out my beginner’s tutorial: https://oscarliang.com/color-grade-fpv-videos/
Spot metering
Spot metering is a useful setting that allows the camera to use a specific portion of the screen to decide the exposure level. This can be handy in challenging lighting scenarios. For instance, with a backlit sky, the camera might underexpose the ground, making it look too dark. By using spot metering, you can force the camera to expose based on the light level of the area that matters most to you.
Top Tips
Getting SD Cards
Make sure to get a good SD card that has decent write speed. With a slow card your GoPro recording might stop randomly or even won’t record at all. It’s important to understand the speed class of SD cards, and the speed requriement for the particular resolution you plan to use with the GoPro.
You can learn about this in my SD card tutorial, where I will also suggest some great cards for your GoPro: https://oscarliang.com/sd-cards-fpv/#GoPro-and-Other-HD-Cameras-4K-Videos
Uploading to Youtube
YouTube compression can negatively affect your video quality, causing fast motion and detailed elements like grass and leaves to appear pixelated. To ensure the best results, follow YouTube’s guidelines for exporting and uploading your videos.
Uploading videos with excessively high bitrates won’t improve quality, as YouTube compresses them anyway. It’s best to let your video editor handle the compression to avoid issues.
One useful tip is to “upscale” your video when exporting it in your video editor. Since YouTube retains higher bitrates for higher resolution videos, exporting a 1080p or 2.7K video in 4K can improve playback quality. For example, YouTube limits 1080p videos to a 12 Mbps bitrate, while 4K videos can have up to 68 Mbps. 60fps videos also retains higher bitrate than 30fps videos.
Using a GoPro Dummy
While practicing or tuning your drone, you might not be recording every flight. Using a GoPro dummy can protect your actual GoPro from damage during non-recording flights.
3D-print a GoPro dummy in TPU and fill it with coins, metal weights or rice to match the weight of your GoPro. This ensures consistent weight distribution, which affects your drone’s performance and control feel.

Using a GoPro dummy allows you to maintain consistency in your training without risking damage to your actual camera during crashes.

To weight your dummy, consider using “wheel balance weights,” available in 5g and 10g pieces: https://amzn.to/3GDHCYd. Alternatively, you can use coins, chains, rice, or other weights that fit inside the dummy.

Common Issues
GoPro Battery Not Fully Charging
If your GoPro battery stops charging at around 80%-90% (or even 70-80%), the issue might be related to the charger. When using a powerful third-party charger (e.g., an Apple charger or one with Power Delivery capabilities), and the battery never reaches 100%, try using a less powerful, non-Power Delivery or Quick Charge compatible charger, such as one with a 5V 2A output. Alternatively, you can try charging your GoPro battery using your computer’s USB port, which should also work effectively.
Conclusion
In conclusion, setting up your GoPro for FPV flying is essential to capture stunning and smooth footage. By following the recommendations and tips in this guide, you can optimize your camera settings and ensure the best results for your FPV videos. Remember, practice makes perfect, so experiment with different settings and use the right tools to enhance your FPV flying experience.
Edit History
- Mar 2017 – Article created.
- Mar 2018 – Added sections “Shutter Speed” and “Uploading to Youtube”.
- Jan 2020 – Updated GoPro list, added settings for Hero 7.
- May 2020 – Added settings for Hero 8 and included separate settings for Reelsteady.
- Oct 2022 – Updated product links and settings.
- Jan 2023 – Added “Top Tips” and “Common Issues”.
- Apr 2023 – Added best settings for Lowlight/Night.
- Jan 2025 – Added GoPro 13 to the product list.
24 comments
Great article! GoPro is still king of the skies, and I think it’s good to support Western innovators, to hold off the Chinese copycats as long as possible.
GoPro is not the king anymore. They stopped innovating years ago. Insta360 Ace Pro and Pro 2 easily beat it in quality, without making a sweat.
Oscar thanks so much for all the wonderful information! Do you have any experience or preferred settings for the DJI Action 2 camera (to be post stabilized with gyro flow)?
Hi Oscar, thanks for this amazing article, you and Joshua Bardwell are the reasons that I fly fpv drones today! However I am a little confused right now. I’ve just read the documentation of gyroflow, and they say nd filters are not recommended l and avoid motion blur in the camera footage, rather apply in post. What do you think?
Thank u so much!
Thanks for this Oscar! I keep coming back to it over the years. There is an excellent firmware update on the go pro labs website that re-enables all “lost” protune settings on the session 5, and allows configuration via QR when the camera powers on. There is also a mobile app for QR code generation with the ability to store multiple settings profiles on it
https://community.gopro.com/s/article/GoPro-Labs?language=en_US
There is another great benefit to upgrading to the labs firmware for the session5 – it removes the need for the “Fry Hack”, a bug that resulted in a blurred image with fixed shutter speeds that you’d have to manually fix in the app (https://youtu.be/CvUGV4kwBik?t=431)
I’ve uploaded the firmware on my hero7 as well, and the QR settings can be shared across camera models. It’s awesome. You can also configure the QR code to set the date/time as well.
Looks like a cut and paste error in the table for “When using Reelsteady GO for Stabilization”, you have Aspect Ratio as 16:9 there, it should be 4:3.
You are correct, thank you for pointing it out!
I’m using a iOS App called Camera Tools that gives you back Shutter control and other functions that the GoPro Quick app took away. Works great!
Thank you so much! this is fantastic!
Do you have any updated info on settings for the Hero 9 and 10?
Very useful article:) I would add the newest way to do shutter and ISO settings, probably all other settings which where removed from the APP.. the GOPRO LABS and QRControl app! Simple update instructions on GoPro Labs website and it’s supporting Session 5 and above :)
Thanks so much for these cheat sheets, Oscar!
From the “Known Issues” page at ReelSteady (reelsteady.com/pages/go-known-issues), I see it’s also recommended to turn off GPS and auto-flip. Maybe these are default settings out of box, but I just bought a naked GoPro Hero 6 in a NamelessRC Sunny case and the GPS was turned on, so I thought I’d pass that along.
I also ran into the unfortunate issue — since Jan 2021 — of GoPro removing ProTune control from phone apps. Ugh! Thankfully, I got around this by sideloading the last-working APK file from an archive site: apkmirror.com/apk/gopro-rm/gopro-formerly-capture-featuring-quikstories/gopro-formerly-capture-featuring-quikstories-7-3-1-release/
Thanks again!
.
Following youtube’s video upload guidelines is fine except for the bitrate; there’s so much moving stuff in the average fpv video that you need a way higher bitrate than recommended. I’m usually somewhere between 80 and 160 for 30/60fps 1080p just to make sure most details make it to youtube. A 1080p 8Mbps h264 video (current recommended settings) export is gonna look bad even before uploading it to youtube.
Is there a hack for Hero 4 to output Video for FPV? I have the firmware version 5 and have the getfpv cable. I can’t get any video. I need it to work with my gimbal as a second camera where I can control pan and tilt. Appreciate any help. I’ve been searching the internet and nada. Except that people said GoPro disabled AV out.
Hey Oscar,
Im confused. My Session 5 does not have 2.4K? The closest is 2.7K and 2.7K 4:3. Whats the deal there?
I bought the camera this week just incase that makes a difference.
So how is 5 better if you can’t hook it up to your fpv
even if you could it’s going to be useless because how large the latency is.
Just use it for recording HD footage.
Good night,
I would like know, there is fpv sustem for gopro hero 5 session??
Thanks
I don’t think so, they don’t have an analogue video output anymore, only HDMI.
No there would not be one as the latency is way too long on HD video. Youll have to run a specific system line the Connex FPB system but $$$$$
I have went through my session(not 4K) and there isn’t a stabilization option. Also don’t see an option for sharpness. It is set now at 14400/30. Was using 1080 and it just looked horrible.
Am wondering if I should have just gotten the 5 now.
The old Session was quite bad IMO, and yea Session 5 is the way to go.
Hey Oscar,
Found this useful, but … could you post a more complete set of settings?
IE include the ones you skipped over?
For example, turning off video stabilization. (Which I think I’m supposed to do, from searching around). Would be cool to have the settings all in one place for those who are getting started with this. thanks!
Hi Scott,
I’ve only mentioned the ones that need changing, the rest should just be at their default values :)
definitely leave stabilization off :) it makes FPV footage look worse.
I am still experimenting with other settings i will keep updating this article.