Discover how to use a LiteVNA for accurately measuring FPV antenna SWR, a crucial aspect of antenna performance indicating power reflection. This guide covers everything from initial setup, calibration, to conducting precise SWR measurements, ensuring optimal antenna performance for your FPV drones.

I tested the SWR of various antennas and posted their plots here: https://oscarliang.com/fpv-antenna-swr/
Check out the tools I recommend for building FPV drones: https://oscarliang.com/fpv-tools/
Table of Contents
What’s a LiteVNA?
LiteVNA stands for Lite Vector Network Analyzer.
A Vector Network Analyzer is an instrument that can measure various properties of a antenna, such as their tuned frequency and how well they are tuned to this frequency.
Traditionally, lab-grade vector network analyzers were highly expensive, costing thousands of dollars. The LiteVNA, however, is a small and affordable Vector Network Analyzer that breaks this price barrier, retailing for around $130. The latest LiteVNA64 model can measure up to 6.3GHz, covering the 5.8Ghz band commonly used for FPV drones. For instance it can display Smith and SWR charts from 5.6GHz to 6.0GHz, and it also works with lower frequencies like 433MHz (radio link), 868/915MHz (radio link), 1.3GHz (fpv link), 2.4GHz (FPV link and standard RC link), etc.
The LiteVNA can be used for measuring antenna SWR and tuning antennas (if you’re making them), evaluating filters, and identifying faults in coaxial cables. While not as accurate as their lab-grade counterparts, they are sufficiently precise for hobbyist use. There are cheaper SWR meters available for FPV use, like the OwlRC SWR Meter, but they lack the reliability and extensive features of the LiteVNA.
Get your LiteVNA from these vendors (IMPORTANT: ensure it supports up to 6.3GHz!):
- AliExpress: https://s.click.aliexpress.com/e/_Dej0jPx
- Amazon: https://amzn.to/4cGjGCE
What’s SWR?
SWR, or VSWR, is a crucial factor in antenna performance, standing for (Voltage) Standing Wave Ratio.
This metric indicates the amount of power that is reflected back to the source. Ideally, all power from the transmitter would travel up to the antenna and be emitted as radio waves. However, in reality, each antenna has a specific tuning, some of the energy will get reflected back. When an antenna is used for transmitting, a high SWR can cause the transmitter overheat, even potentially damage the radio. Conversely, if the antenna is for receiving, a high SWR won’t harm the receiver, but may degrade signal reception.
Learn more about Antenna SWR in my antenna guide: https://oscarliang.com/best-fpv-antenna/
While some antenna manufacturers list the SWR value on their product pages, these figures aren’t always precise and may not specify the frequency at which they’re measured. Over time, damage to an antenna can alter its SWR value. Having a tool to measure this can help you assess the condition and performance of your antennas, and decide which channel would be best to use it on.
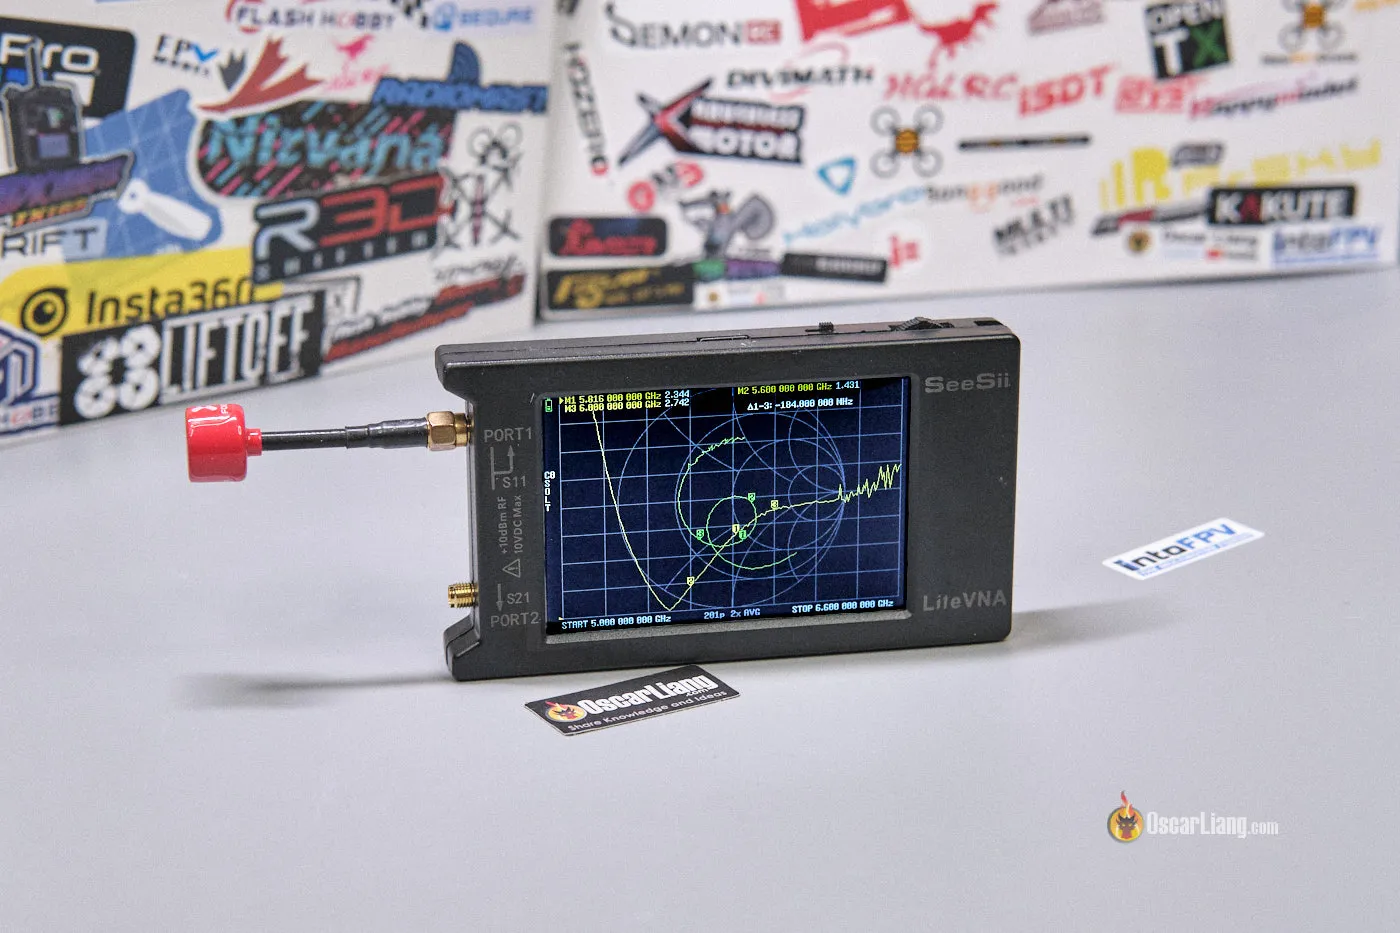
For example, consider the SWR diagram of the RushFPV Cherry antenna below. Between 5600MHz (Marker 2) and 6000MHz (Marker 3), the lowest SWR is 1.113 at exactly 5.8GHz, which is excellent. Even at 5600MHz and 6000MHz, the SWR is only around 1.4 and 1.6 respectively, making this antenna ideal for FPV usage.

How much signal loss and range reduction for SWR 1.1? Let’s look it up in this table I made. It’s about 0.2% signal loss and 0.1% range reduction, which is basically nothing. For SWR 1.4 and 1.6, the range reduction is 1.4% and 2.7% respectively.

Further Readings:
- I tested the SWR of various antennas and posted their plots here: https://oscarliang.com/fpv-antenna-swr/
- Learn more about how to calculate FPV range in this tutorial: https://oscarliang.com/calculate-fpv-range/
- I made a FPV range calculator which allows you to plug all the numbers in to estimate maximum range: https://oscarliang.com/js/fpvrange.html
How to Use LiteVNA
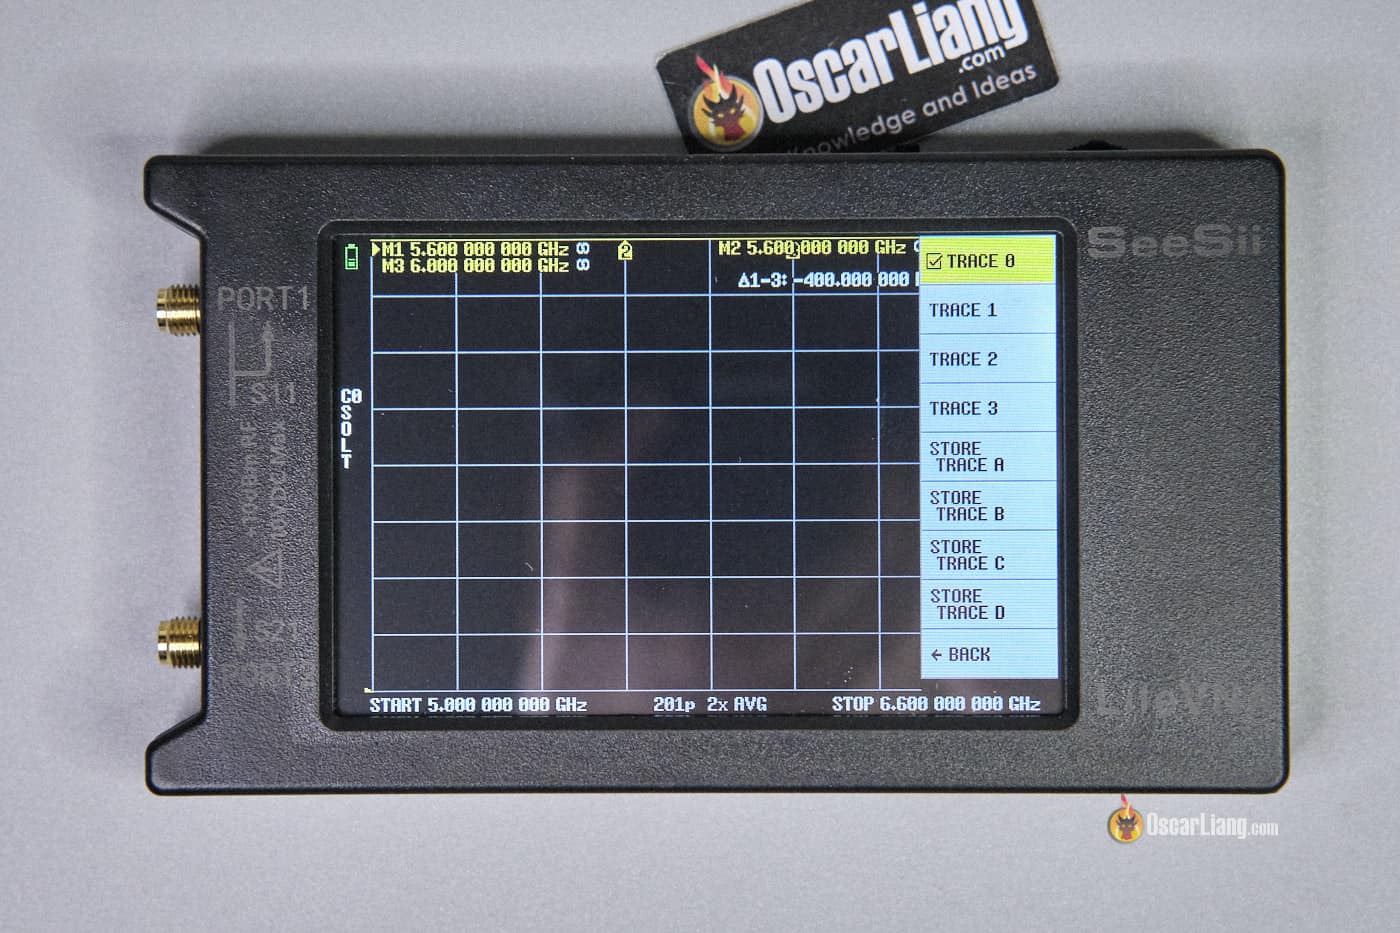
Display Trace
Out of the box, the LiteVNA displays all 4 traces, which can be quite messy. Since we’re mainly interested in SWR, you can remove the other 3 traces:
- Navigate to “Display” and deselect all traces except for Trace 0.
- Under “Format S11”, change to SWR.
- In “Scale/DIV”, set it to 0.5 and enable “Show grid values”.

Sweep Range
This is where you’ll set the frequency range you wish to analyze:
- Go to “Stimulus”, select “Start”, and enter the lowest frequency you’re interested in observing.
- Select “Stop” and input the highest frequency you wish to observe.
- Typically, for FPV, I set the range from 5.6GHz to 6.0GHz.
Remember, it’s recommended to recalibrate your VNA each time you adjust the sweep range.
Calibration
It’s important to calibrate your LiteVNA before performing any measurements. Using an uncalibrated VNA renders the results unreliable, essentially making them useless and misleading.
The LiteVNA comes with a set of calibration tools (open, short, and load connectors), which are essential for the calibration process.

Navigate to the calibration menu, and attach the “open connector” (which has no middle pin) to the first port. Select “Open” in the menu.

Repeat the process for the “Short” and “Load” connectors. Note that both of these connectors have a center pin; however, the “short connector” is shorter, whereas the “load connector” is taller. Ensure it’s tightly screwed on to guarantee a good connection.
If you’re testing filters, you’ll also need to calibrate “Thru” by connecting Port 1 to Port 2 using the provided cable. However, if you’re solely testing antenna SWR as demonstrated here, you can skip it.

Once complete, click Done. You have the option to save this calibration in memory, which will automatically load upon the device’s next startup, including all settings and the frequency sweep range. This feature allows you to save multiple calibrations with different setups and switch between these profiles in the “Recall” menu, offering significant convenience.
Additionally, you can verify your calibration using the Smith chart. The short point should be at the center-left of the circle, the load point directly at the center, and the open point at the center-right of the circle. Remember, it’s advisable to recalibrate your VNA each time you adjust the sweep range.

Using an Adapter or Cable
If you intend to use any adapter or cable during testing, it’s crucial to recalibrate with the adapter connected. This step helps eliminate the potential impact of your test cable or adapter skewing the results.
If you lack a calibration set with the appropriate connector, you can make adjustments using “Electrical Delay”. First, calibrate the VNA without the adapter, then connect the adapter. You’ll notice the open point has shifted on the Smith chart. You can rectify this by navigating to “Scale”, then “Electrical Delay (E. Delay)”. Input a value until the open point realigns to its correct position. This typically ranges between 50-150 picoseconds for SMA adapters (or a longer delay for cables).
How to Measure Antenna SWR
To test an antenna with your LiteVNA, first, attach the antenna to the first port. Ensure it’s tightly secured to guarantee a solid connection. Position the antenna away from any metal or conductive materials. The VNA will then display a graph showing the VSWR within your specified frequency range.
Important:
- Ensure the surrounding area is clean and free of obstacles during the test. Specifically, keep the setup away from metal or any magnetic material.
- Additionally, inspect the SMA connector to ensure it’s clean.
Most antennas have a dip in the graph, indicating the frequency to which they are best tuned. While some antennas may not show a pronounced dip, having a relatively low SWR value within the desired frequency range is generally acceptable.
For a VSWR of 2, only about 10% of the power is reflected, which is considered very good. With a VSWR below 2, differences in real-life performance are hardly noticeable, but of course, the lower the better.
Identify the frequency with the lowest VSWR to determine the best FPV channel for use. It’s advisable to select an antenna for the receiver that matches the tuned frequency for optimal performance.
Conclusion
Using LiteVNA offers a detailed insight into your antenna’s SWR, helping you select the best frequency for unmatched performance. It can also be used for checking if your antenna is any good for FPV. The LiteVNA stands out as an affordable and practical tool for hobbyists, providing reliability and a breadth of features to fine-tune and evaluate your antennas efficiently.
Get your LiteVNA from these vendors (IMPORTANT: make sure it supports up to 6GHz!):
- AliExpress: https://s.click.aliexpress.com/e/_Dej0jPx
- Amazon: https://amzn.to/4cGjGCE
4 comments
Is there a cost effective alternative for ufl calibrator kits? So far, the only options coming up in searches cost over 400 dollars!
There are a ton of options on AliExpress selling for around $3, just search “SMA load calibration kit”. You could buy a new LiteVNA which comes with calibration kit and it won’t cost you more than $150.
Hi Oscar, say what are you using to measure ufl antennas? I just picked up the LiteVNA and it’s great to find out how my diy antennas are doing, but I have ufl to sma extension on some and would like to measure them including the extensions attached. Thanks for all you do for the community!
I use a SMA to UFL adapter, but if you are using an adapter you need to calibrate the LiteVNA including the adapter. In this case you probably want to get a set of calibration tools with UFL connectors.