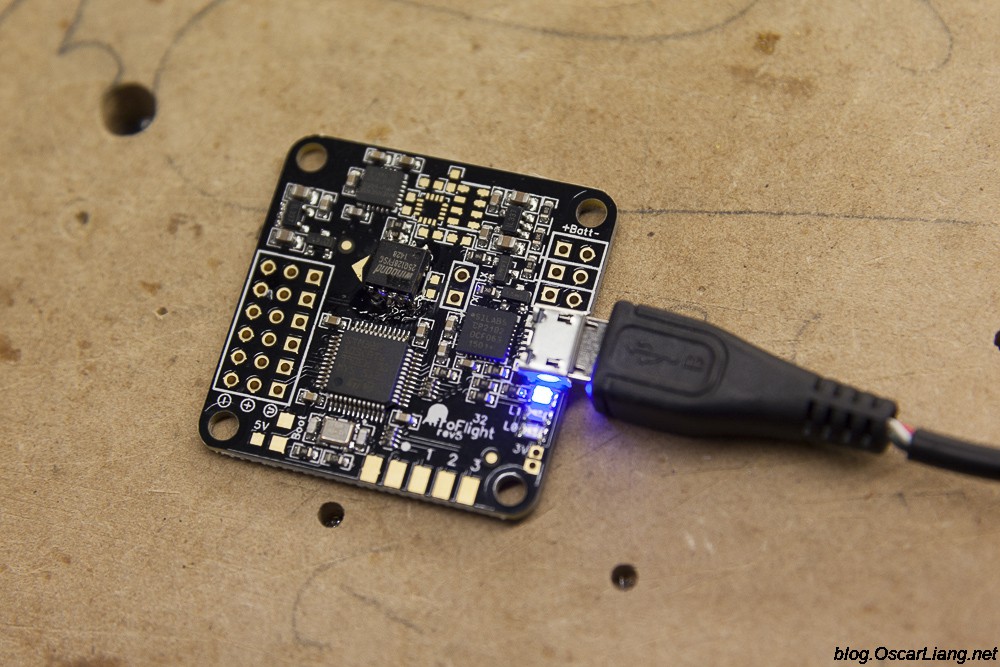
In this tutorial, I’ll show you how to flash and update Betaflight firmware on your FPV drone flight controller. I’ll also cover troubleshooting common issues you might encounter during the process.
For those new to Betaflight, don’t forget to check out my step-by-step setup guide after flashing firmware, where I’ll guide you through configuring your flight controller for its first flight.
Table of Contents
What’s Flashing?
Just like Windows that runs on your computer, the software that powers your flight controller is called Betaflight. Like all software, Betaflight has different versions. Putting a new version of Betaflight on your flight controller is called “flashing” your board.
Installing Drivers
Even if you decide not to update your firmware right now, you still need to install the VCP driver to configure the board. So, you’ll need to complete at least Step 1 below to use your board.
- MacOS or Linux Users: Your OS comes with the drivers you need pre-installed. You can skip directly to “Installing Betaflight Configurator.”
- Windows Users: You must install the drivers manually. This is often a challenging step for beginners, so we’ll go through it carefully here.
- Install the Virtual COM Port (VCP) Driver: https://www.st.com/en/development-tools/stsw-stm32102.html. You’ll need to create a login or provide your email address to receive the download link.
- Download and run the ImpulseRC Driver Fixer from here. It will instruct you to plug in your flight controller:
- While holding down the bootloader button on the FC, plug it into your PC via USB.
- The ImpulseRC Driver Fixer should complete successfully.
The good news is that you only need to install the VCP driver once on your computer. But every time you get a new flight controller, you’ll need to run the ImpulseRC Driver Fixer once for that specific board before you can flash it.
Installing Betaflight Configurator
Betaflight Configurator is the software for both flashing Betaflight firmware to the flight controller and configuring it.
Download and install the latest version, compatible with Windows, MacOS, and Linux: https://github.com/betaflight/betaflight-configurator/releases/latest
Before proceeding, connect your flight controller to your computer using a USB data cable. Charging-only cables won’t work for this purpose.
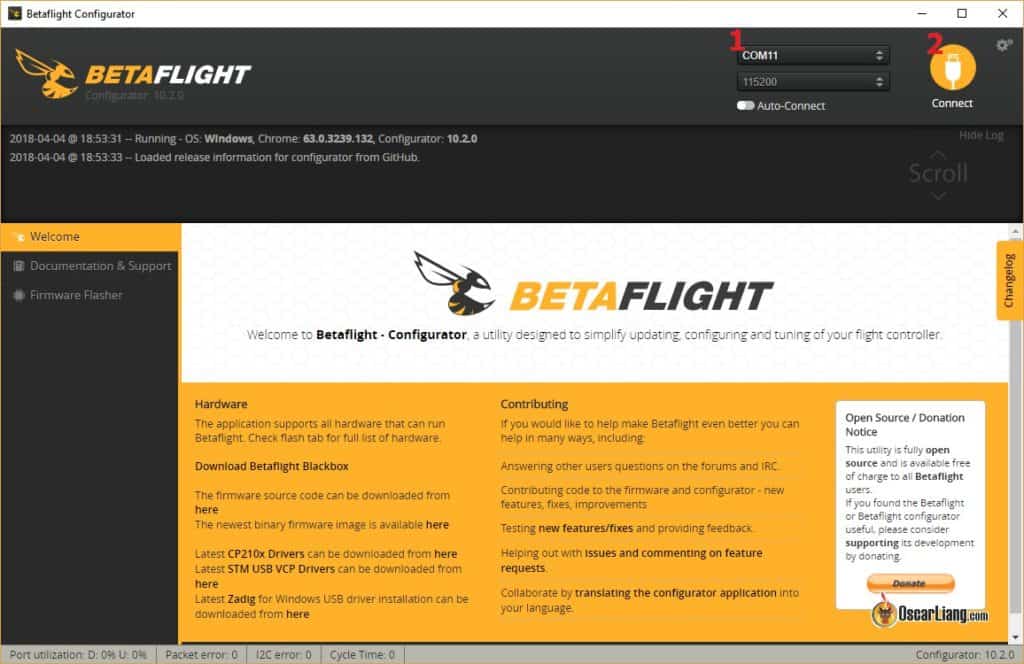
Once you’ve launched the Betaflight Configurator, select the COM port of your flight controller on the top right of the screen. If you’re unsure which COM port to choose, a simple trick is to unplug and replug the USB cable and observe which port disappears and reappears.
It’s advisable to backup your existing configuration before updating or flashing new firmware, as new firmware can potentially erase all settings. Here’s a tutorial on how to backup Betaflight settings.
Navigating the Firmware Flasher Section
In the Betaflight Configurator, navigate to the “Firmware Flasher” tab on the left.
Choosing the correct board (aka firmware target) is crucial, you can use one of these methods:
- Auto-Detect: This button should automatically select the correct board for your FC.
- Manual Selection: If Auto-Detect fails, manually select your board from the dropdown list. You can determine the name of your board by typing
versionin the CLI (follow instructions here: https://oscarliang.com/identify-betaflight-firmware-target/)
Choosing the wrong board can lead to failure or even bricking the FC. If this happens, you can recover by following this: https://oscarliang.com/cannot-connect-to-naze32-brick-fix/
Next, select the firmware version you wish to flash.
For those eager to test the waters, Betaflight offers ‘Release Candidate’ versions by enabling the “Show release candidates” option. However, it’s essential to approach with caution as these are still in the testing phase. For regular users, it’s advised to stick with the stable releases.
You’ll see additional options under the firmware version; typically, these can be left disabled unless you know what you are doing. I will talk about what they do in more detail later in this article.
Once you’ve made your selections, click “Load Firmware [Online]” to download the firmware. You also have the option to “Load Firmware [Local]” for custom compiled firmware.
Lastly, click “Flash Firmware” to begin the update, ensuring not to disconnect the USB cable during this process or you could brick the FC. It should only take a minute or two.
If you encounter any issues flashing, they’re likely related to driver problems. Here’s a guide how to fix it: https://oscarliang.com/fc-driver-issues-flash-firmware/
Flashing Options
Full Chip Erase
To wipe all existing configurations and start fresh, you can select the “Full Chip Erase” option before flashing. This is useful for eliminating any outdated or potentially wrong configuration.
To do this, put your FC in DFU Mode by holding down the boot button on the FC while connecting the USB cable. Once in DFU mode you should see “DFU” appearing in the COM port.
Now flash the FC as described before.

No Reboot Sequence
Normally you can leave this option disabled. Most flight controllers, when flashing, will reboot into ‘DFU mode’. However, some might not reboot correctly. In such cases, the ‘no reboot sequence’ option can be handy.
Applying Custom Settings
After flashing, you should be able to re-connect to the configurator by clicking the “Connect” button at the top right corner.
When connecting for the first time after flashing, Betaflight will prompt you to apply custom defaults. Always select ‘Yes’. These defaults configure critical settings like gyro connection and motor pins specific to your FC.
Cloud Build System
The Cloud Build System allows for custom Betaflight compilation to include only the features you need to minimize firmware size. This might not be a big deal right now, but in the future when Betaflight code continues to grow and becomes too big for certain processors, it will become useful. As I mentioned in my FC processor guide, F411 and F722 processors have only 512KB of memory. Cloud Build System can make Betaflight firmware smaller for these processors and prolong their lifespan.
A word of advice: unless you’re entirely sure about your requirements, there’s no need to change anything, just leave everything at default and it should usually work for most people. But you can remove or add features as you see fit if you know what you are doing.
What Does “Legacy” Mean in “Select a Board”?
When selecting a board in Firmware Flasher, you may see duplicated flight controller boards, with one of them having “Legacy” at the end of the name.
It’s usually best to ignore those legacy boards, and choose non-legacy targets, which are newer and have a unified structure. “Legacy” are the old-style compilations for each specific board. The Legacy targets are being phased out and eventually replaced by the non-legacy targets, but are still available for troubleshooting.
Edit History
- Sep 2018 – guide created
- Oct 2022 – updated for BF4.3
- Jan 2023 – updated for BF4.4
- Nov 2023 – updated instructions


27 comments
I just flashed and updated fc flashhobby f722, and after that, I didn’t find the barometer, please help
I just checked its specs and in no where it mentions it has barometer.
Can you flash esc with ecs configuration app
I cant believe I found this page. This is my first drone I’m not having a good time.
thank you so much for your time and effort.
No not me either I should have just bought it built with a warranty
I did this on my GEPRC Crocodile baby 4″ and it keep trying to fly way. Can’t figure this out all my other drones had no issues
what if I get the message: failed to open connection with USB device
So if I’m updating from BF 4.2 to 4.3 and already have the receivers, motors and ports tabs configured in BF 4.2 and don’t want to have to set these tabs up again when I flash to 4.3 would I flash new firmware and just leave full chip erase unselected?
because 4.3 is a major update, your settings will get wiped regardless that setting.
You can however use this mirgration tool to get your 4.2 settings converted to 4.3, and just copy and paste it in the CLI: https://oscarliang.com/betaflight-4-3/#betaflight-43-migration-tool
you state the following comment: Start Betaflight Configurator, and go to the Firmware Flasher Tab.
Select the COM port of your FC
how do i get to the FC? My drone is Vortex-150
I flashed the CLi for my Beta65 Pro2 (MATEKF411RX) as instructed here, now my quad does nothing when I connect batteries. I can still connect it to Betaflight; when I do, the blue light stays lit and the red and green flash on and off. Why does BETAFPV provide the CLi on their site if we need to go through Betaflight? Is it possible to flash the file I downloaded?
Can’t seem to flash a brand new Talon F7 Fusion board. For some reason it tells me if fails to connect to the Boot Loader (?).
Is this a driver issue? I have no problem viewing the board in BF, but cannot flash BF 4.2.
When you are ready to flash have loaded the firmware and then nothing happens – Run ImpulseRC – Betaflight will go into DFU mode then you can flash it
i have installed drivers and am able to connect to betaflight but all i get if i go into DFU mode and try clicking on fimware flasher of update firmware is “Waiting for Data”. even if i dont have anything plugged into a usb i still get this message. i have uninstalled betaflight 10.7.0 and reinstalled.. still same problem. downloaded from Betaflights own site. tried an earlier version and still same problem. not sure what else to do. installed drivers more than one and has not made any difference
I have been having this exact same problem for over a year now, and I can’t fix it. Does anyone have a solution??? Oscar!! If you read this, please help!!
Issue rectified for Tinyhawk 2 flash firmware for BF 4.2!
After much discussions with the drone communities and dev’s at github, seems people have been flashing the STM32 file which is not the correct “board”, you need the target name, the STM file will create the LED to flash 5 x blue, 4 x green, 1 x red. rendering your quad to be pretty useless. But, also found there is a miss print on the target name in manufacturer notes. If you flash the MATEKF411 (manufacturer notes), BF will recognize the quad but won’t be able to bind your stock controller and you will only get red LED’s flashing all the time. No matter how many times you hit the bind button, restart, hit more buttons, restart again, it doesn’t work.
Flash MATEKF411RX, connect to BF, calibrate accelerometer, then go to the receiver tab and enable AUX1 and AUX2, as they will be blank, and setup your angle. horizon, arm and beeper to what it was before on your switches and you should be good to go.
Same thing happened to me Murray Sheppard. After flying it a handful of times without issues, my Tinyhawk 2 shat itself in the exact same way after flashing new firmware (4.2.1) following instructions as per Betaflights, Joshua Bardwell’s and Oscar’s advice. God knows how many TH2’s will go down from this.
I followed the instructions and now my TinyHawk2 seems dead. I plug in the USB and no lights come on, but I can connect to BetaFlight. (All the settings are gone)
If I plug in a battery, the blue LED flashes 5 times, green 4 times, red once, blue 5 again, green 4 again and red once.
Then nothing.
Check with your reseller and get it replaced or repaired.
Ninos Sadek you need to find the firmeware online and load it locally. I’ve just done this for the MATEKF411 and it worked perfectly. Not sure why the onlder versions of Betaflight aren’t showing up anymore?!
Hi what do you mean load it locally .l have lost data flash chip by pressing something wrong in Betaflight and lm trying to find some way of putting it back if that makes sense I’m very new to this
Regards Keith
I have a mamba F722 that originally came with BF 3.5.7 and now has 4.1
I tried everything to flash 3.5.7 back on the mamba F722 with no success.
I have tried older BF configurator version like 10.4.0 and earlier with no options to chose any firmware below 4.0.
Any help would be appreciated
Hi!
I have an old multiwii/megapirate flight controller that I would like to flash with betaflight. Would that be possible?
hobbyking.com/en_us/multiwii-and-megapirate-aio-flight-controller-w-ftdi-atmega-2560-v2-0.html
this board is not supported by Betaflight.
In the Betaflight Configurator, select the blackbox tab. You can erase the data flash chip and regain the lost storage space. You may chose to save the data to a file if you wish, before you erase the chip. Flashing the firmware with full chip erase does not clear the dataflash chip.
The data flash bar on the top right is your blackbox. You need to go into blackbox in the configurator and select erase data flash and it will empty.
I flashed emuflight in my mamba f405 FC then again switched back to betaflight, while flashing I selected full chip erase option everytime but unfortunately the dataflash memory (i.e on top right corner of configurator above expert mode) is kept on increasing and not erasing, only 2.8MB space is free out of 16MB. is there any way to erase this? Can someone help me out ?